When you purchase through links on our site, we may earn an affiliate commission.Heres how it works.
However, I soon realized that being limited on storage space was rather inconvenient.
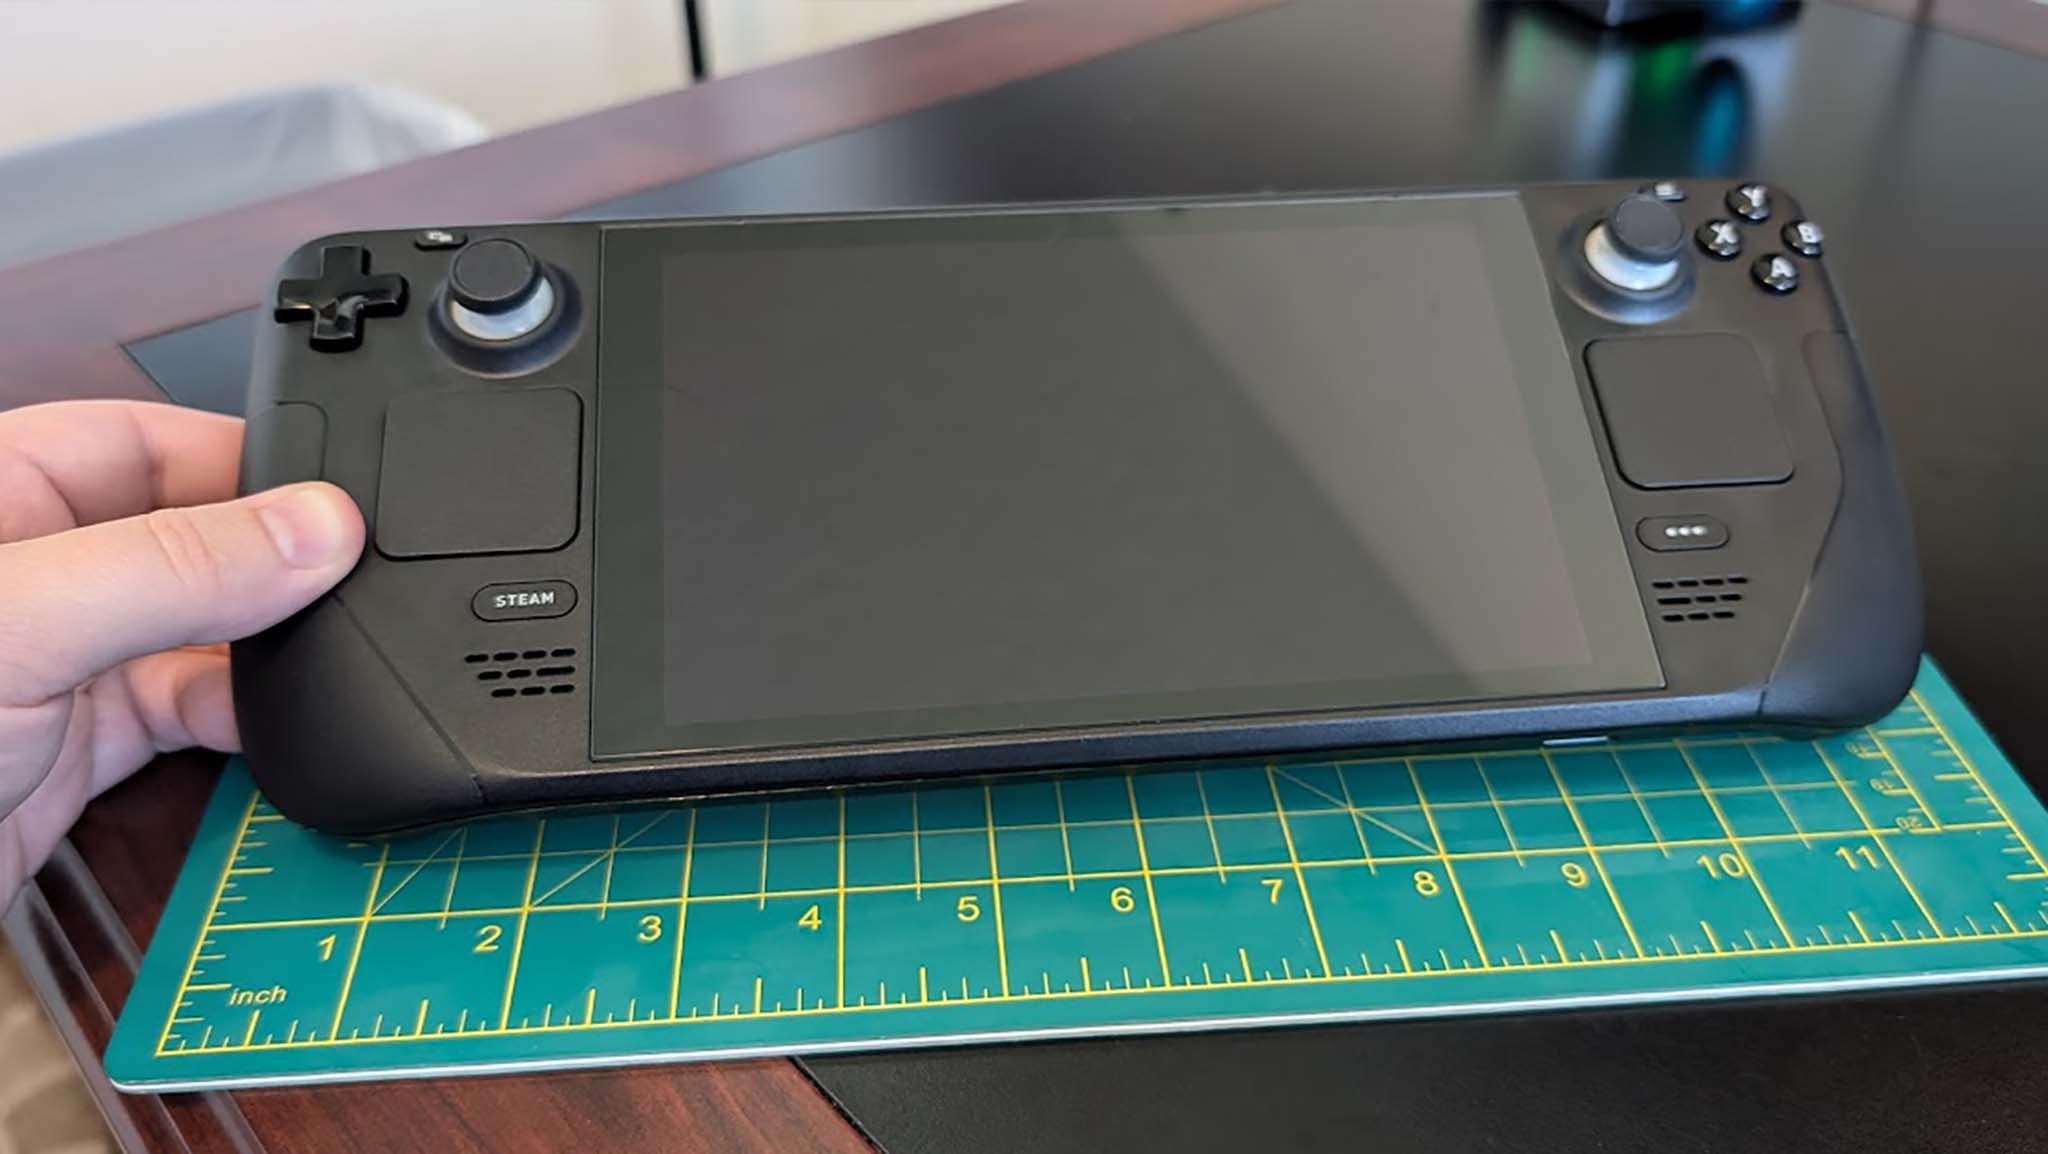
As such, I was excited to upgrade my SSD on thegaming handheldas soon as I could.
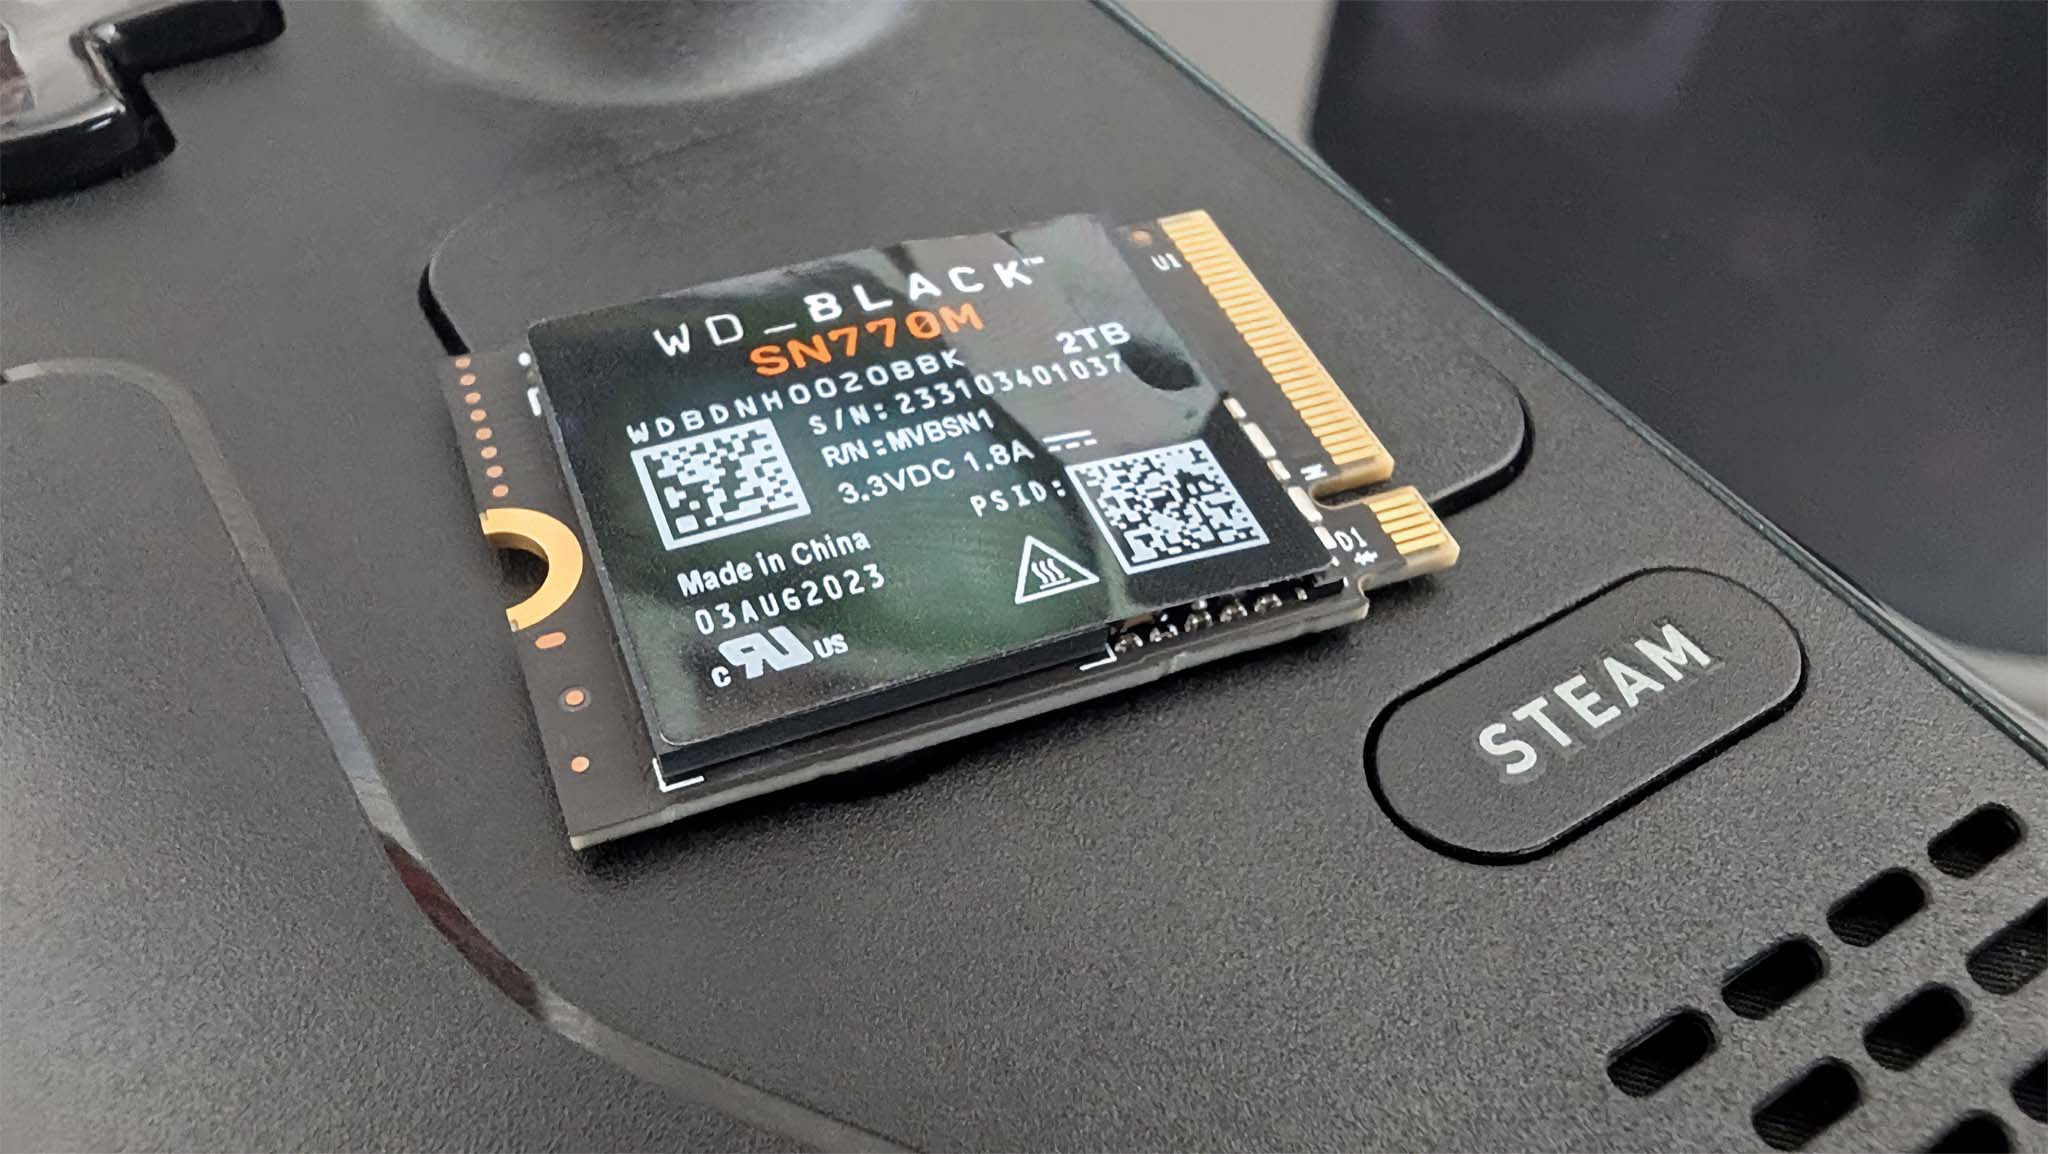
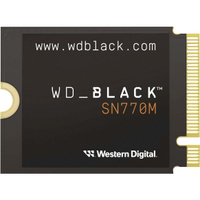
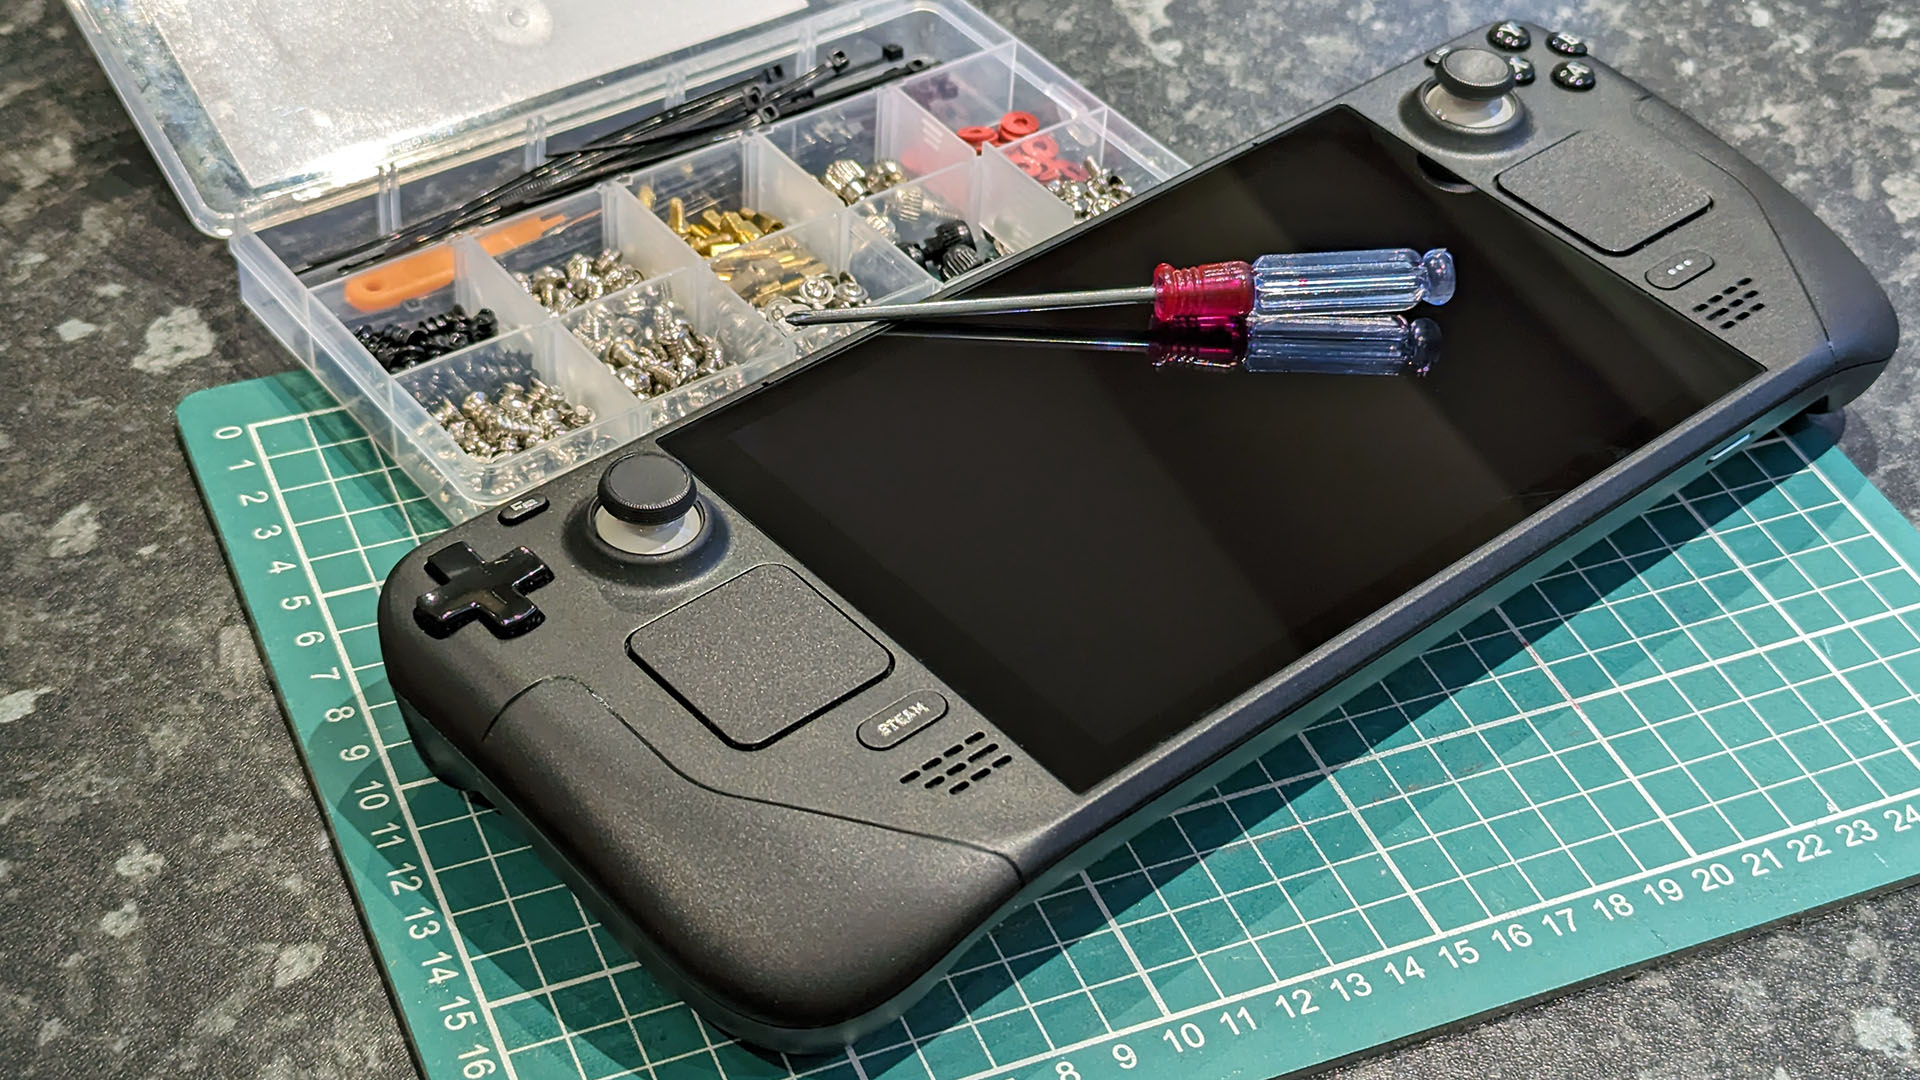
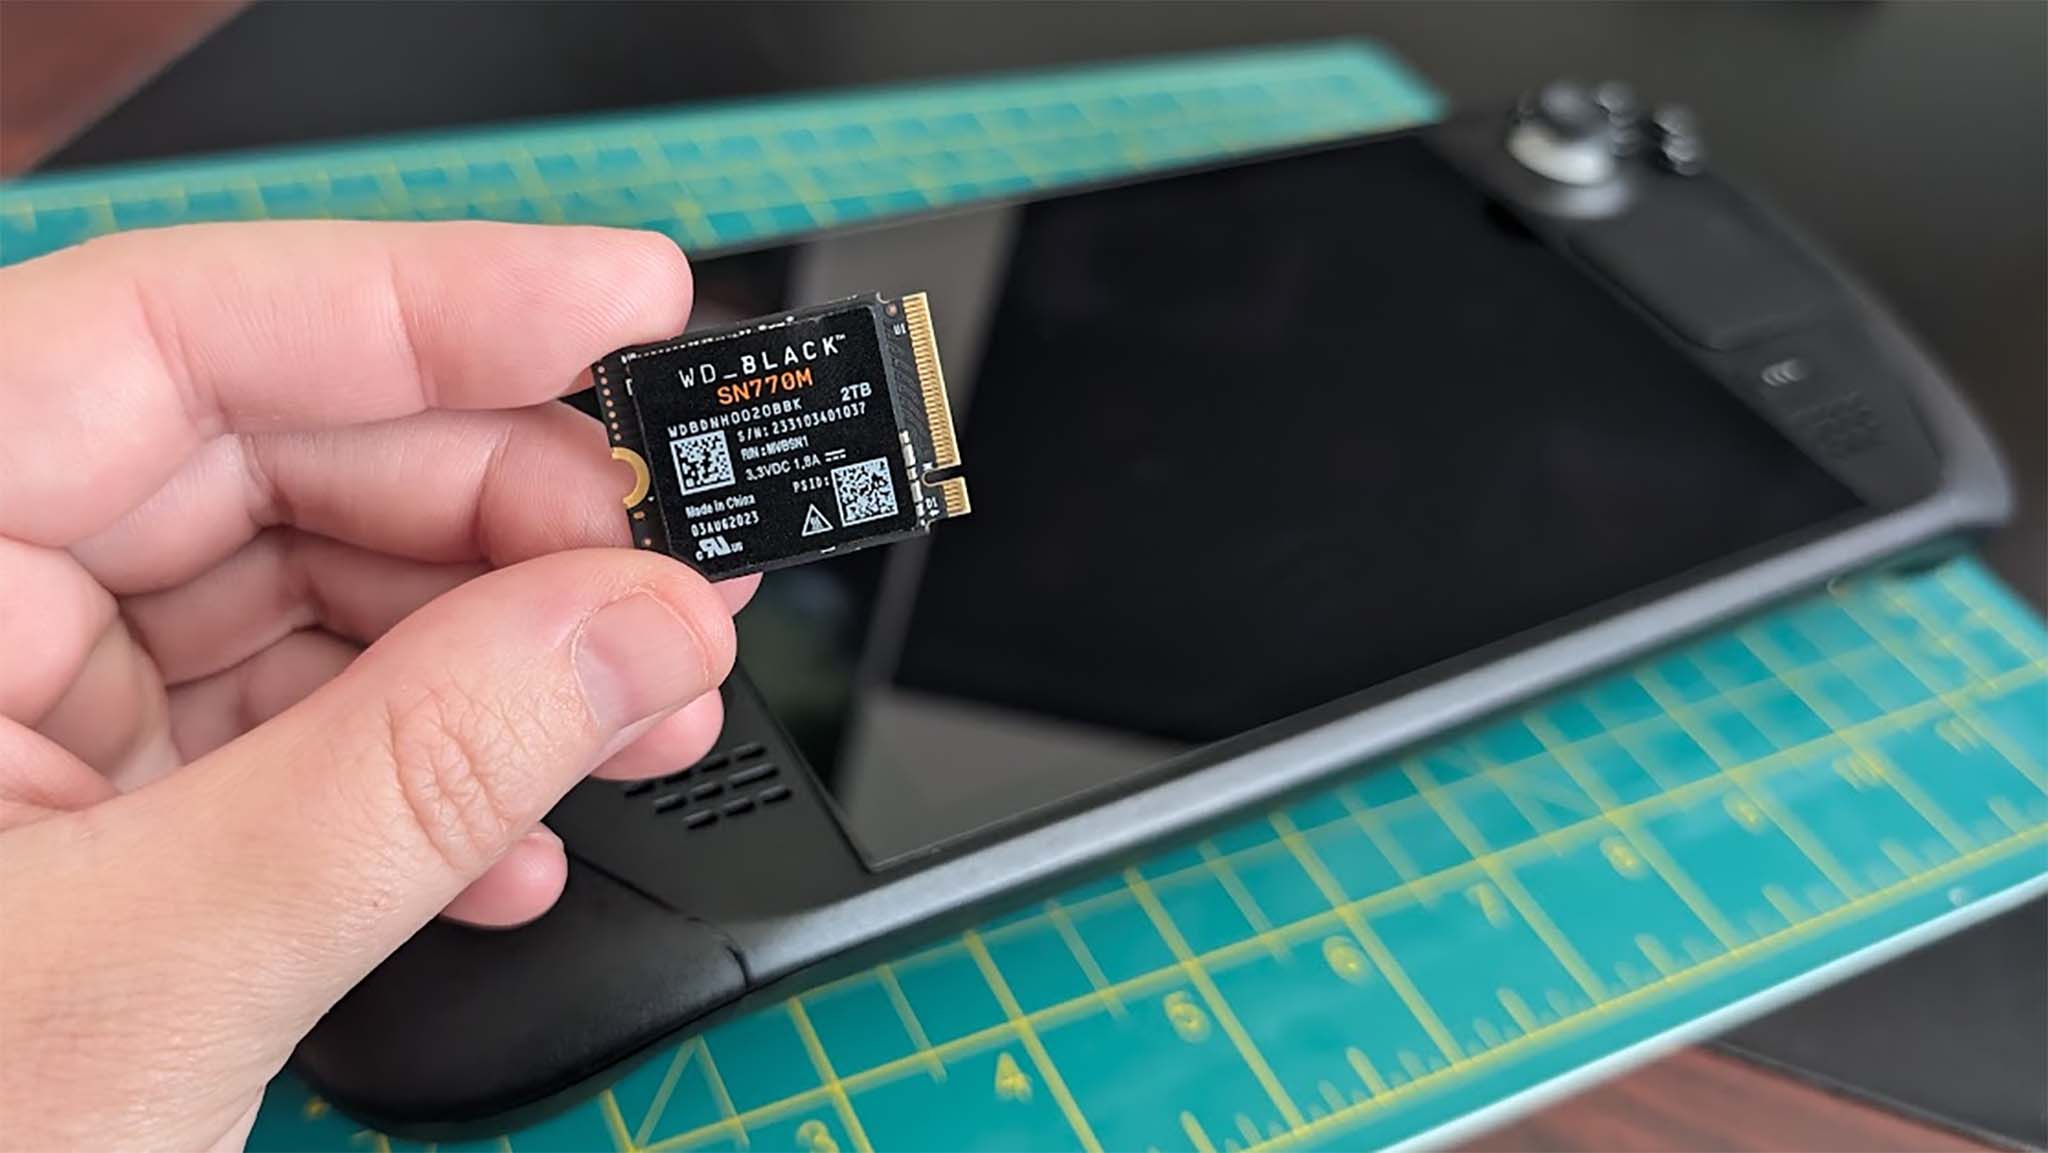
I used an anti-static wrist strap, a Western Digital SN700M SSD, and a screwdriver set with a plastic pick and tweezers during this installation process.
Thankfully, the upgrade process is pretty easy.
Let’s get started.
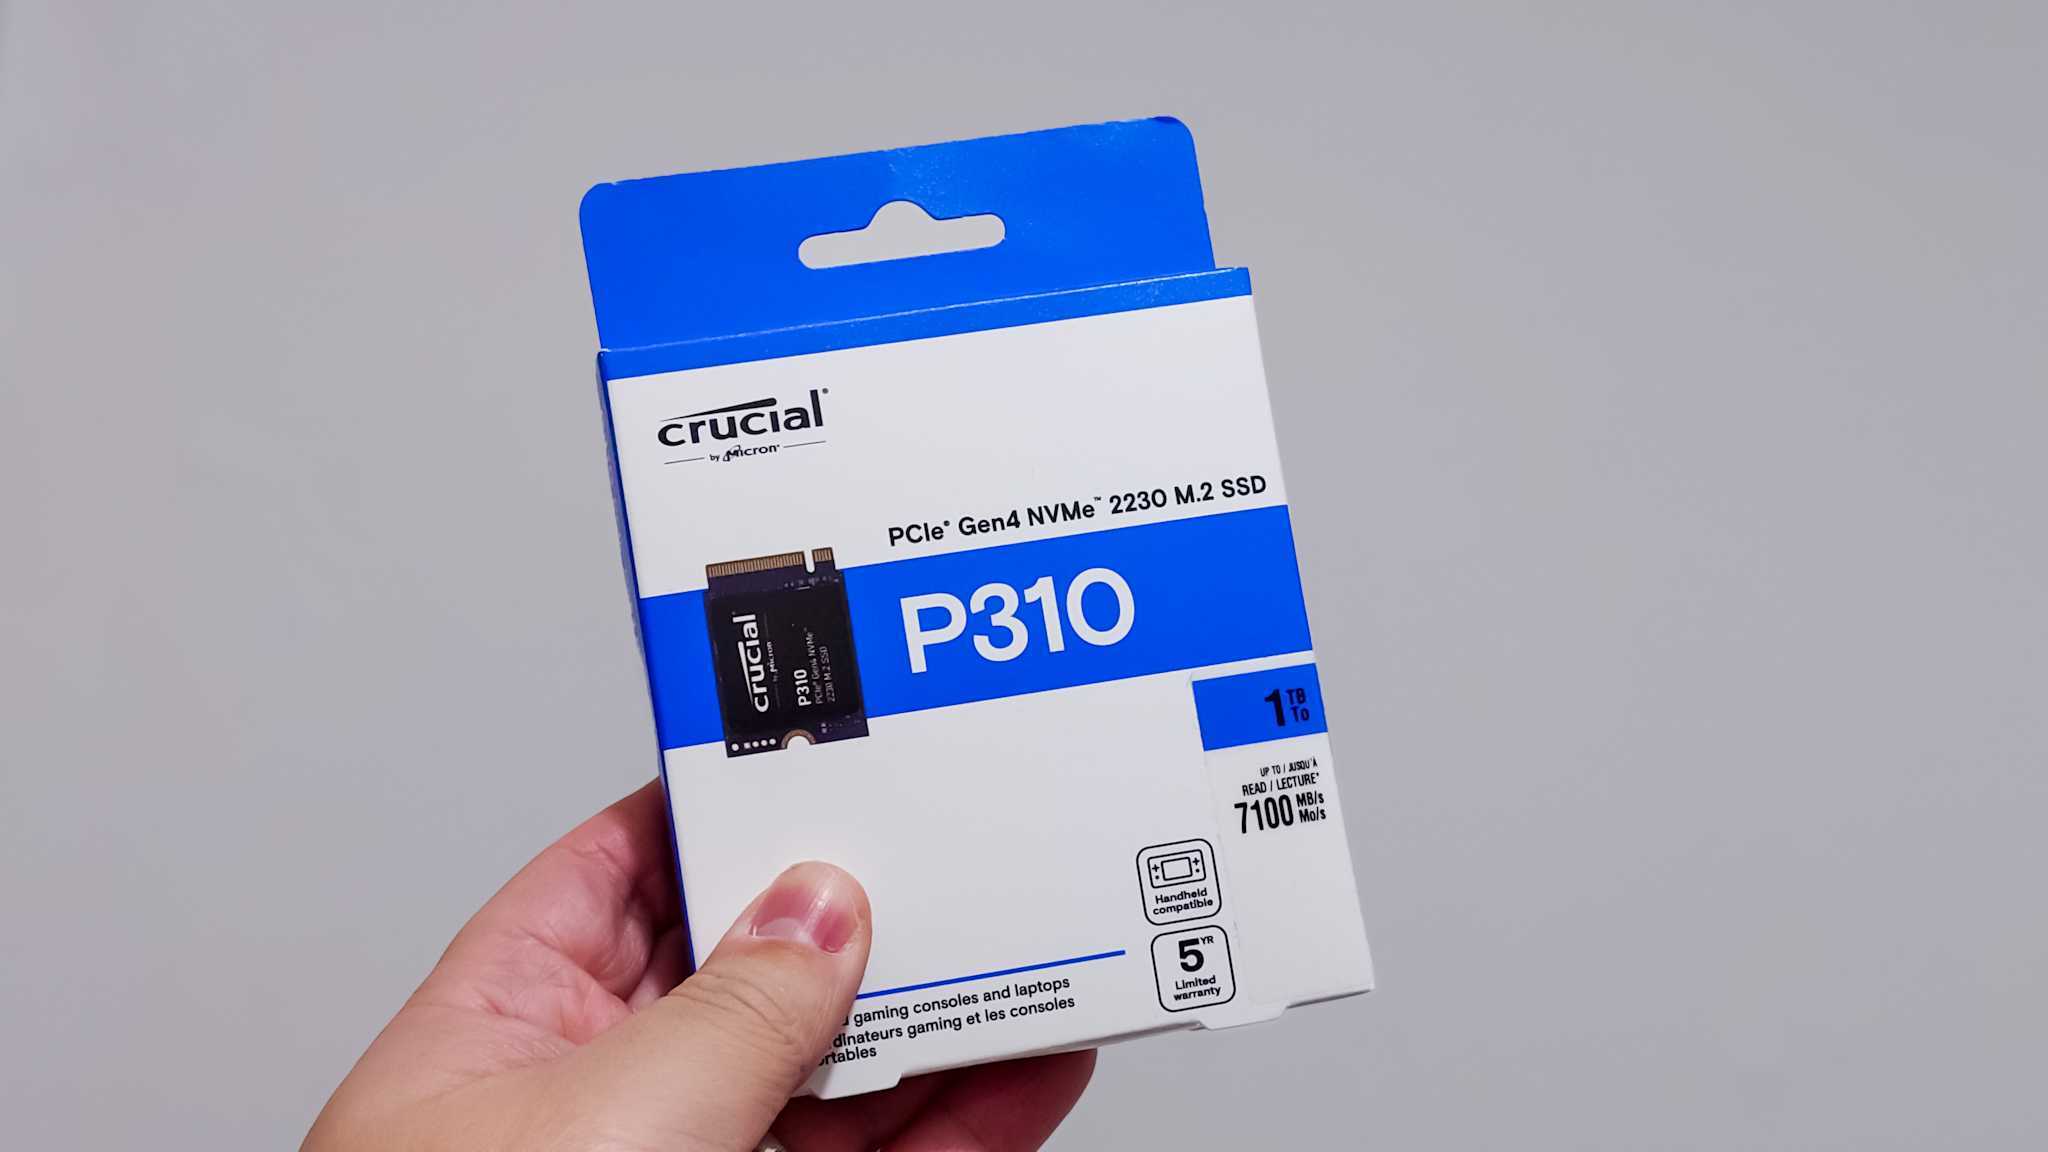
It’s available in 1TB, 2TB, and 4TB capacities.
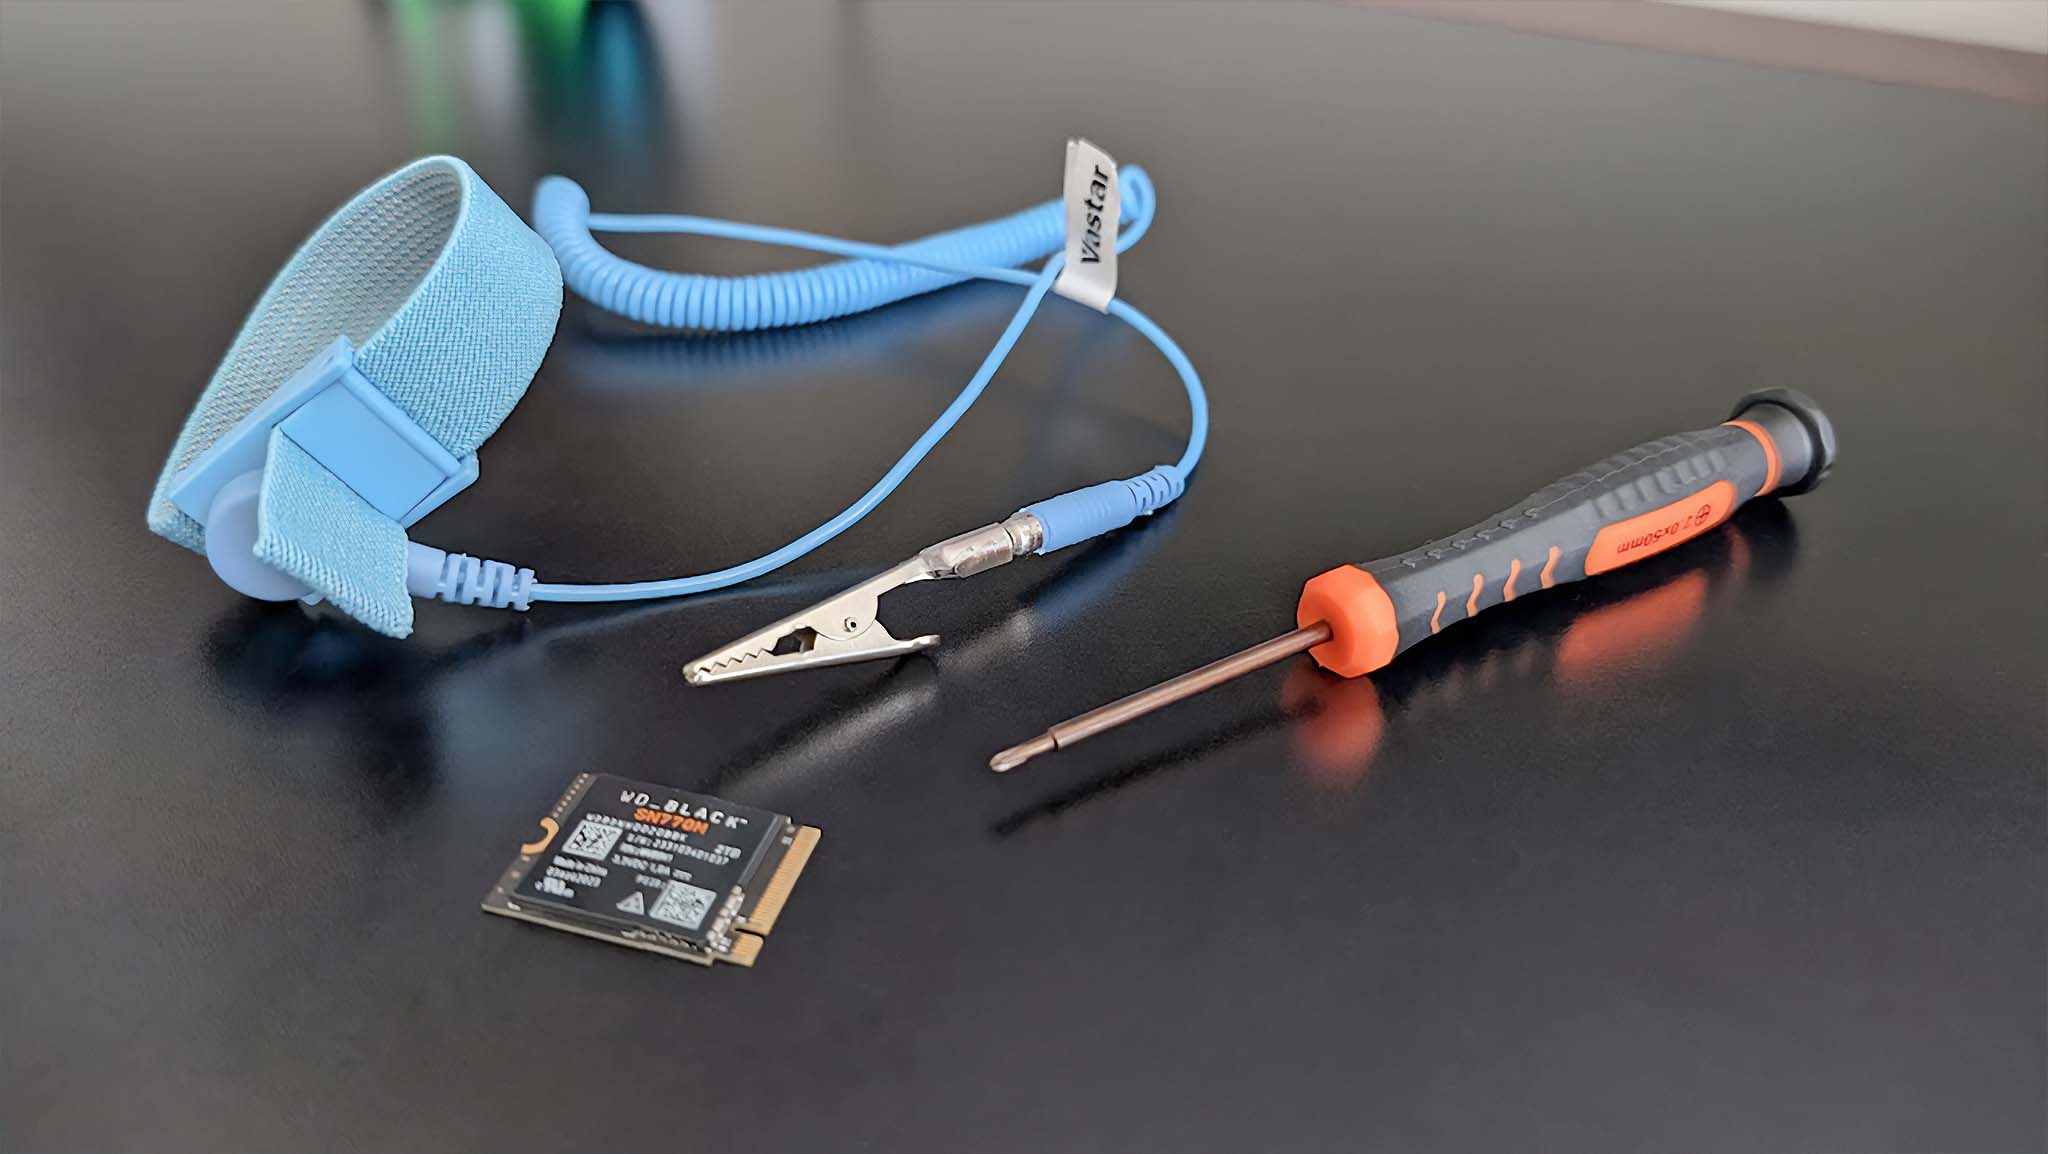
I used an anti-static wrist strap, a Western Digital SN700M SSD, and a screwdriver set with a plastic pick and tweezers during this installation process.
Otherwise, an SSD works well for this.
This guide will cover what to do for either one.
Now that these steps have been followed, you now have the new SSD installed in your Steam Deck.
However, the gaming handheld doesn’t currently have SteamOS on it.
I’ll cover how to install that in the next section.
Here’s what to do.

What SSD is compatible with Steam Deck?
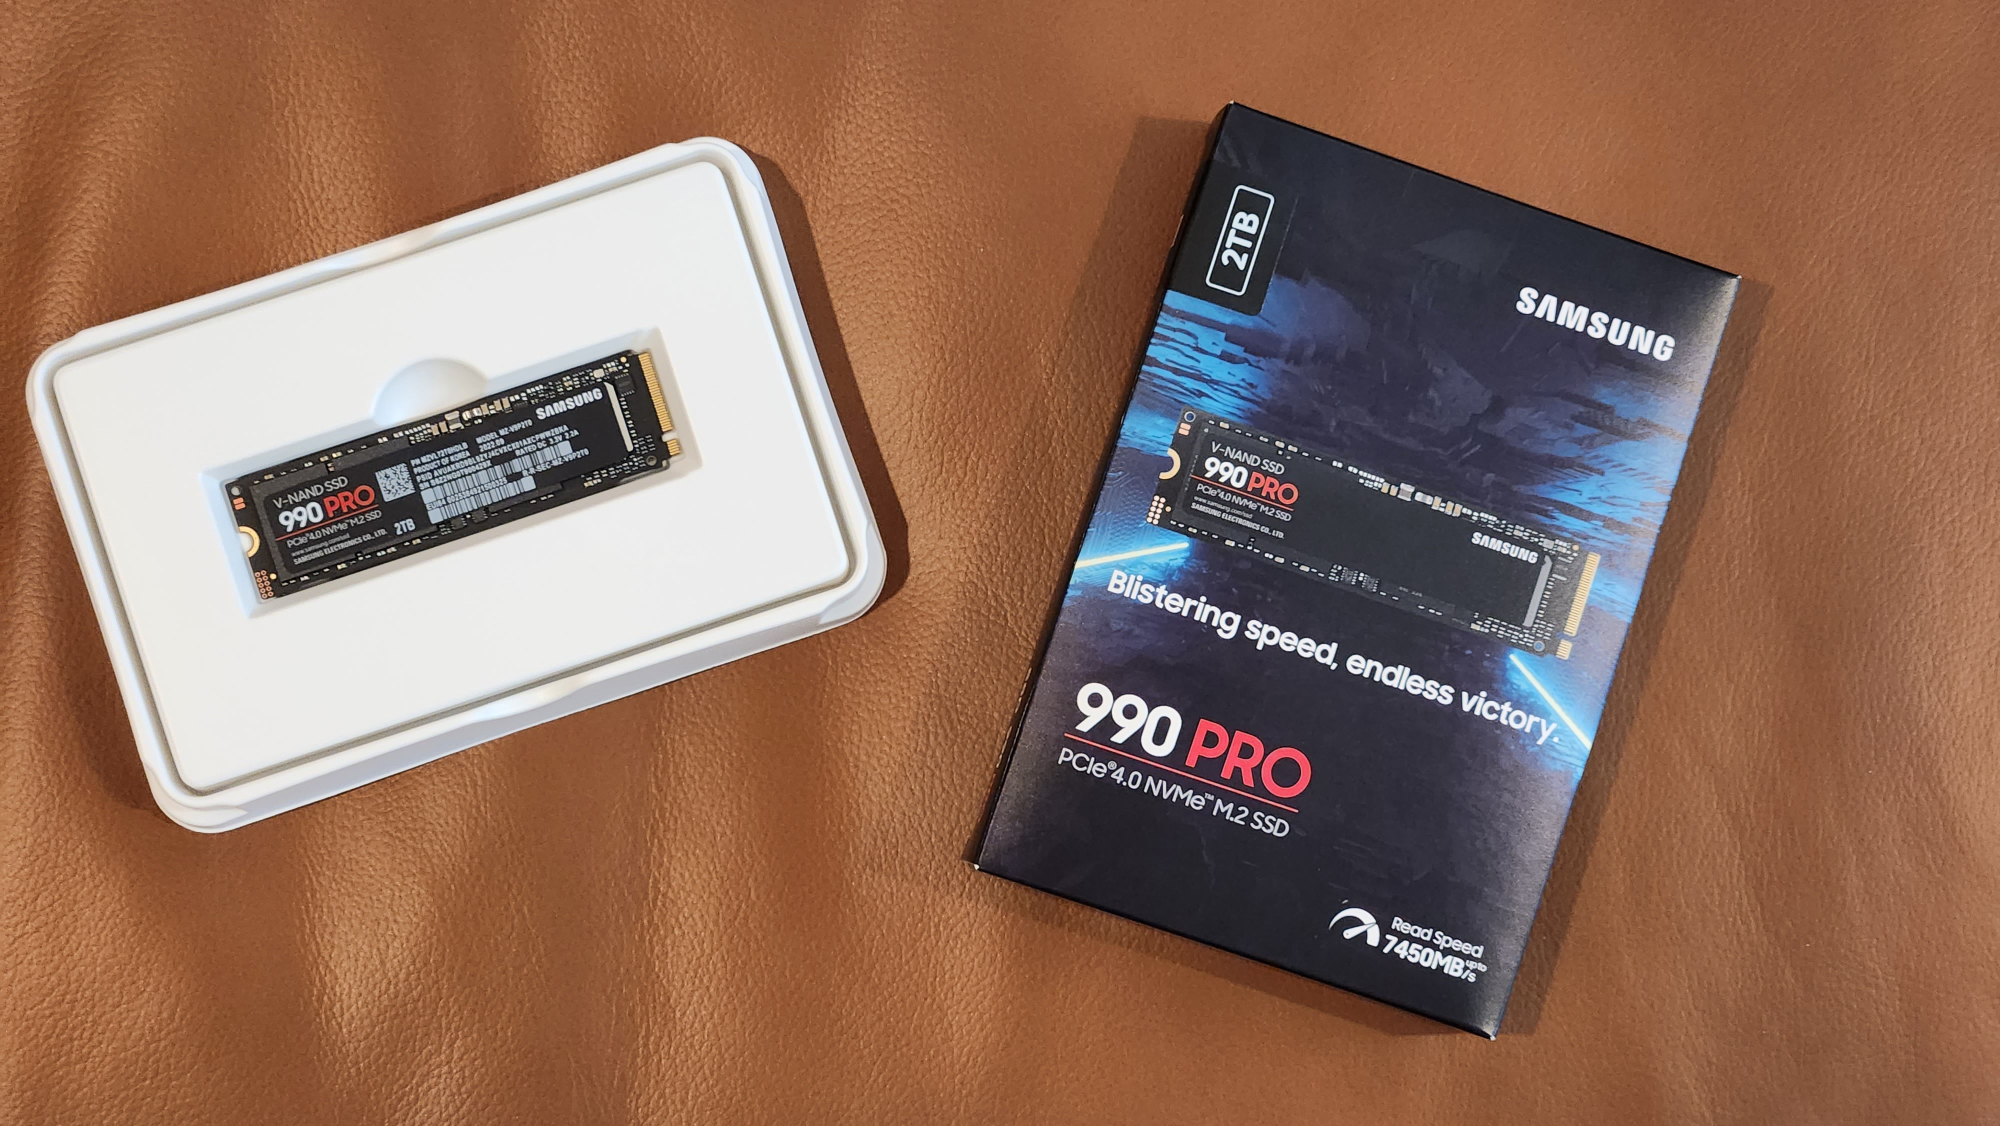
It’s available in 512GB, 1TB, or 2TB capacities.
Should I backup my Steam Deck before upgrading the SSD?

That way, your game data for sure won’t be lost.
What size SSD should I put in Steam Deck?
Thankfully, the SSD installation process really isn’t that difficult.
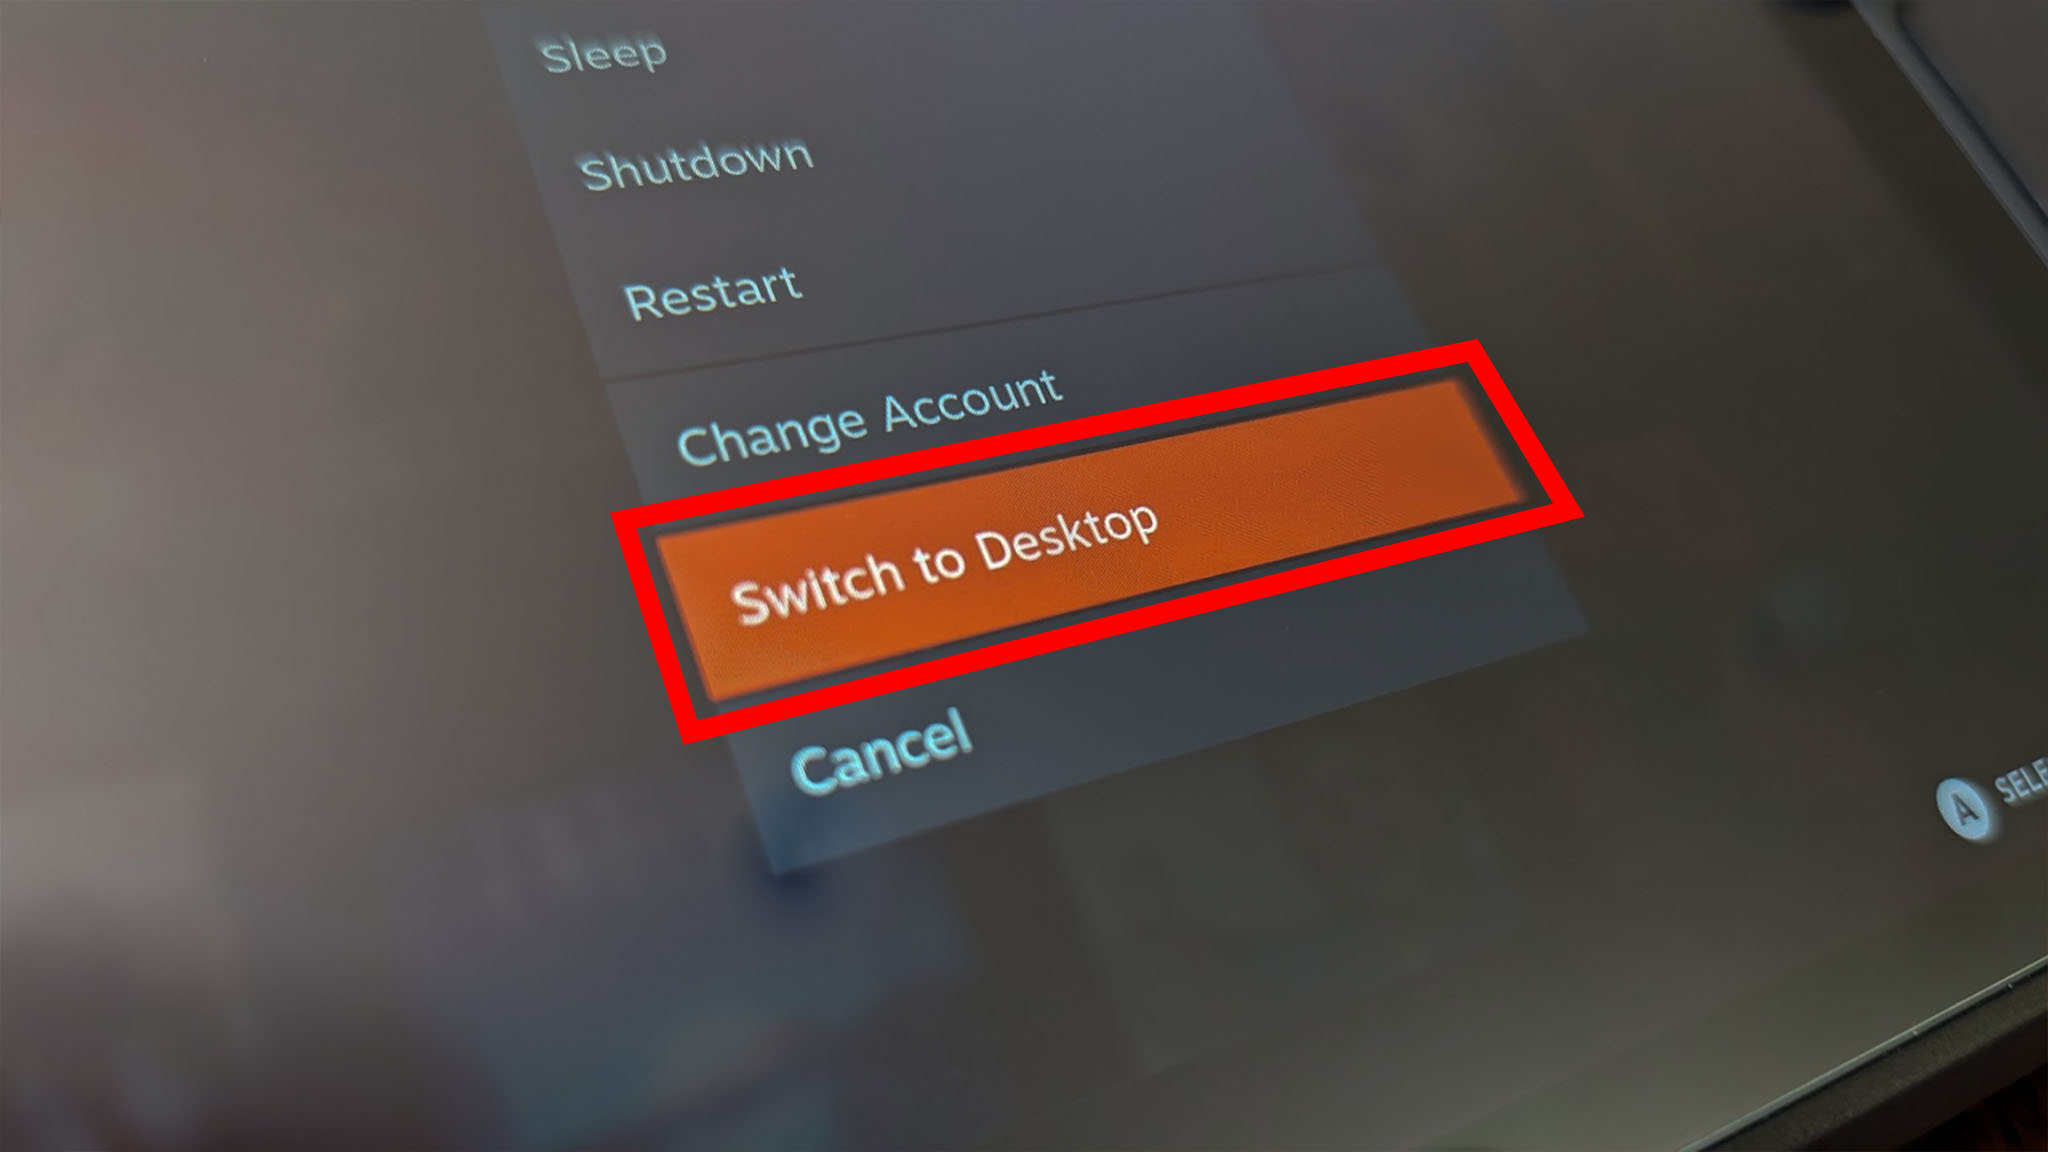
You’ll want to Switch to Desktop mode on Steam Deck.
Use a clean workspace when opening the Steam Deck.
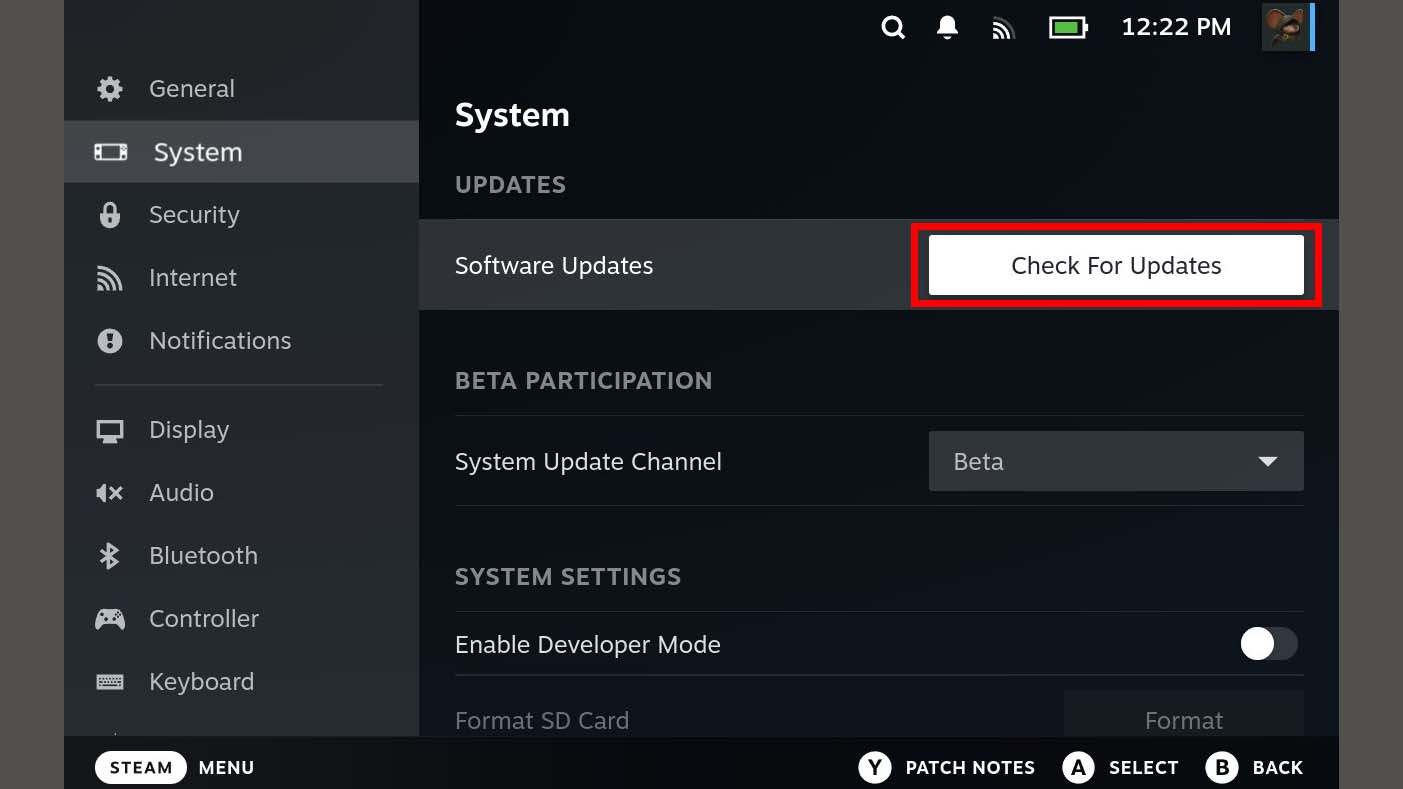
Check for Updates before starting the SSD installation process.
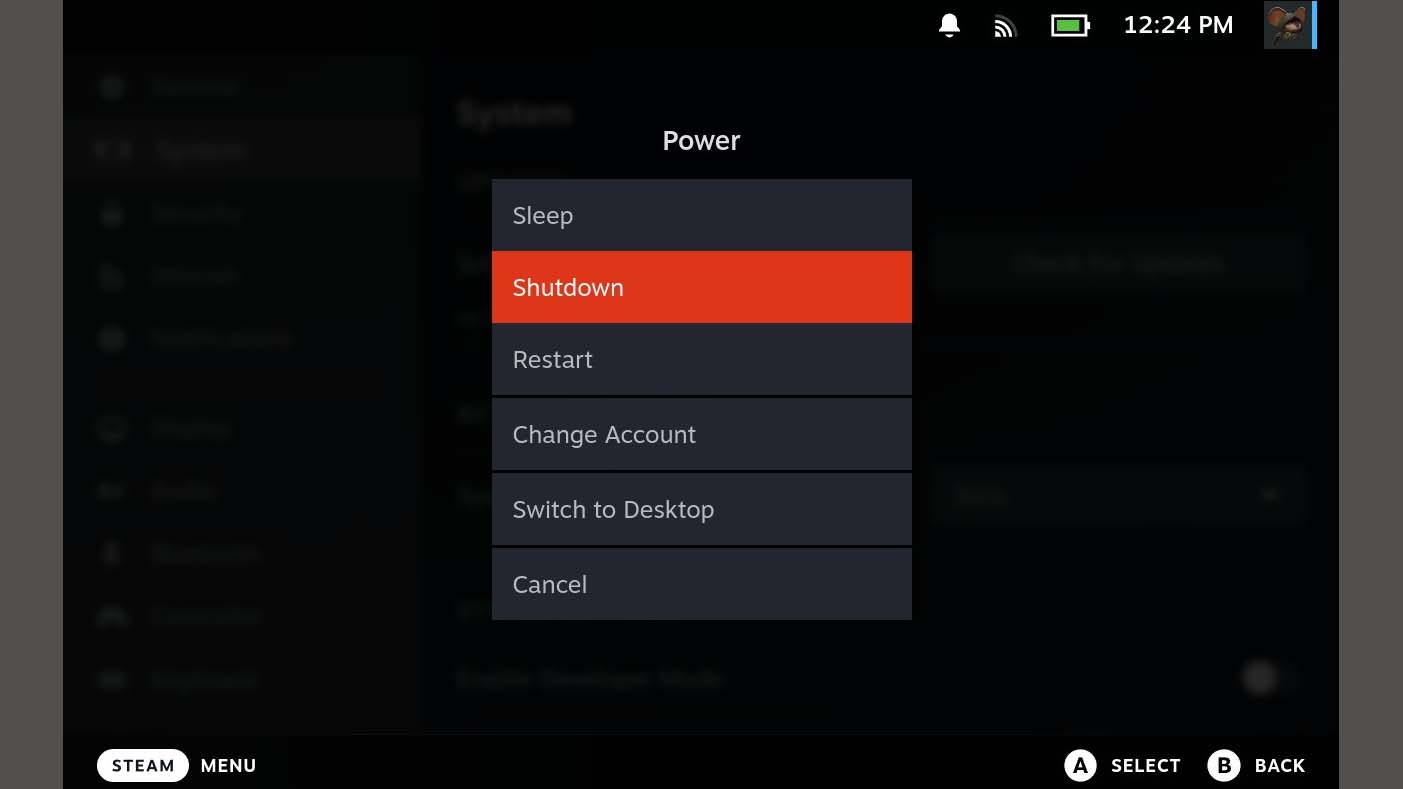
Turn off the Steam Deck completely.
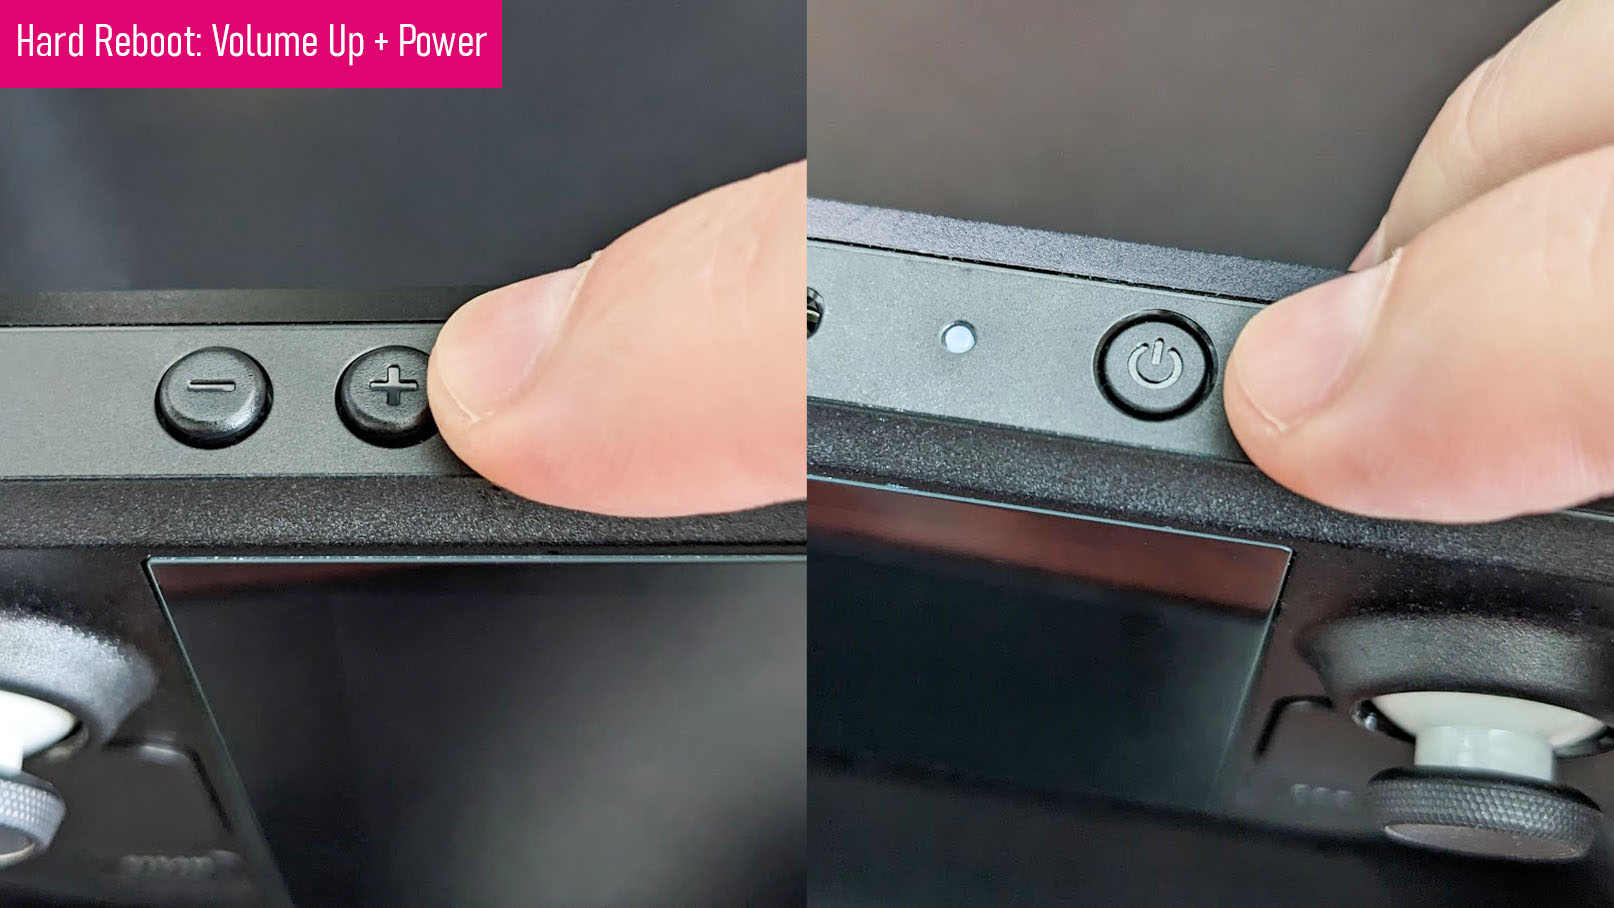
Hold the volume up and Power buttons until you hear a beep.

Select the Setup Utility option.
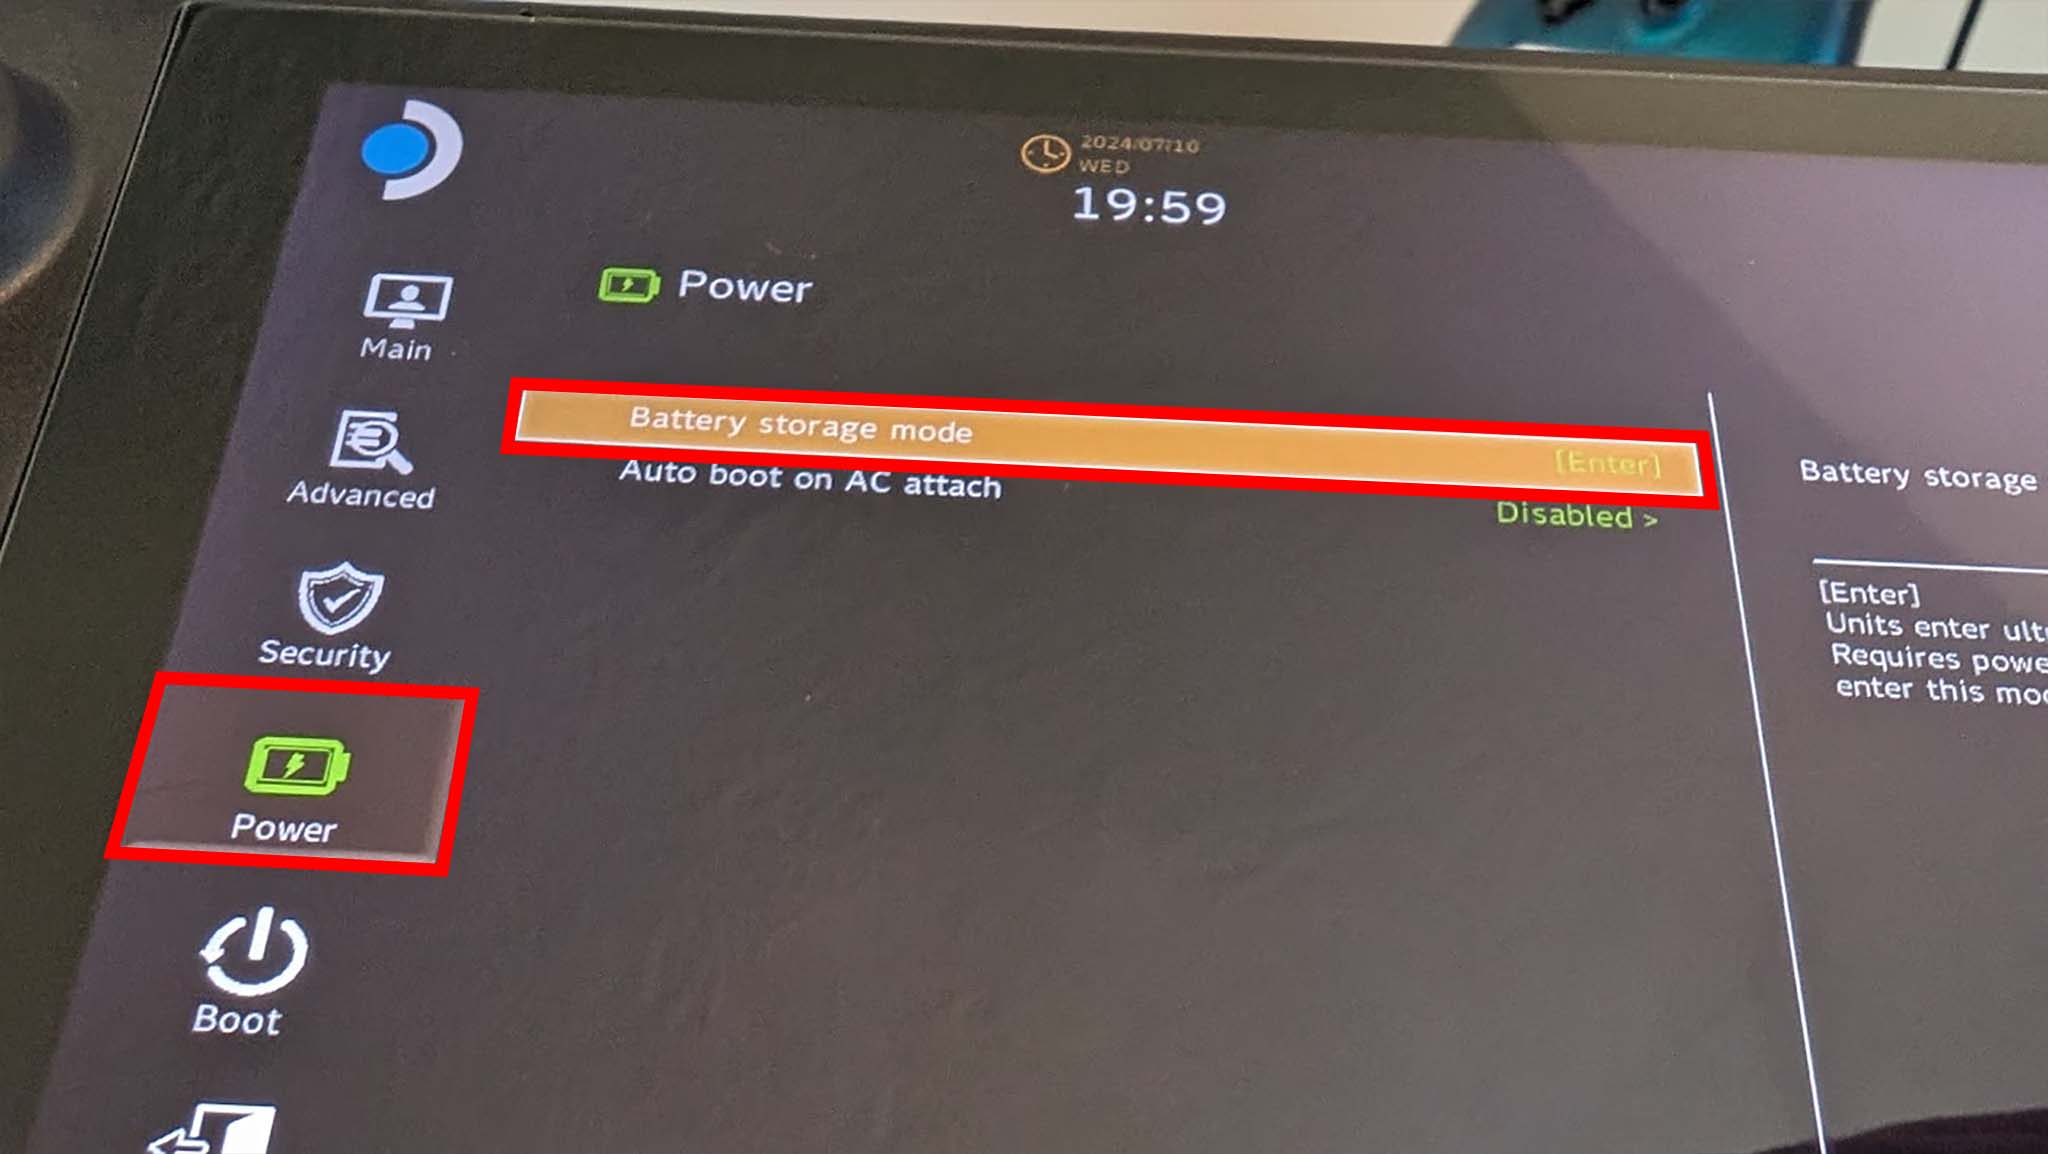
Turn on Battery storage mode before opening the Steam Deck.
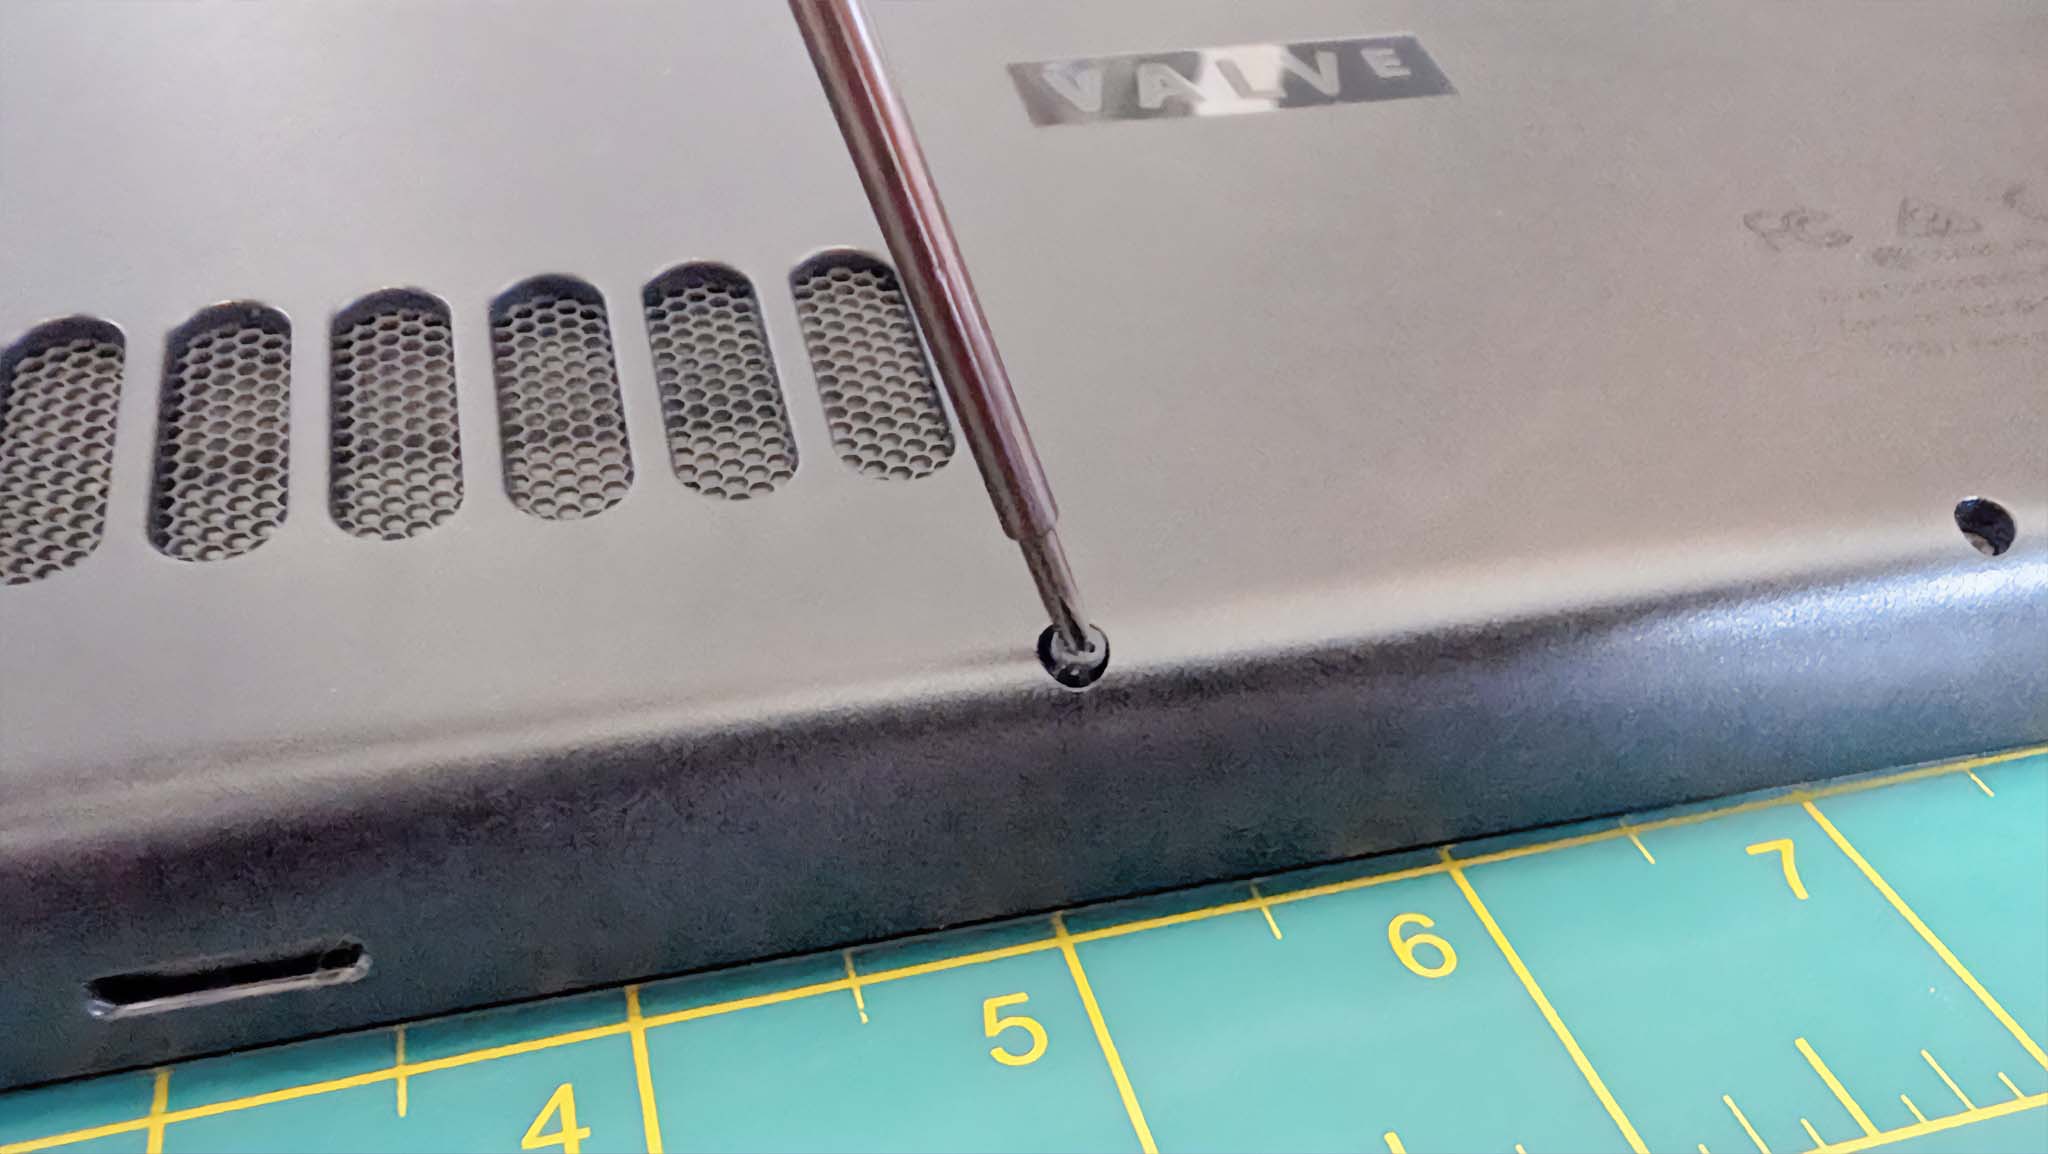
Unscrew the eight screws on the back covering using a Philips screwdriver.
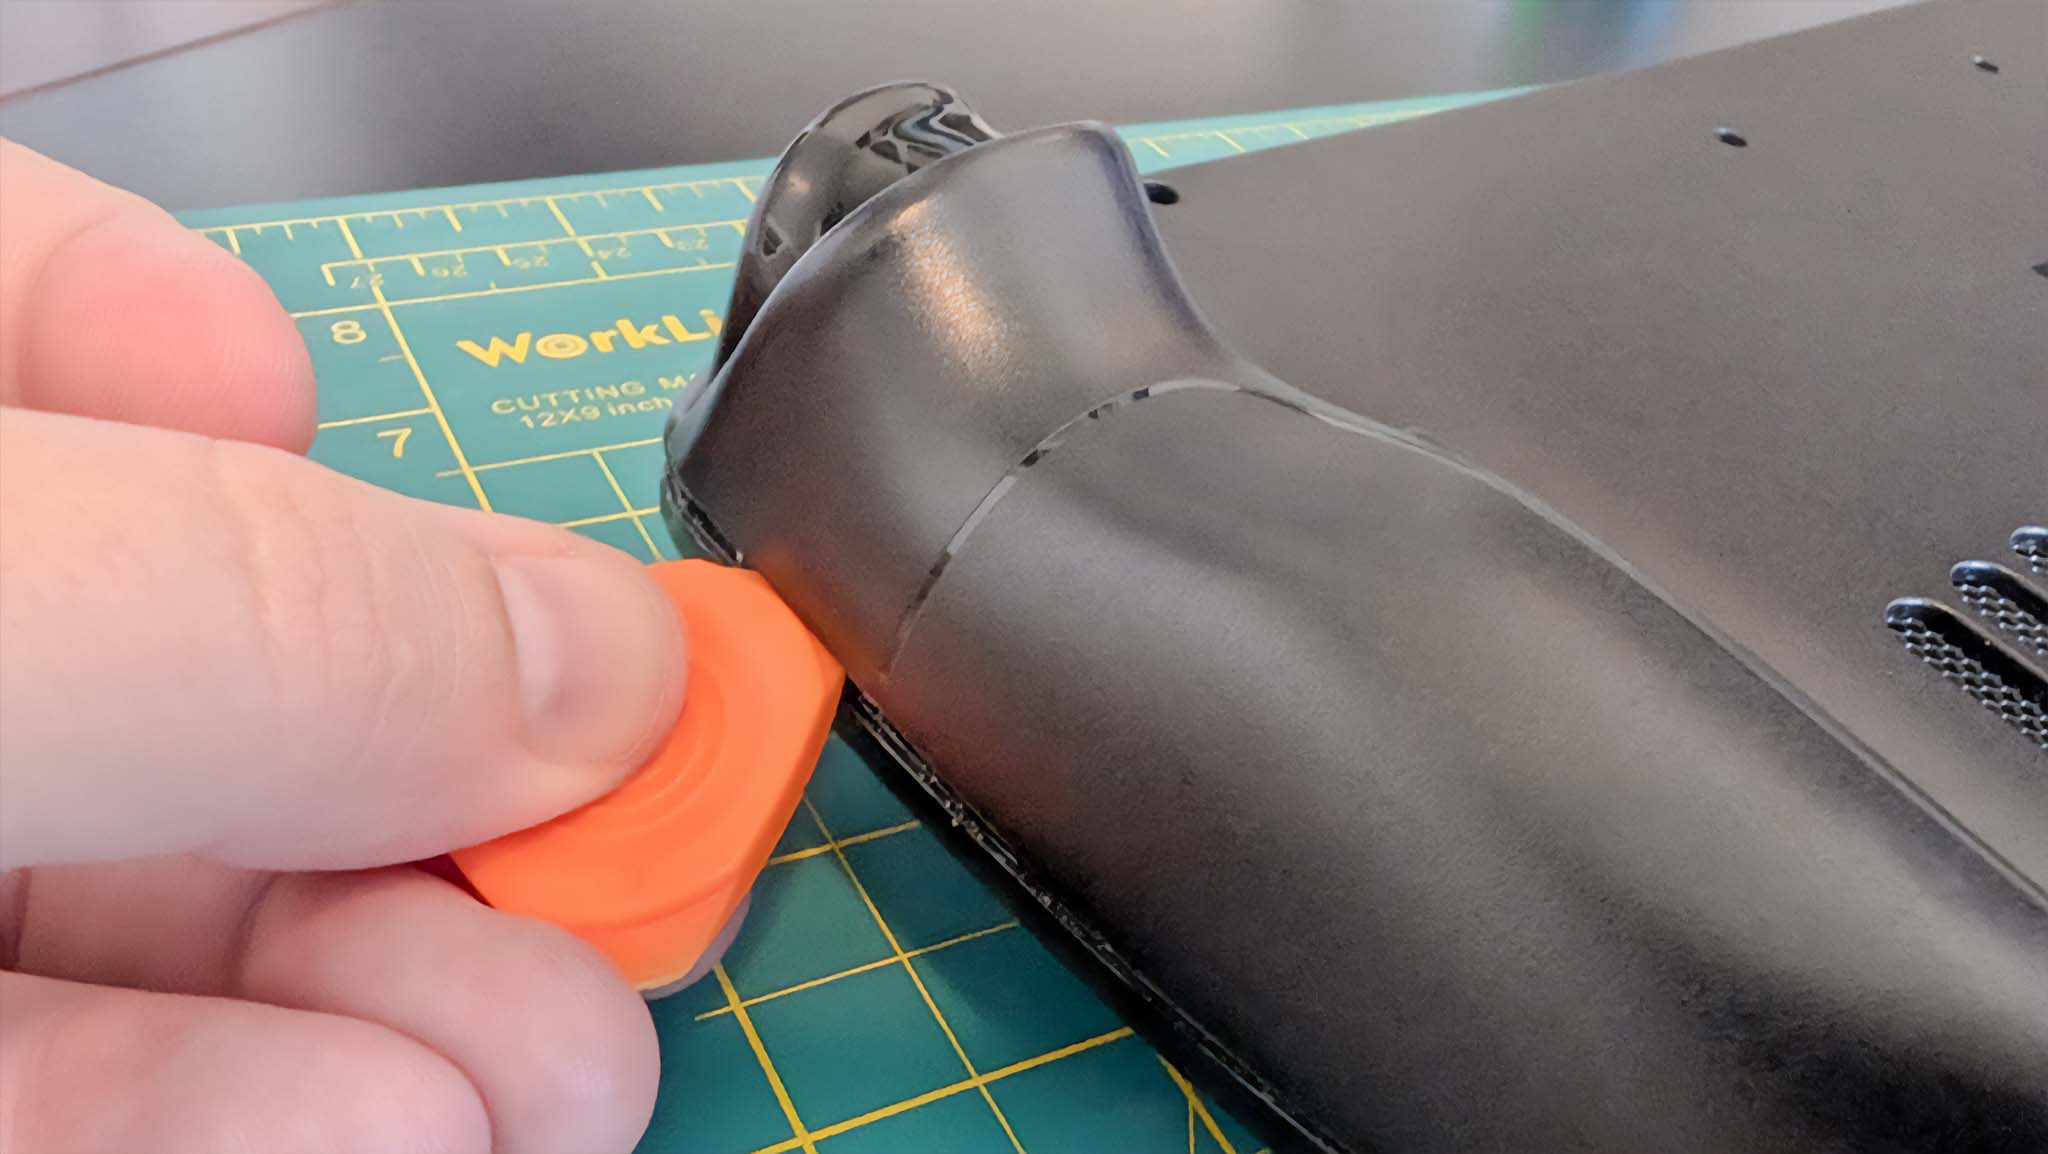
Use an opening pick on the top side of the grip and move it down.
At first, I attempted to ground myself to a Steam Deck screw, but the parts were too small and the alligator clamp kept popping off. I ended up grounding myself to my computer tower frame, which I was working next to.
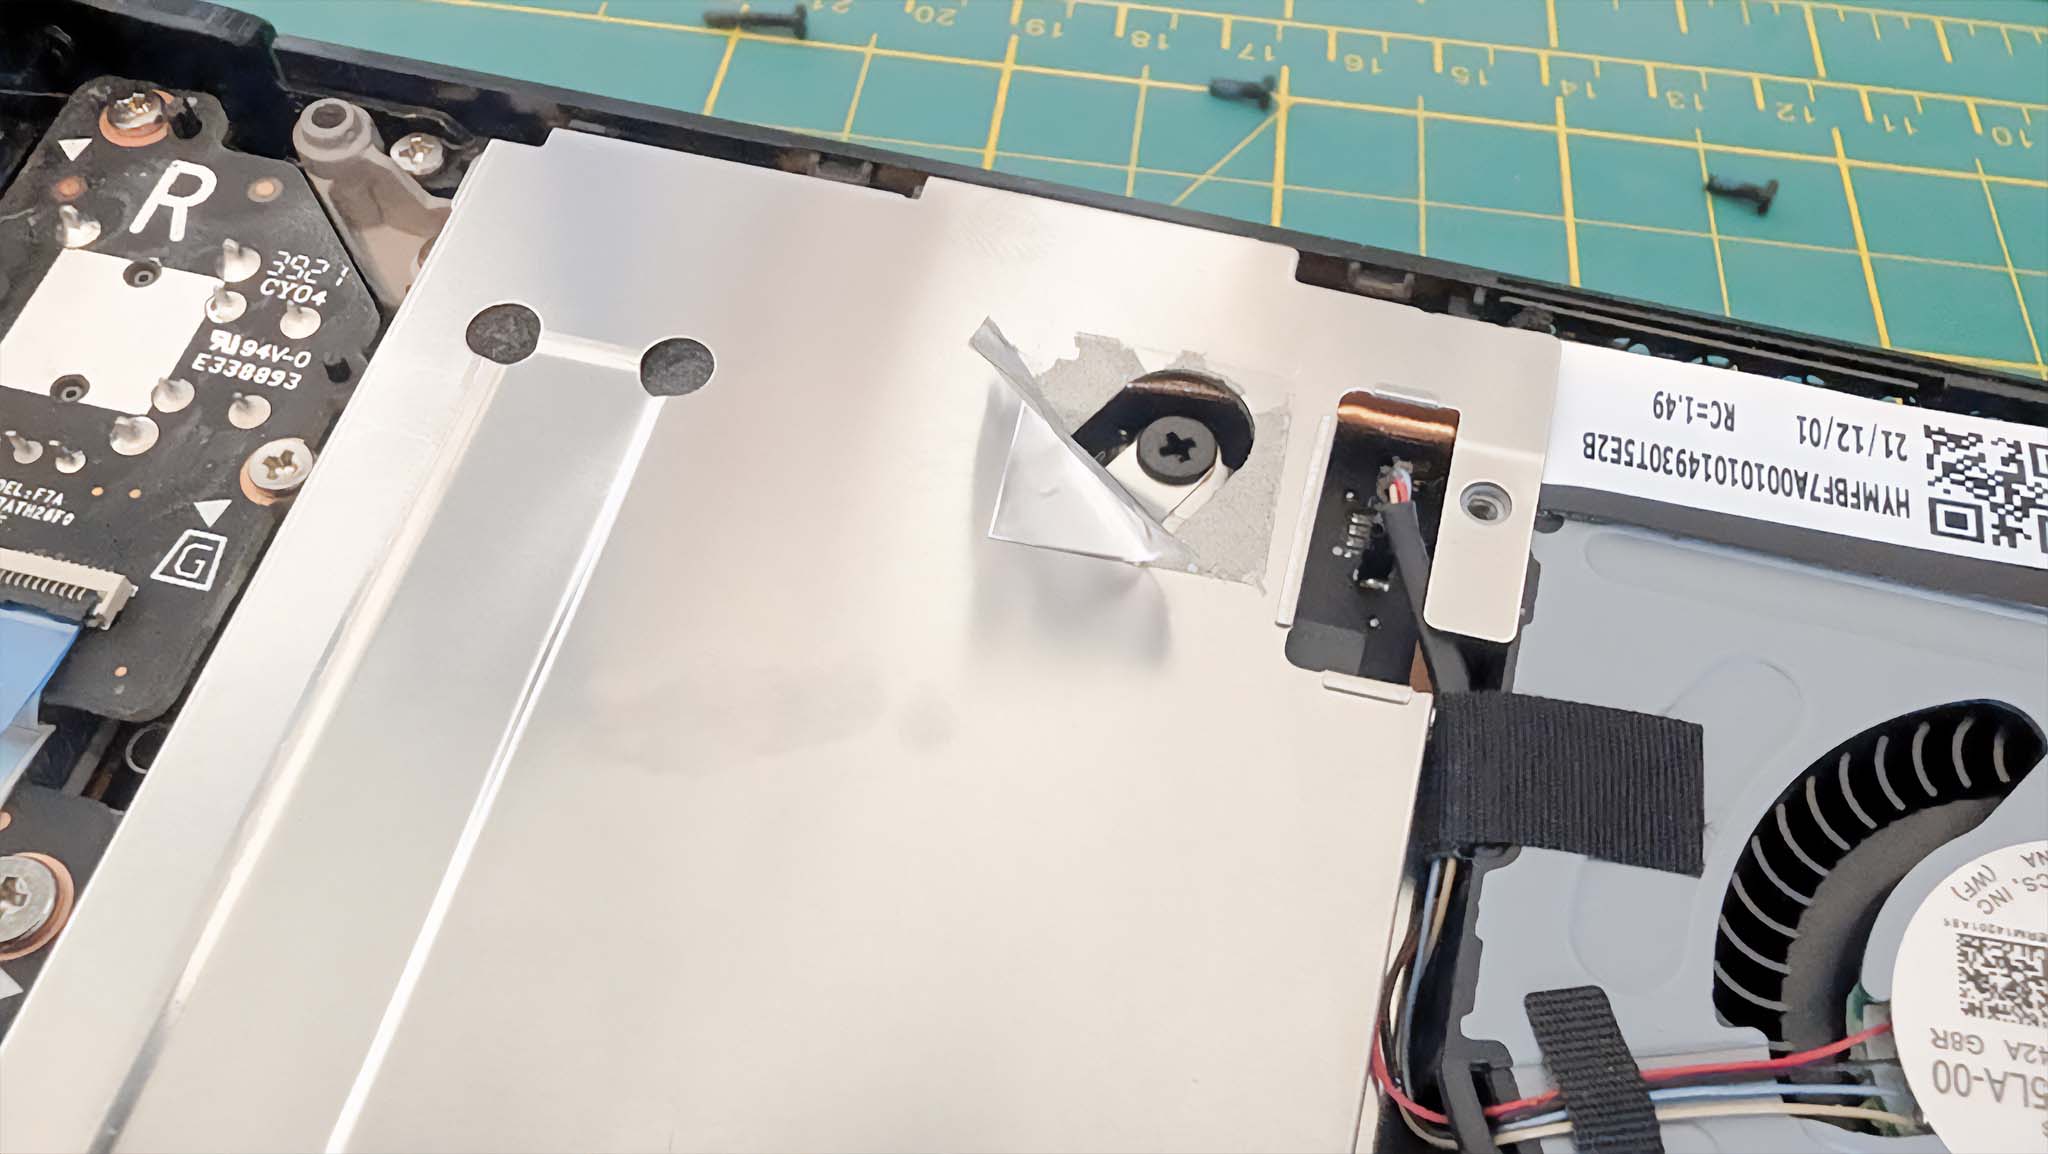
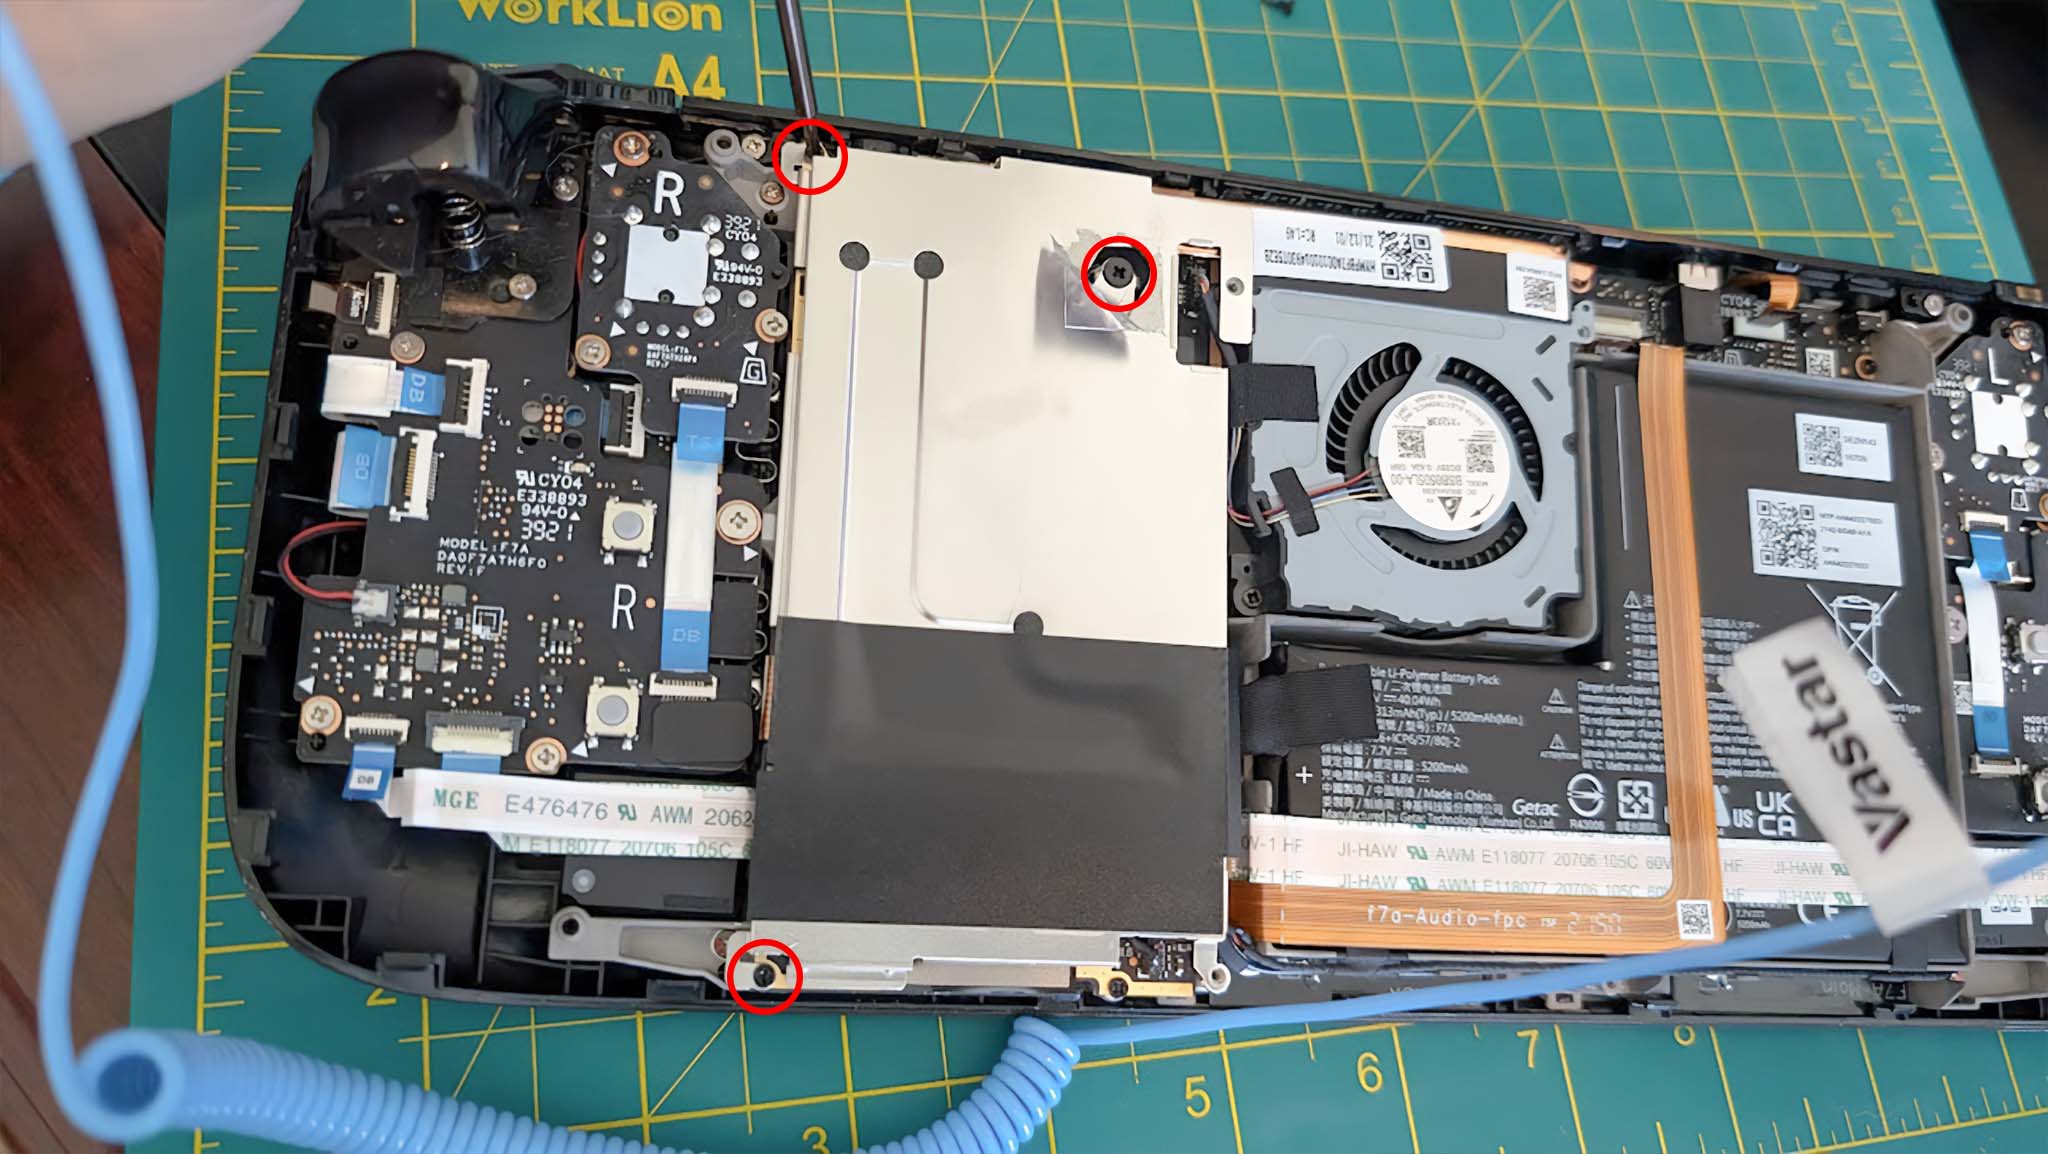
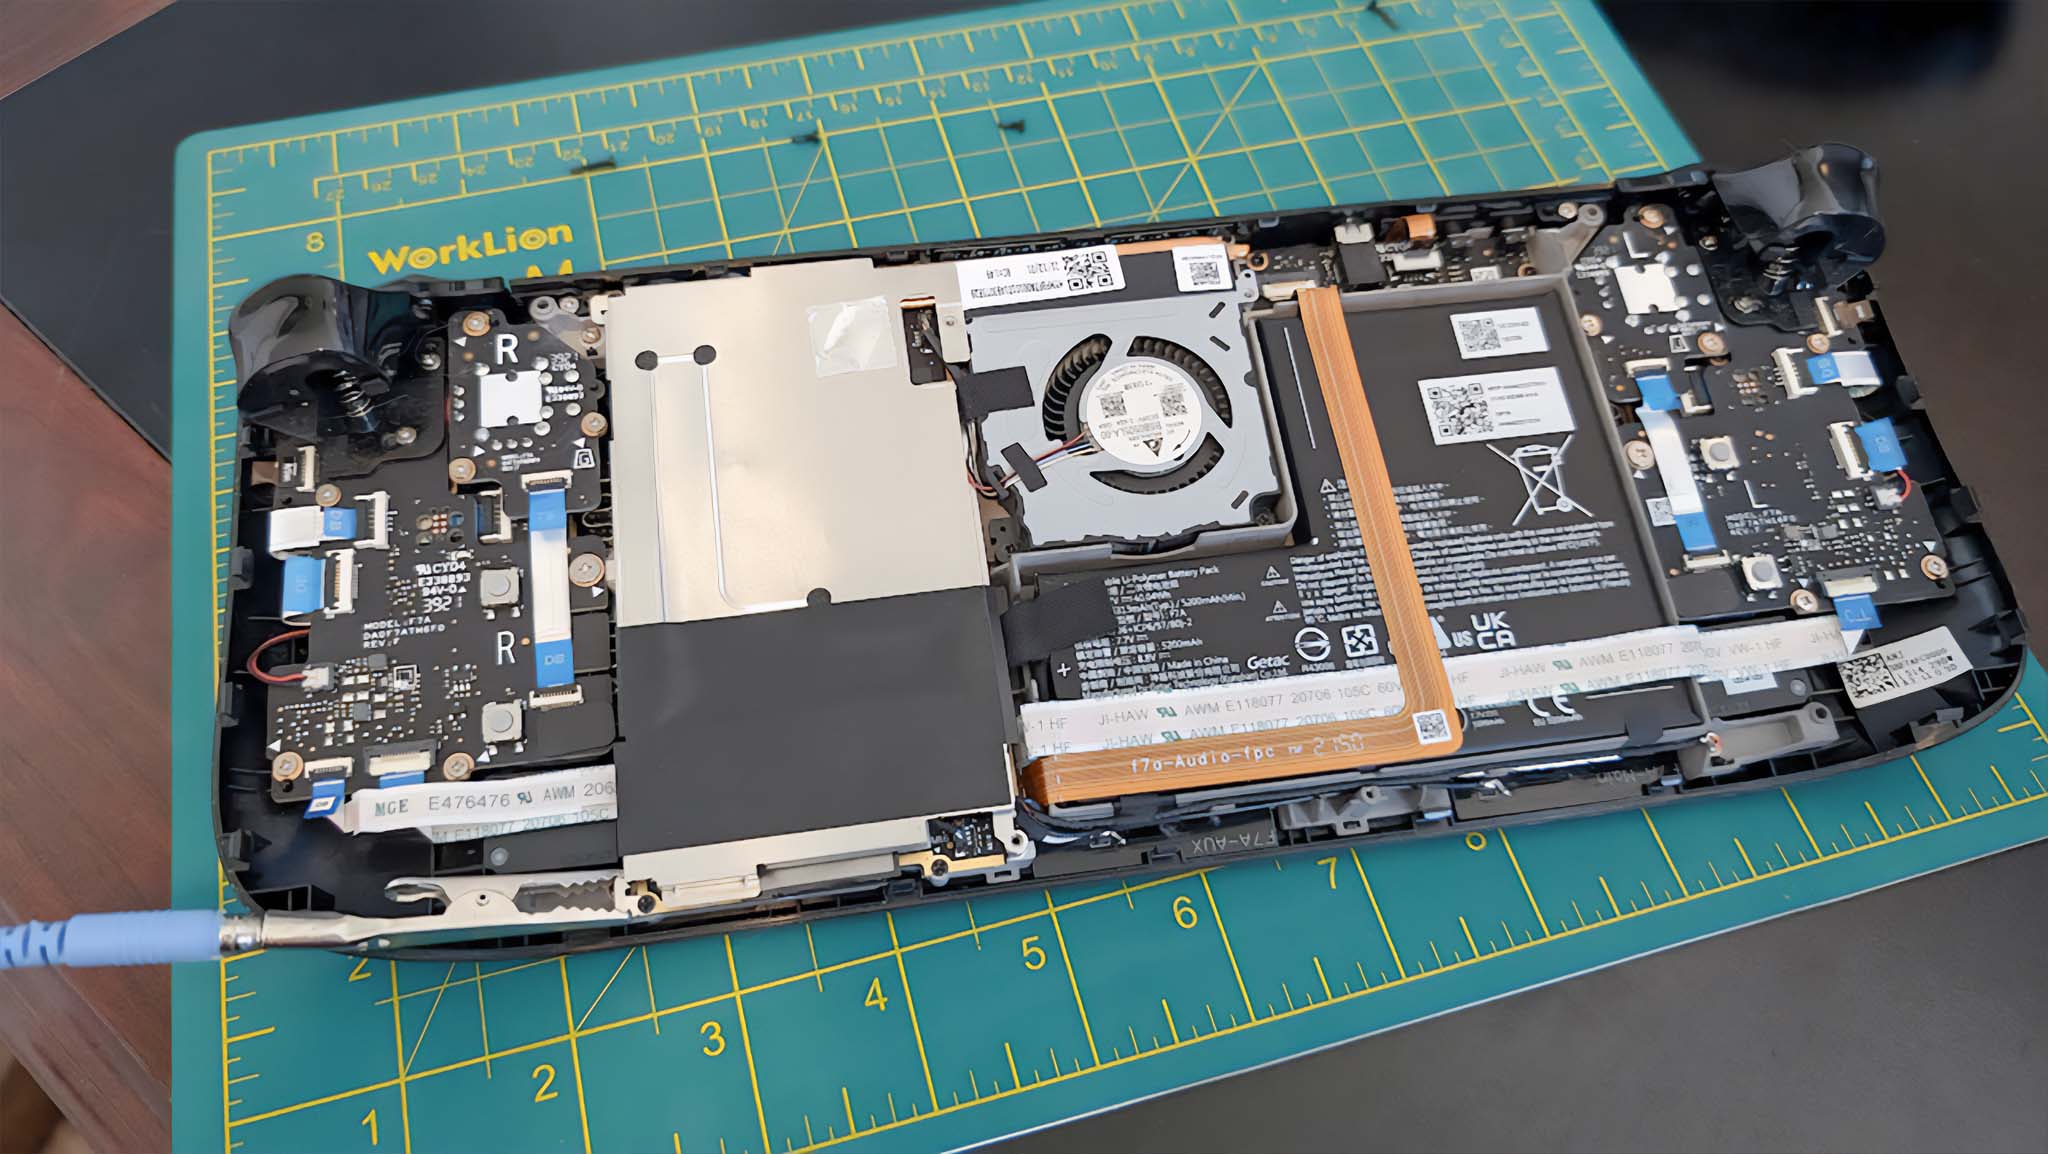
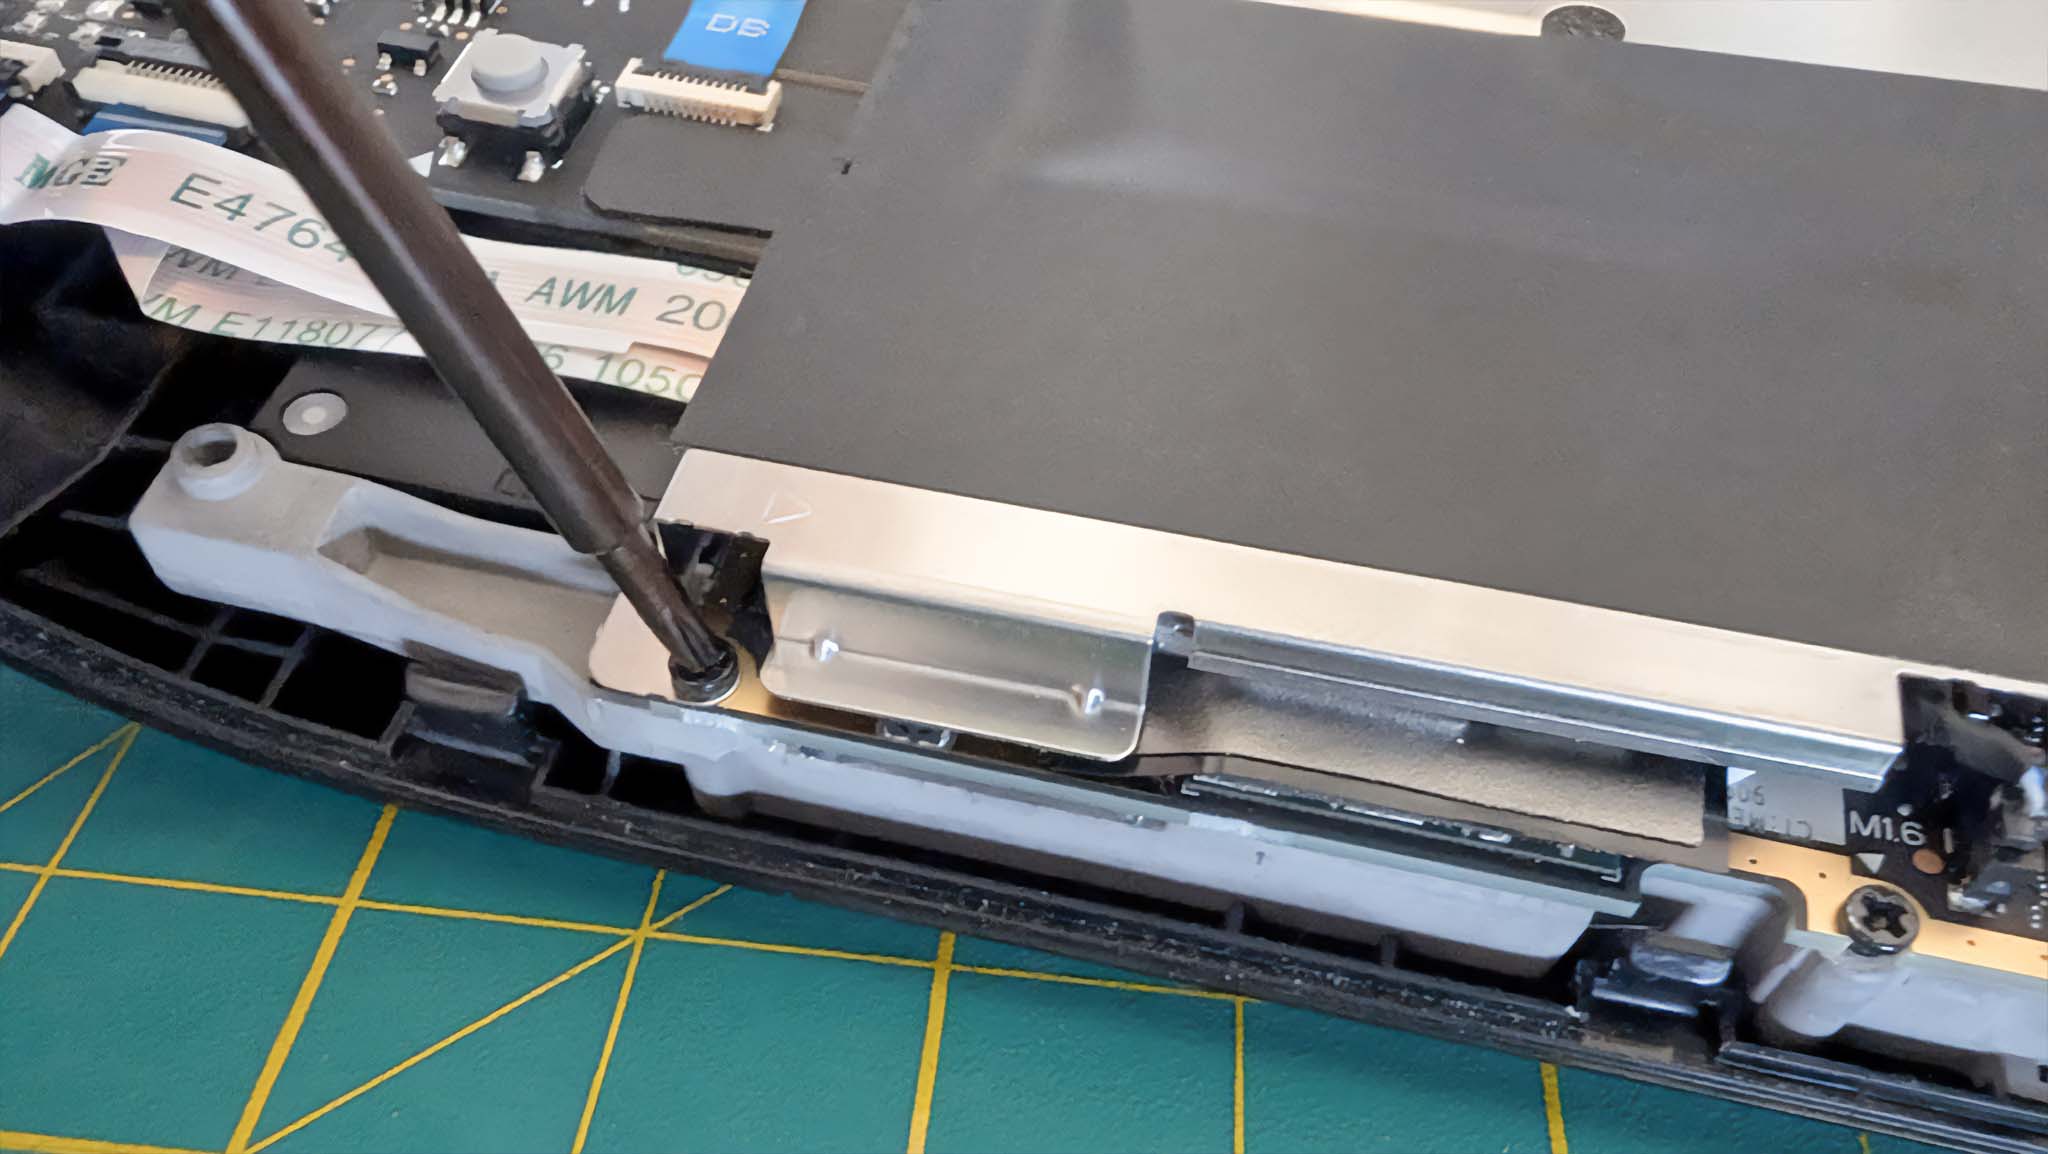
Unscrew the three screws holding the motherboard shield in place.
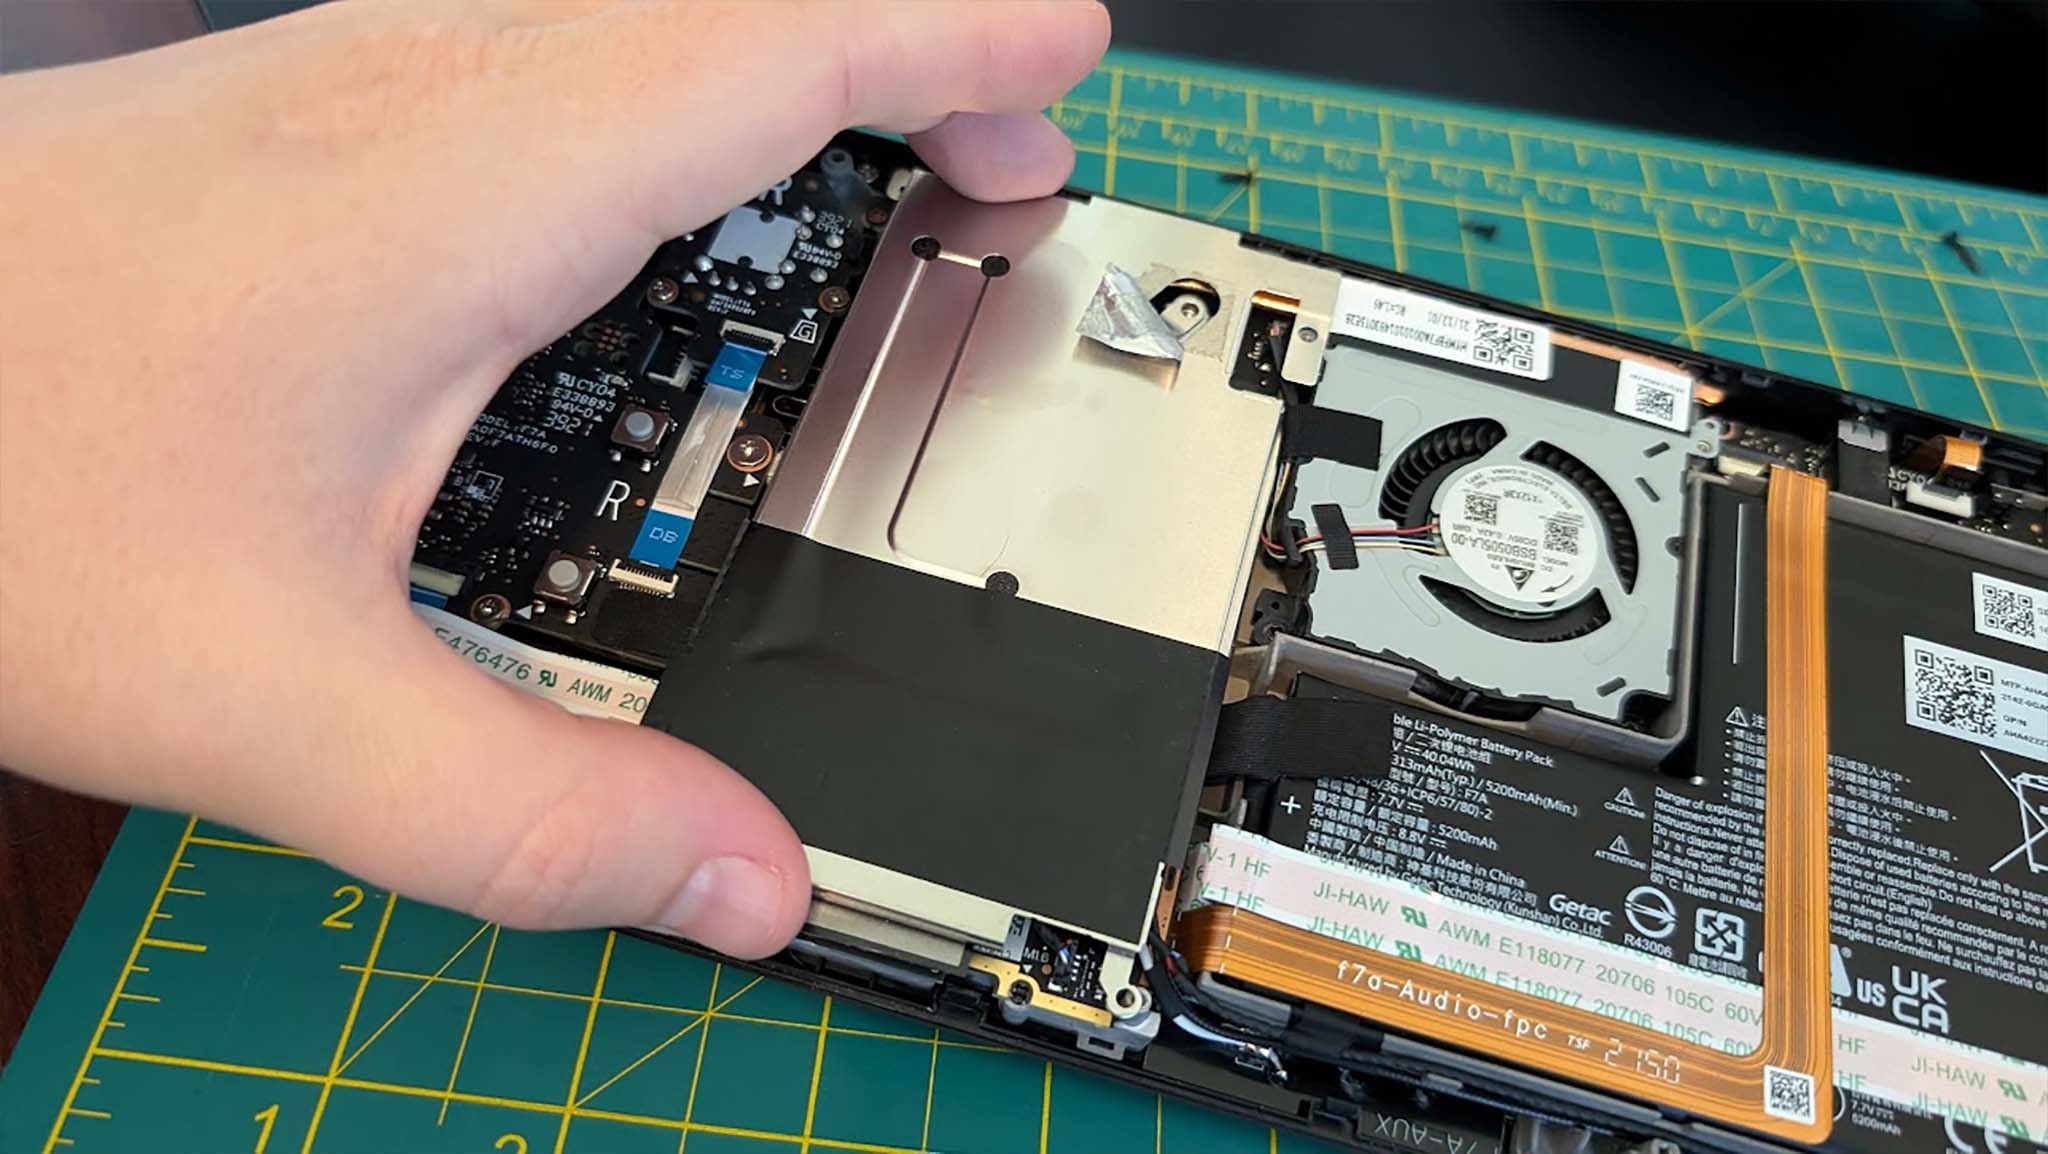
Gently pick the motherboard shield up and move it away from the Steam Deck.
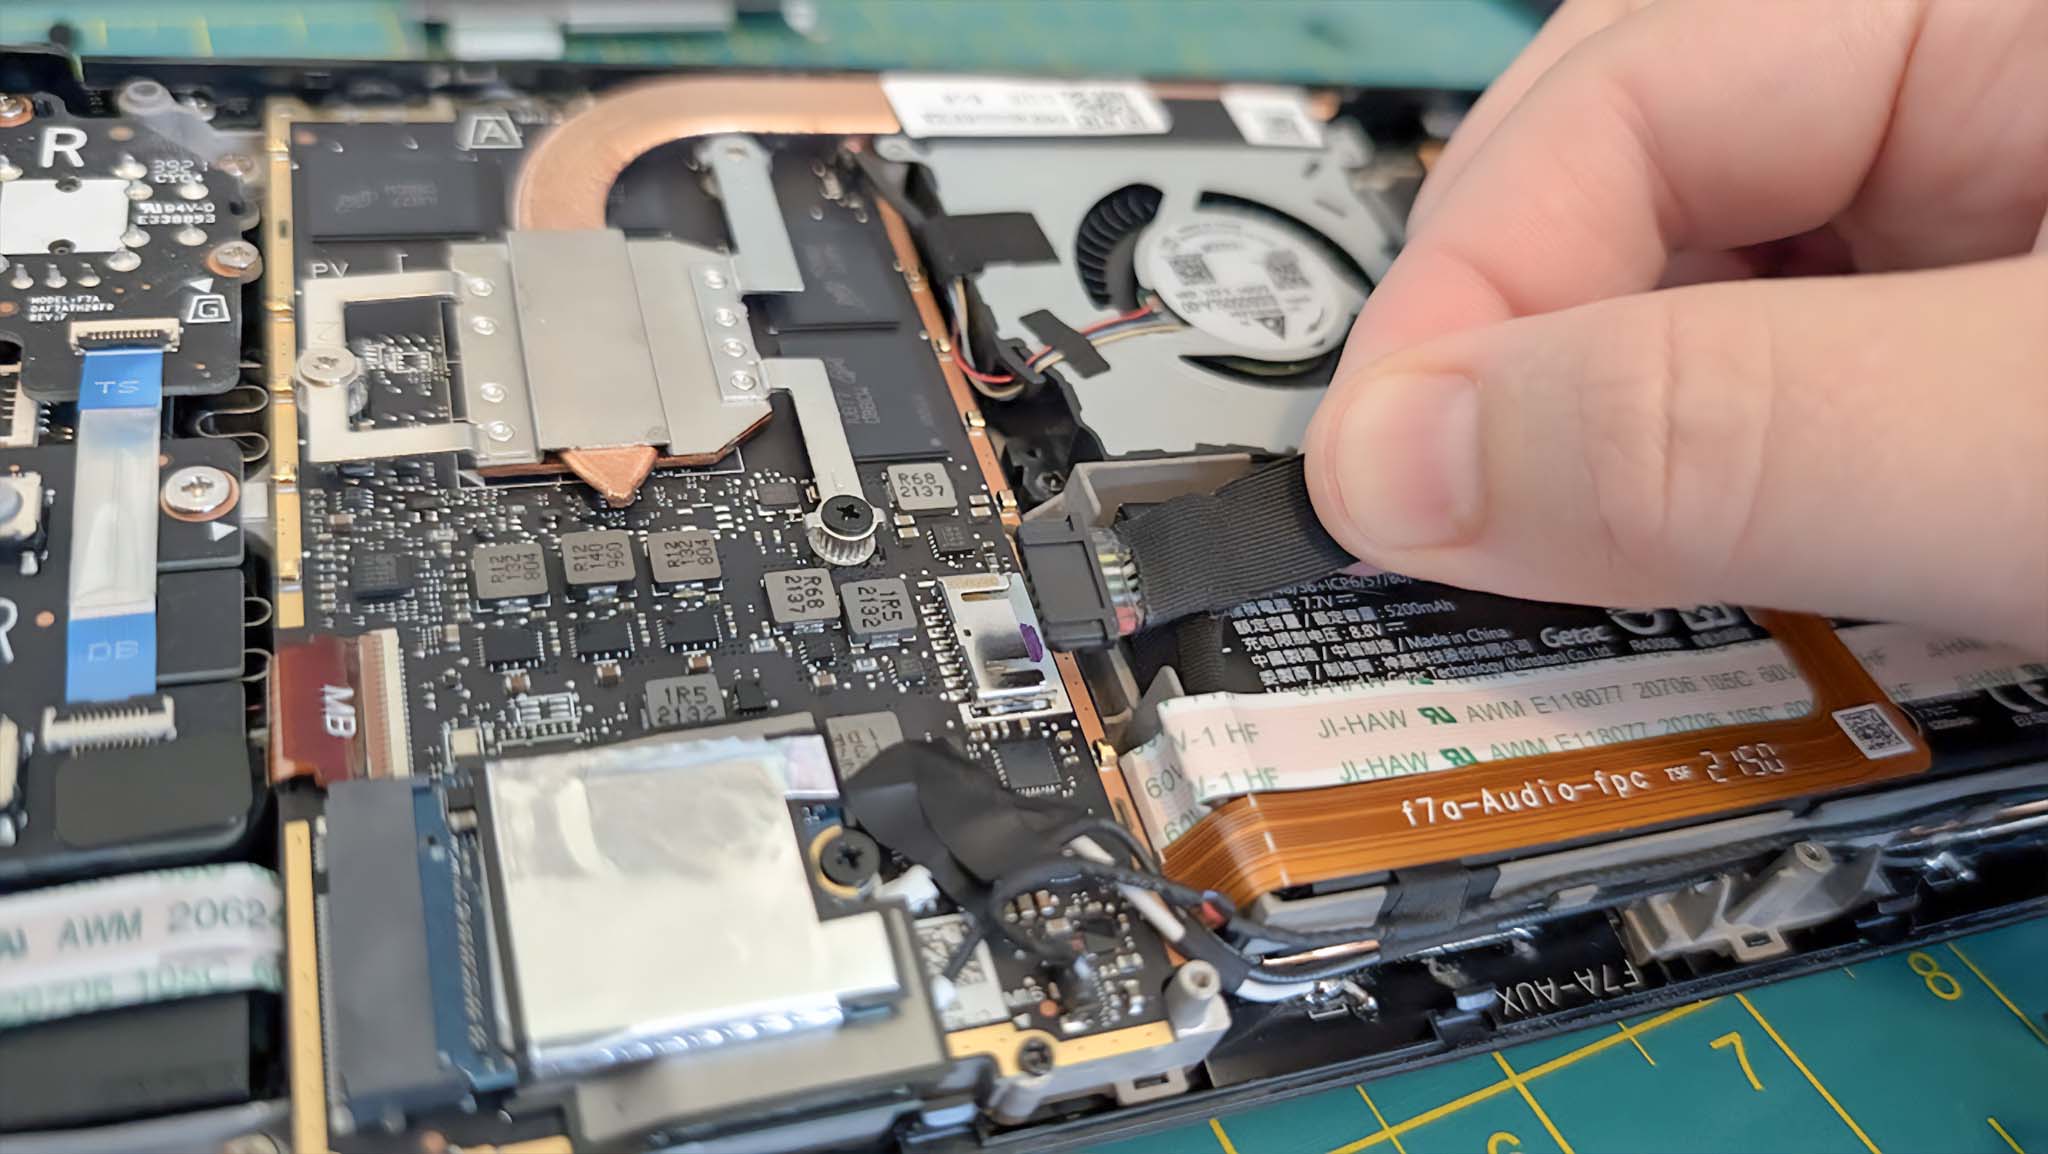
Pull on the fabric tab to unplug the battery.
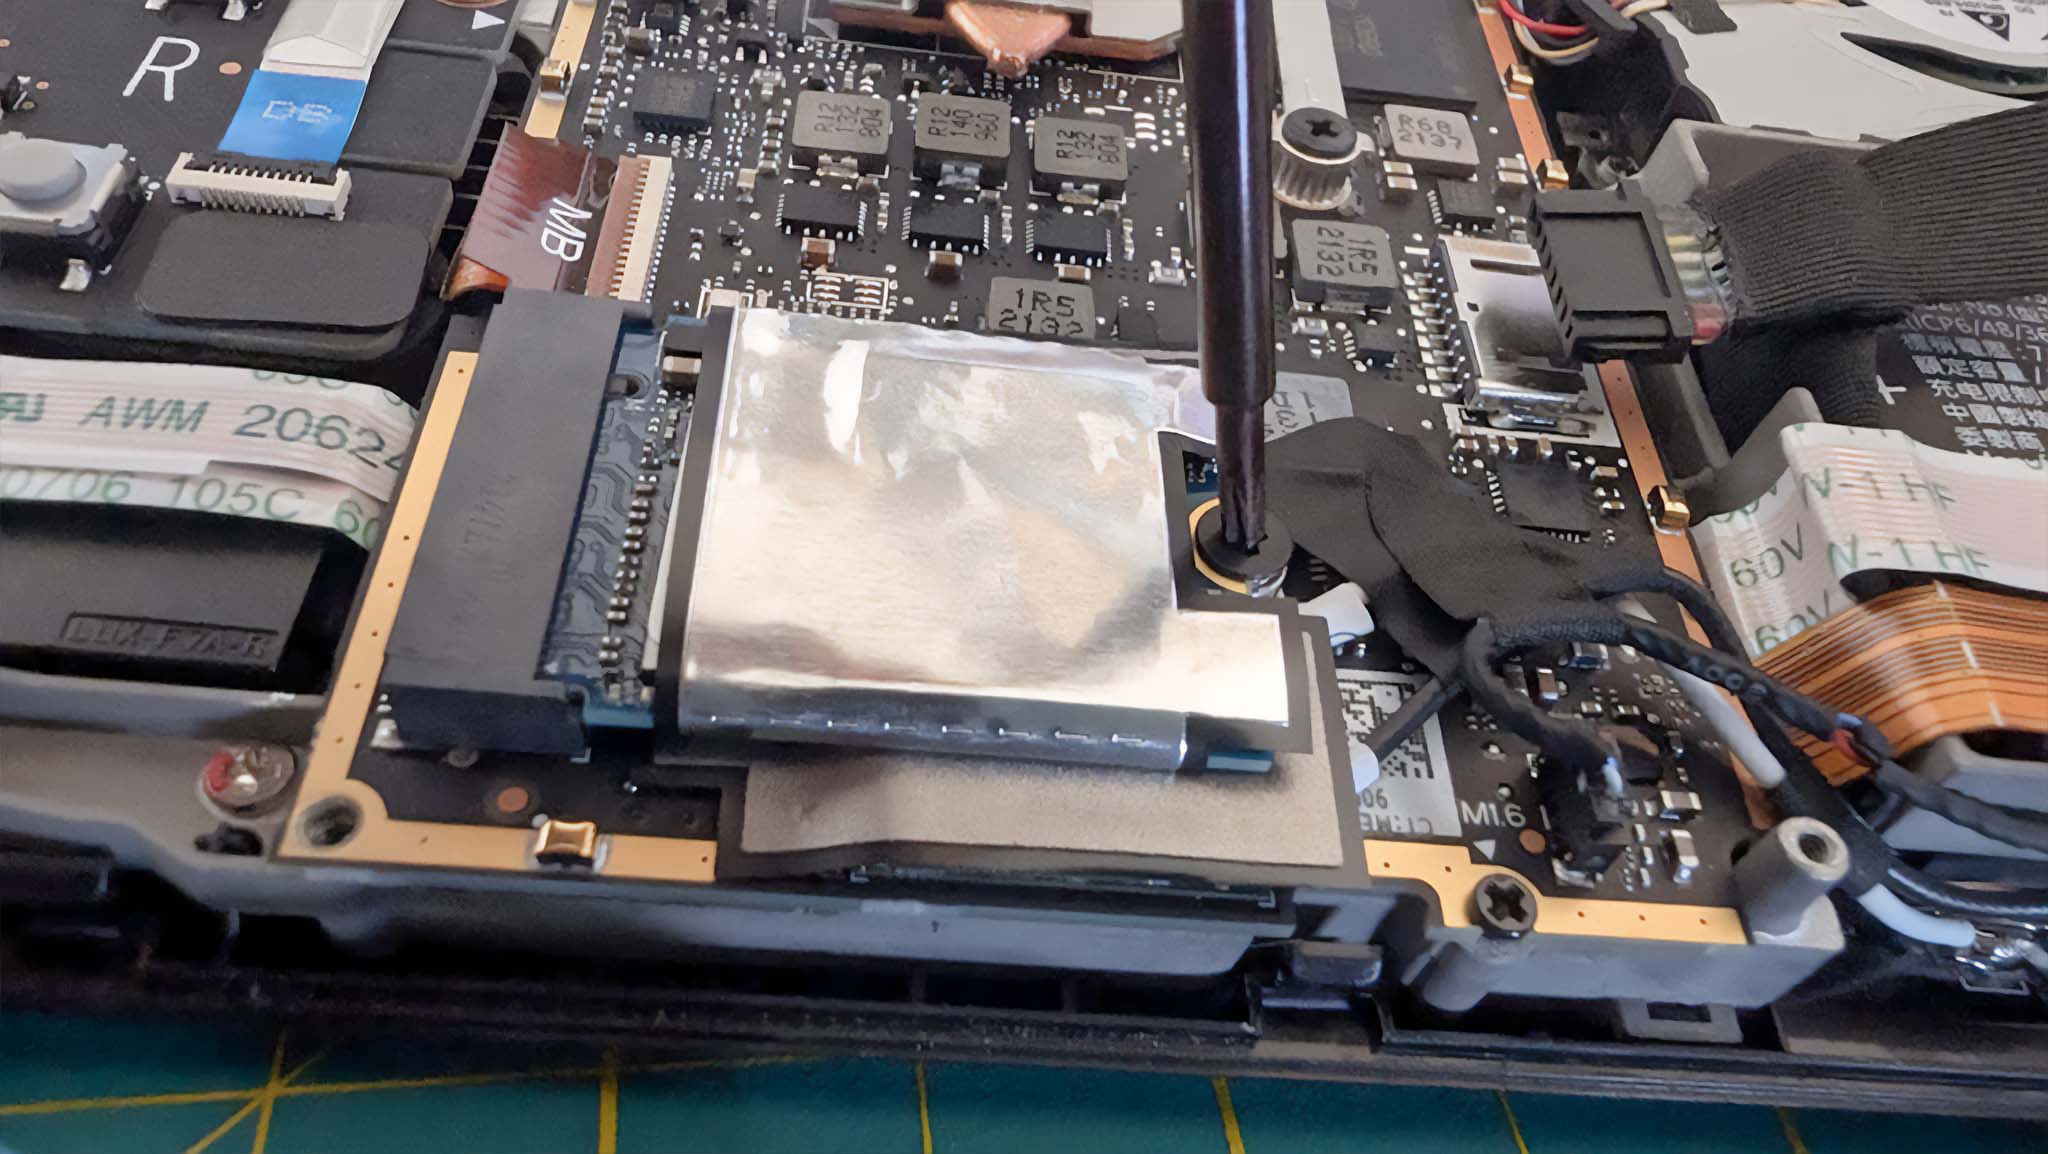
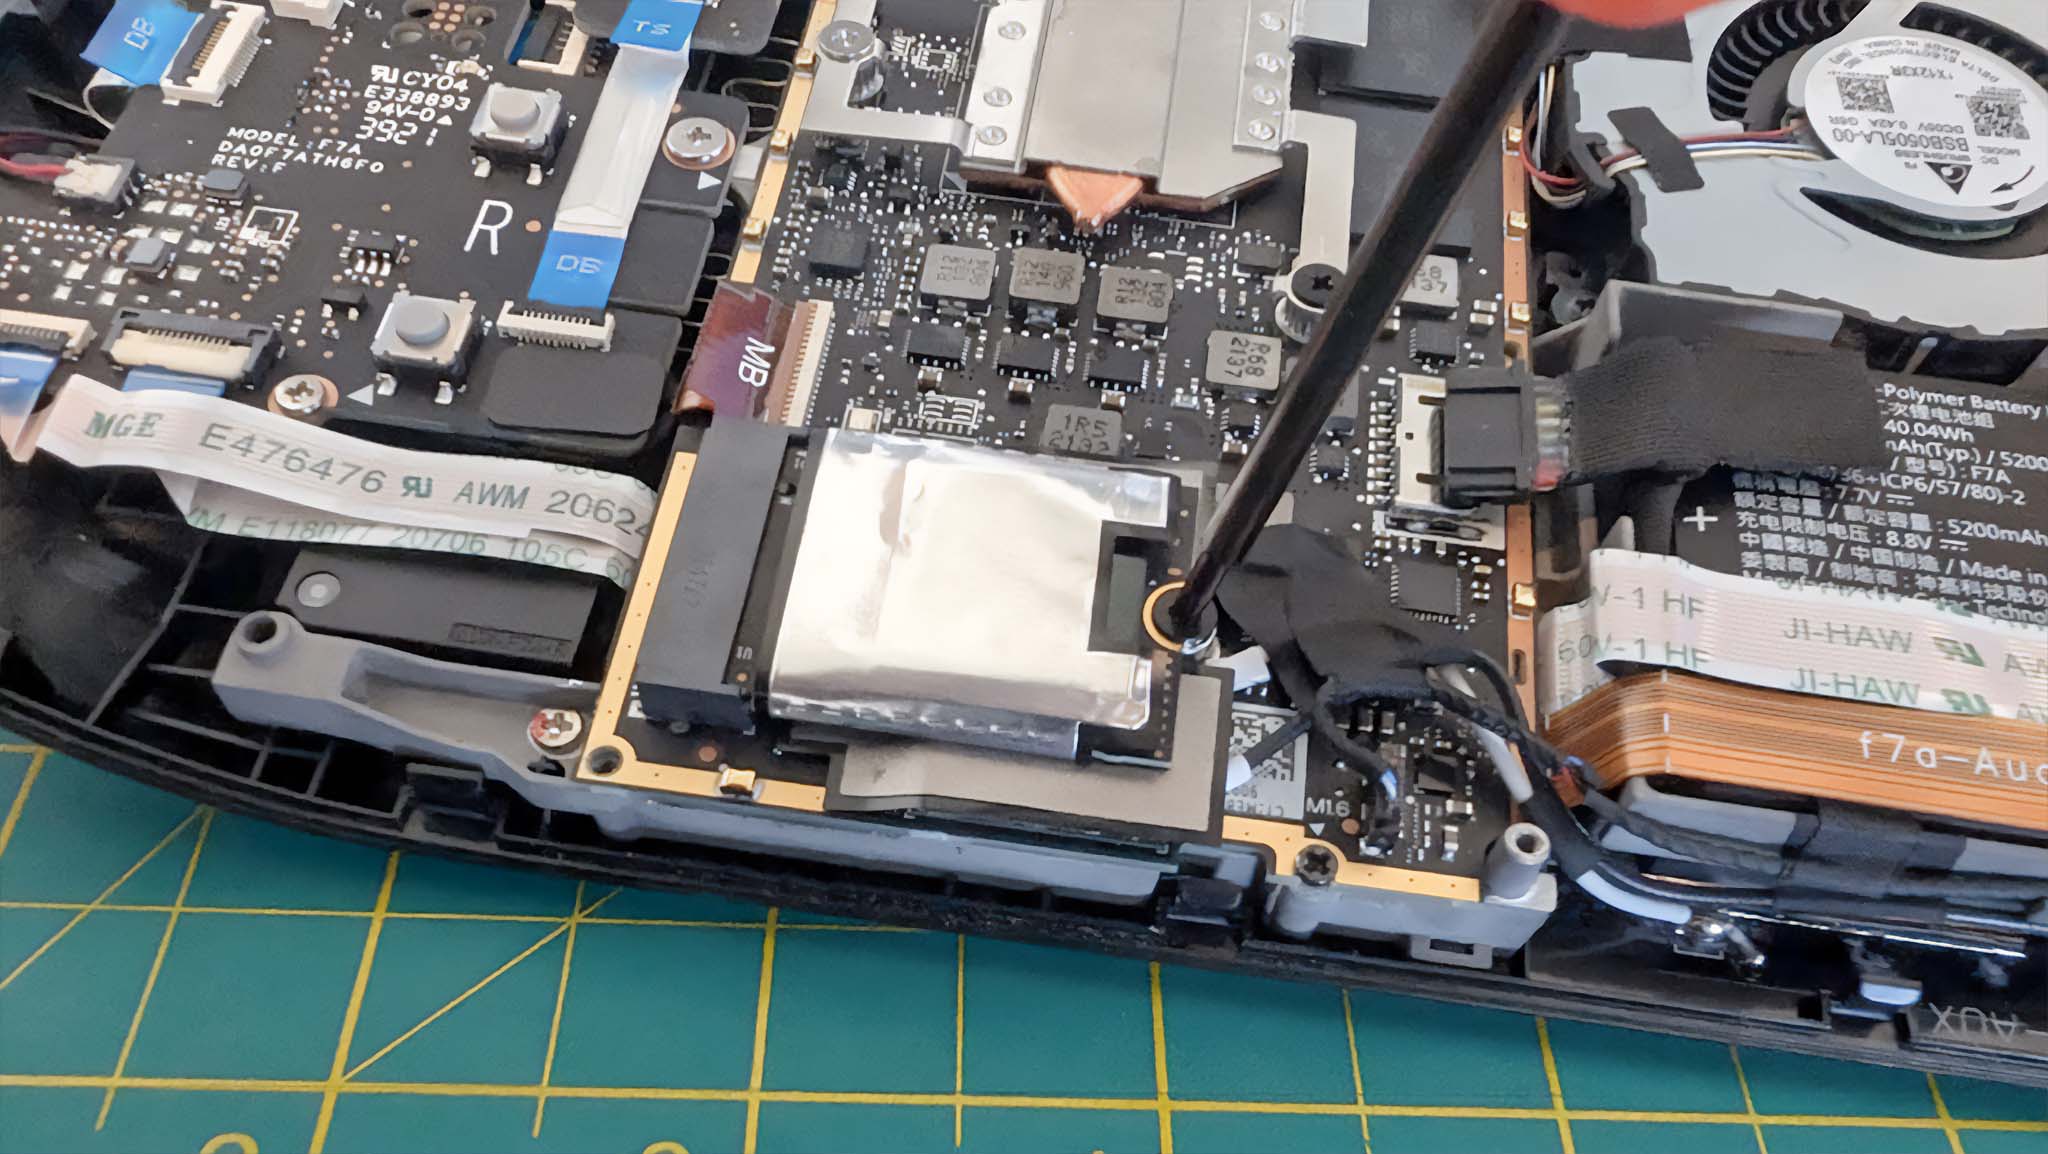
Unscrew the solitary screw holding the old SSD in place.
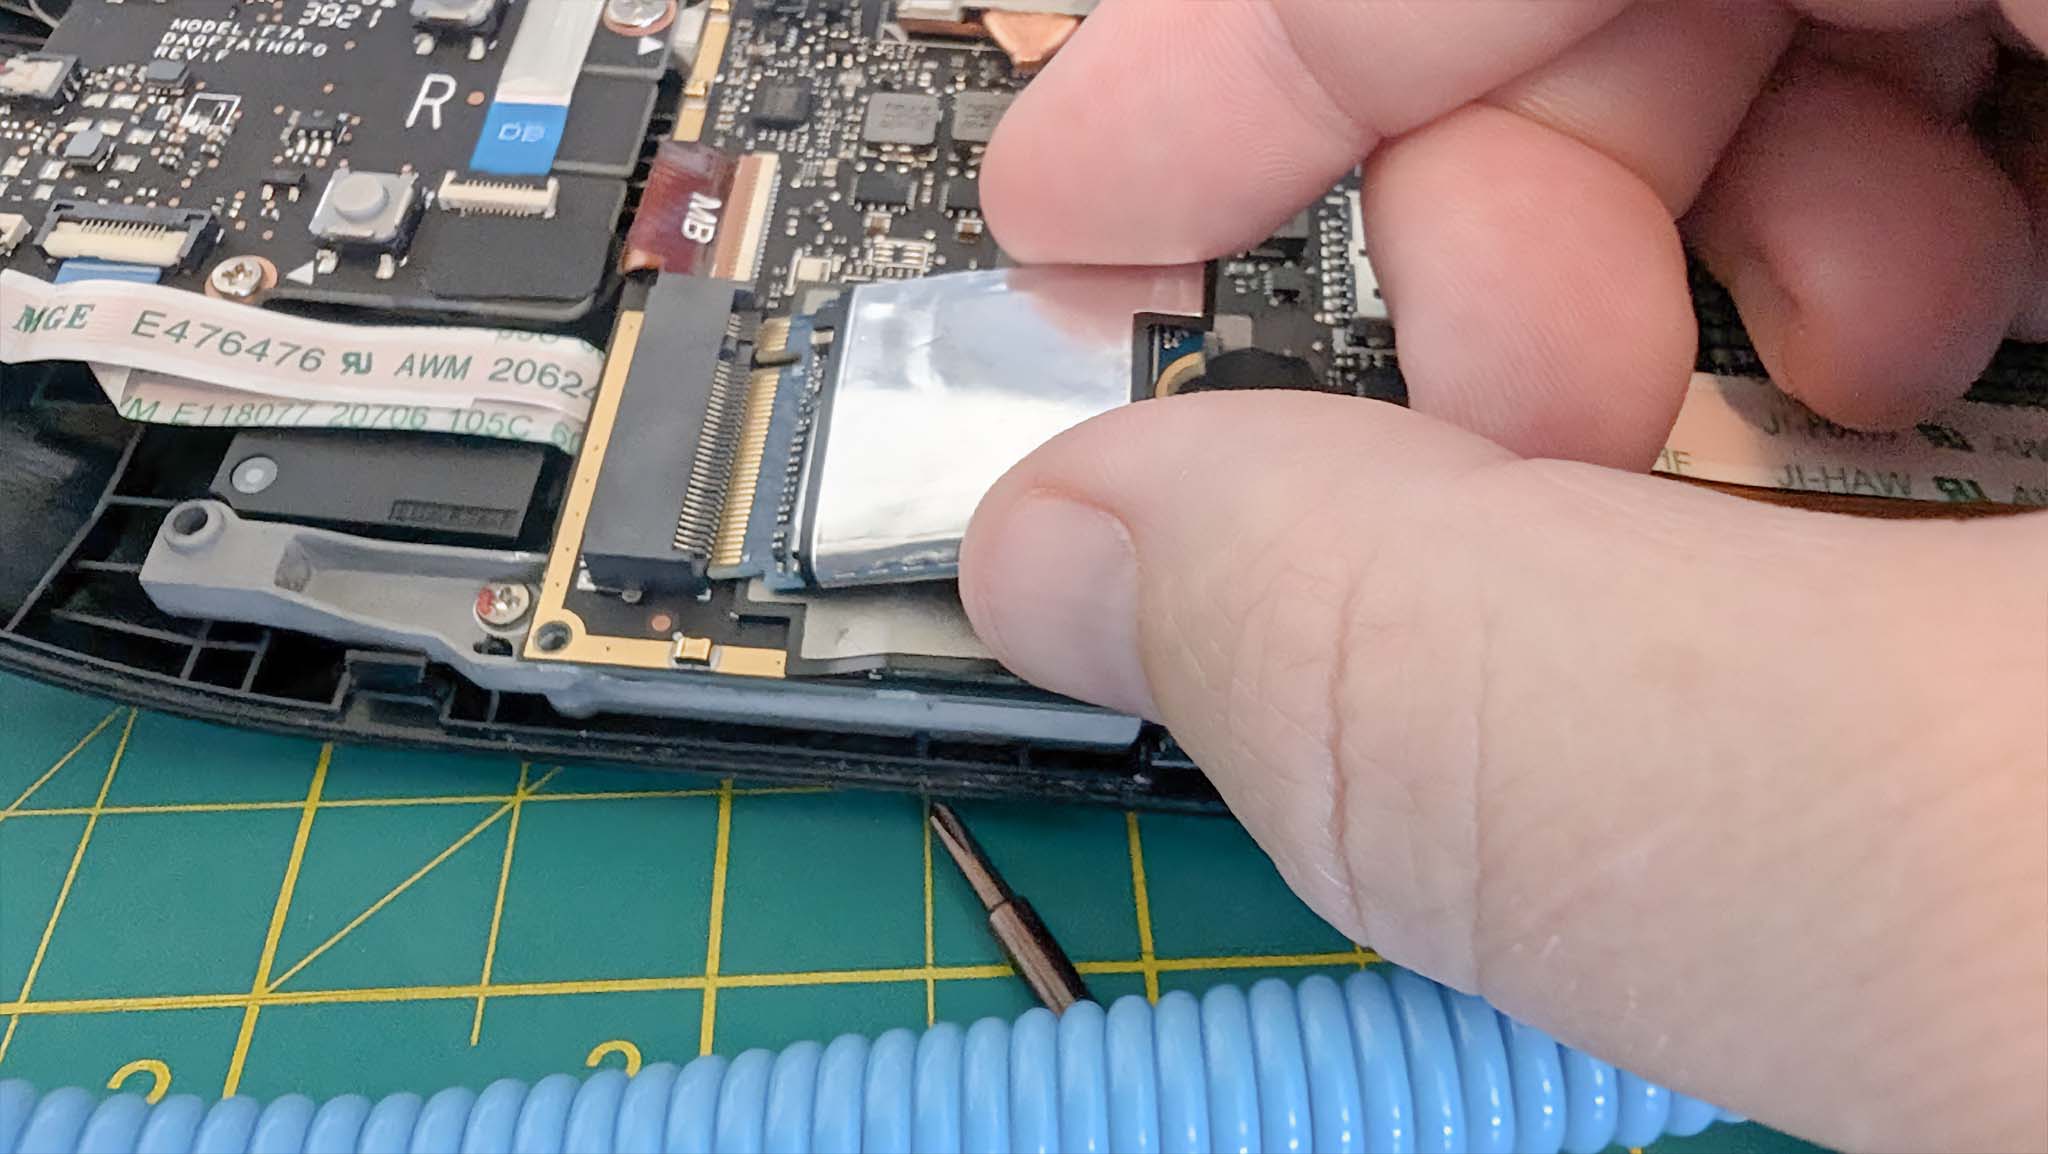
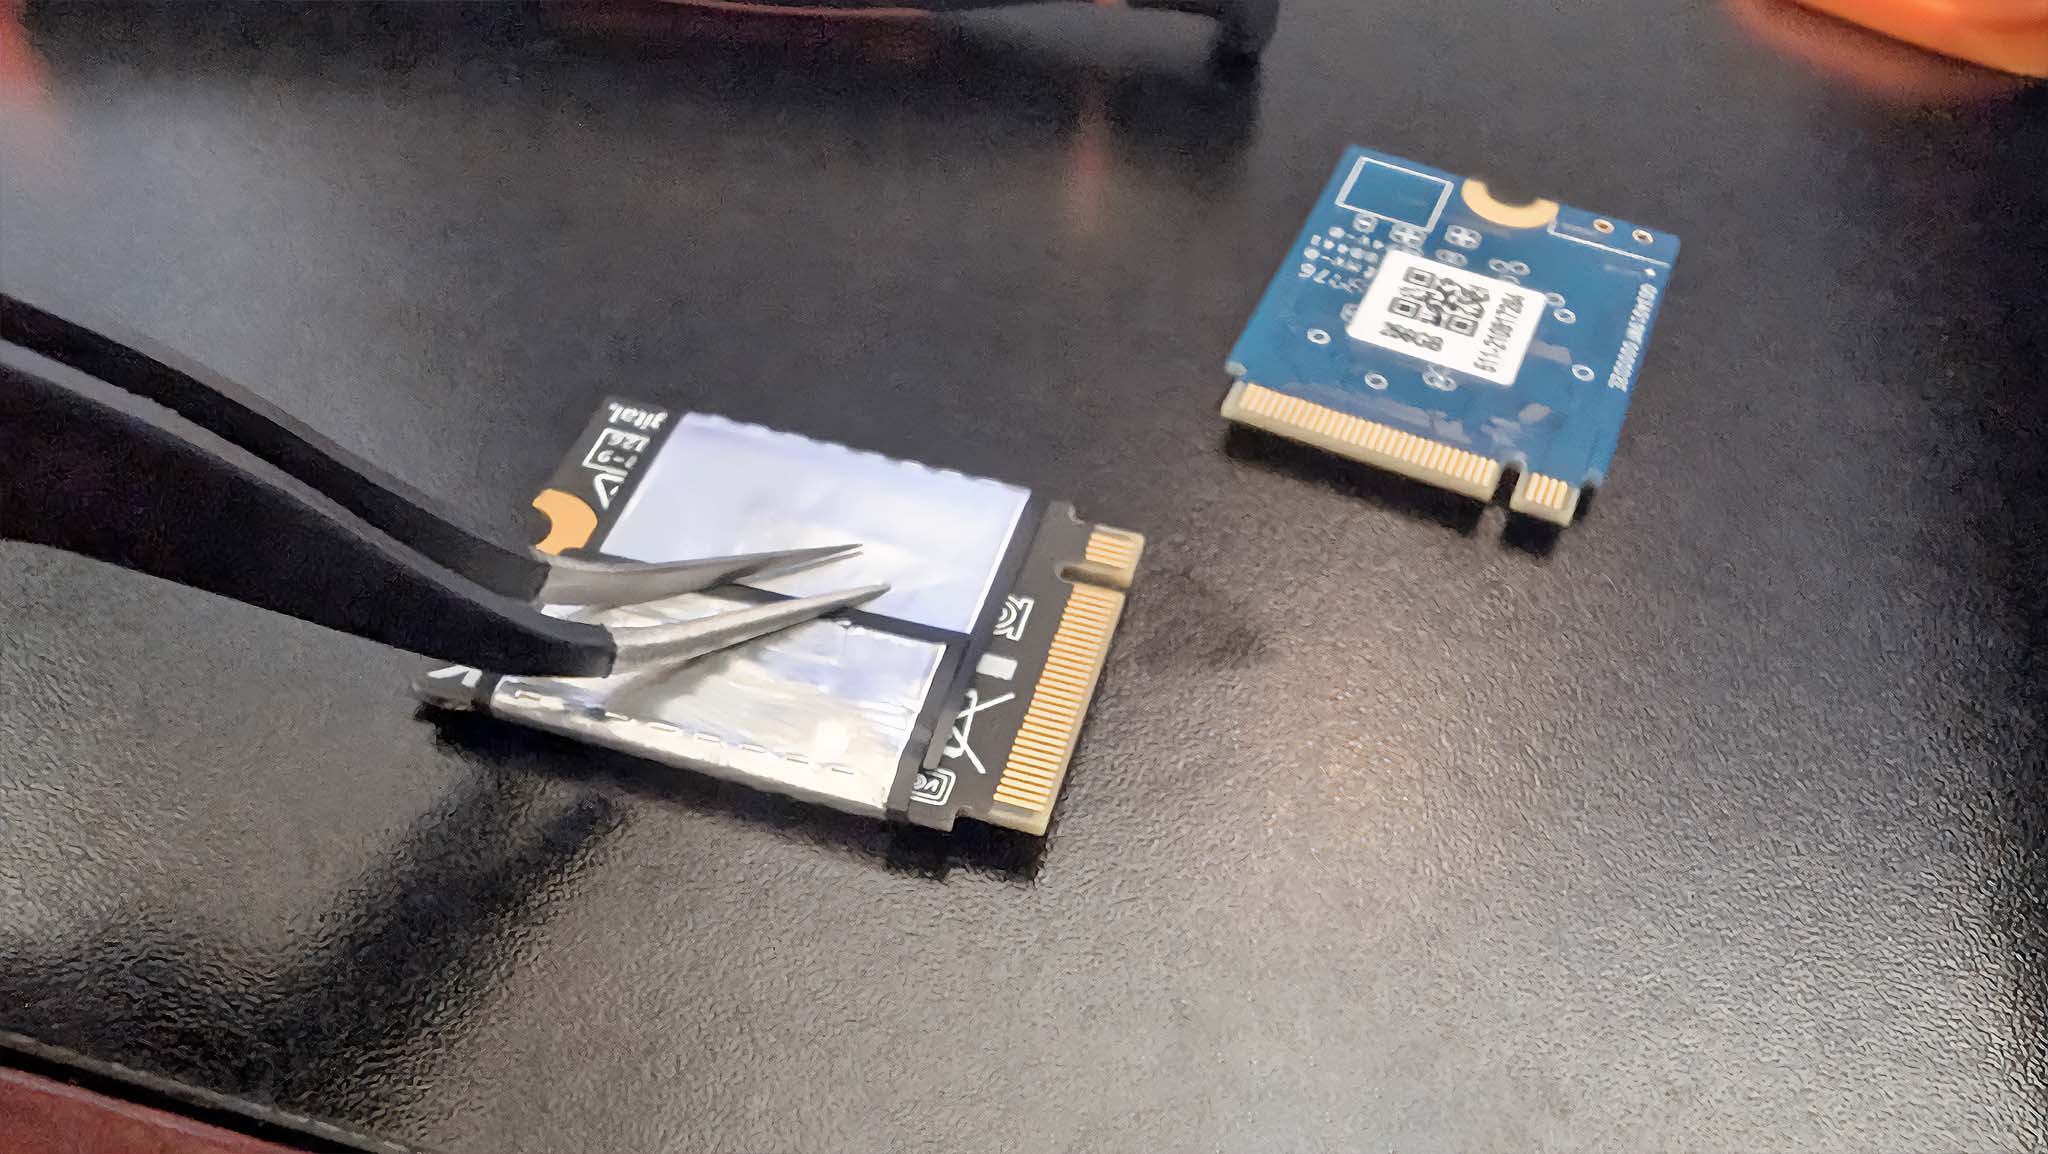
Carefully pull the SSD out of its slot.

(Image credit: Rebecca Spear / Windows Central)
(Image credit: Rebecca Spear / Windows Central)
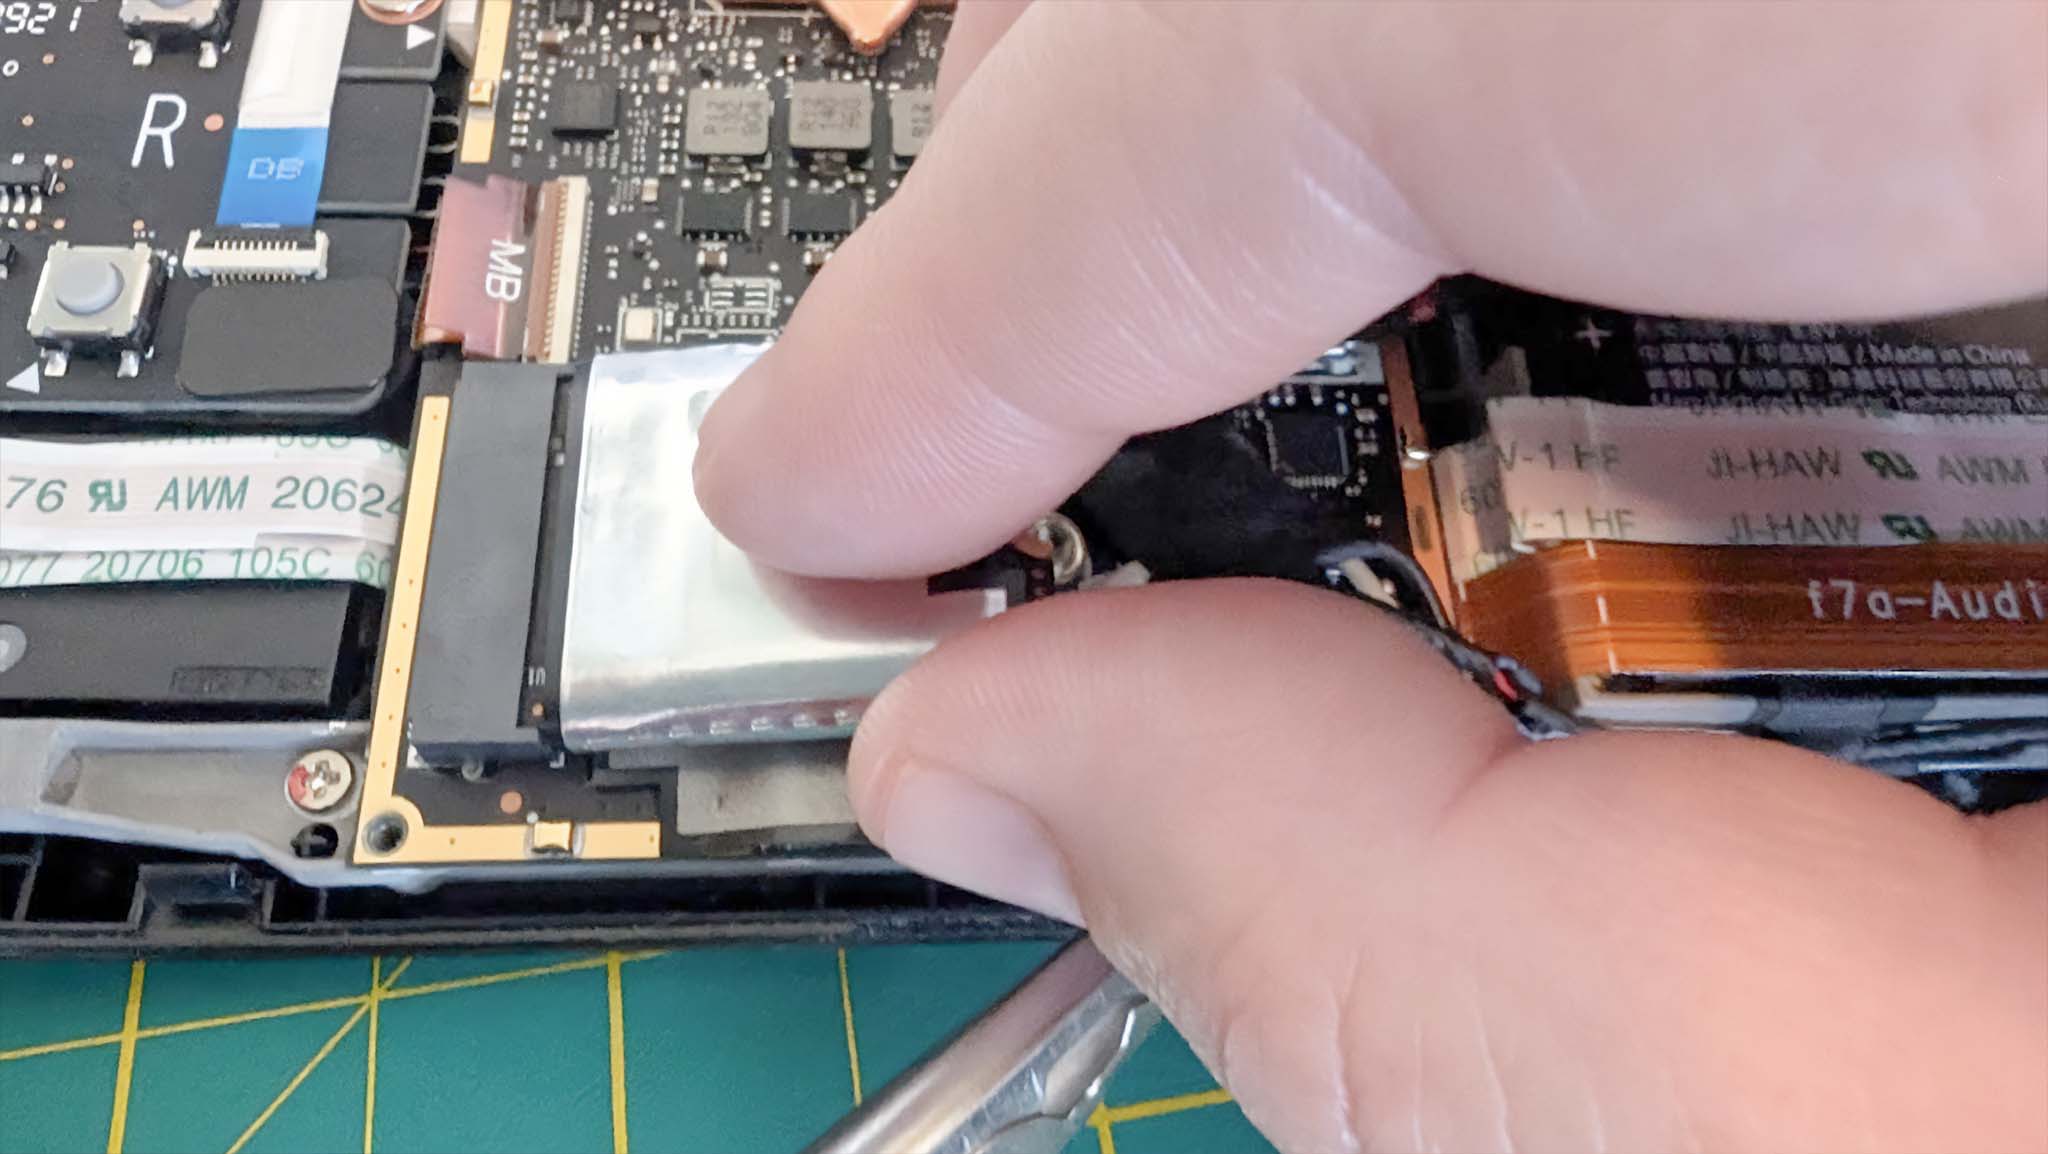
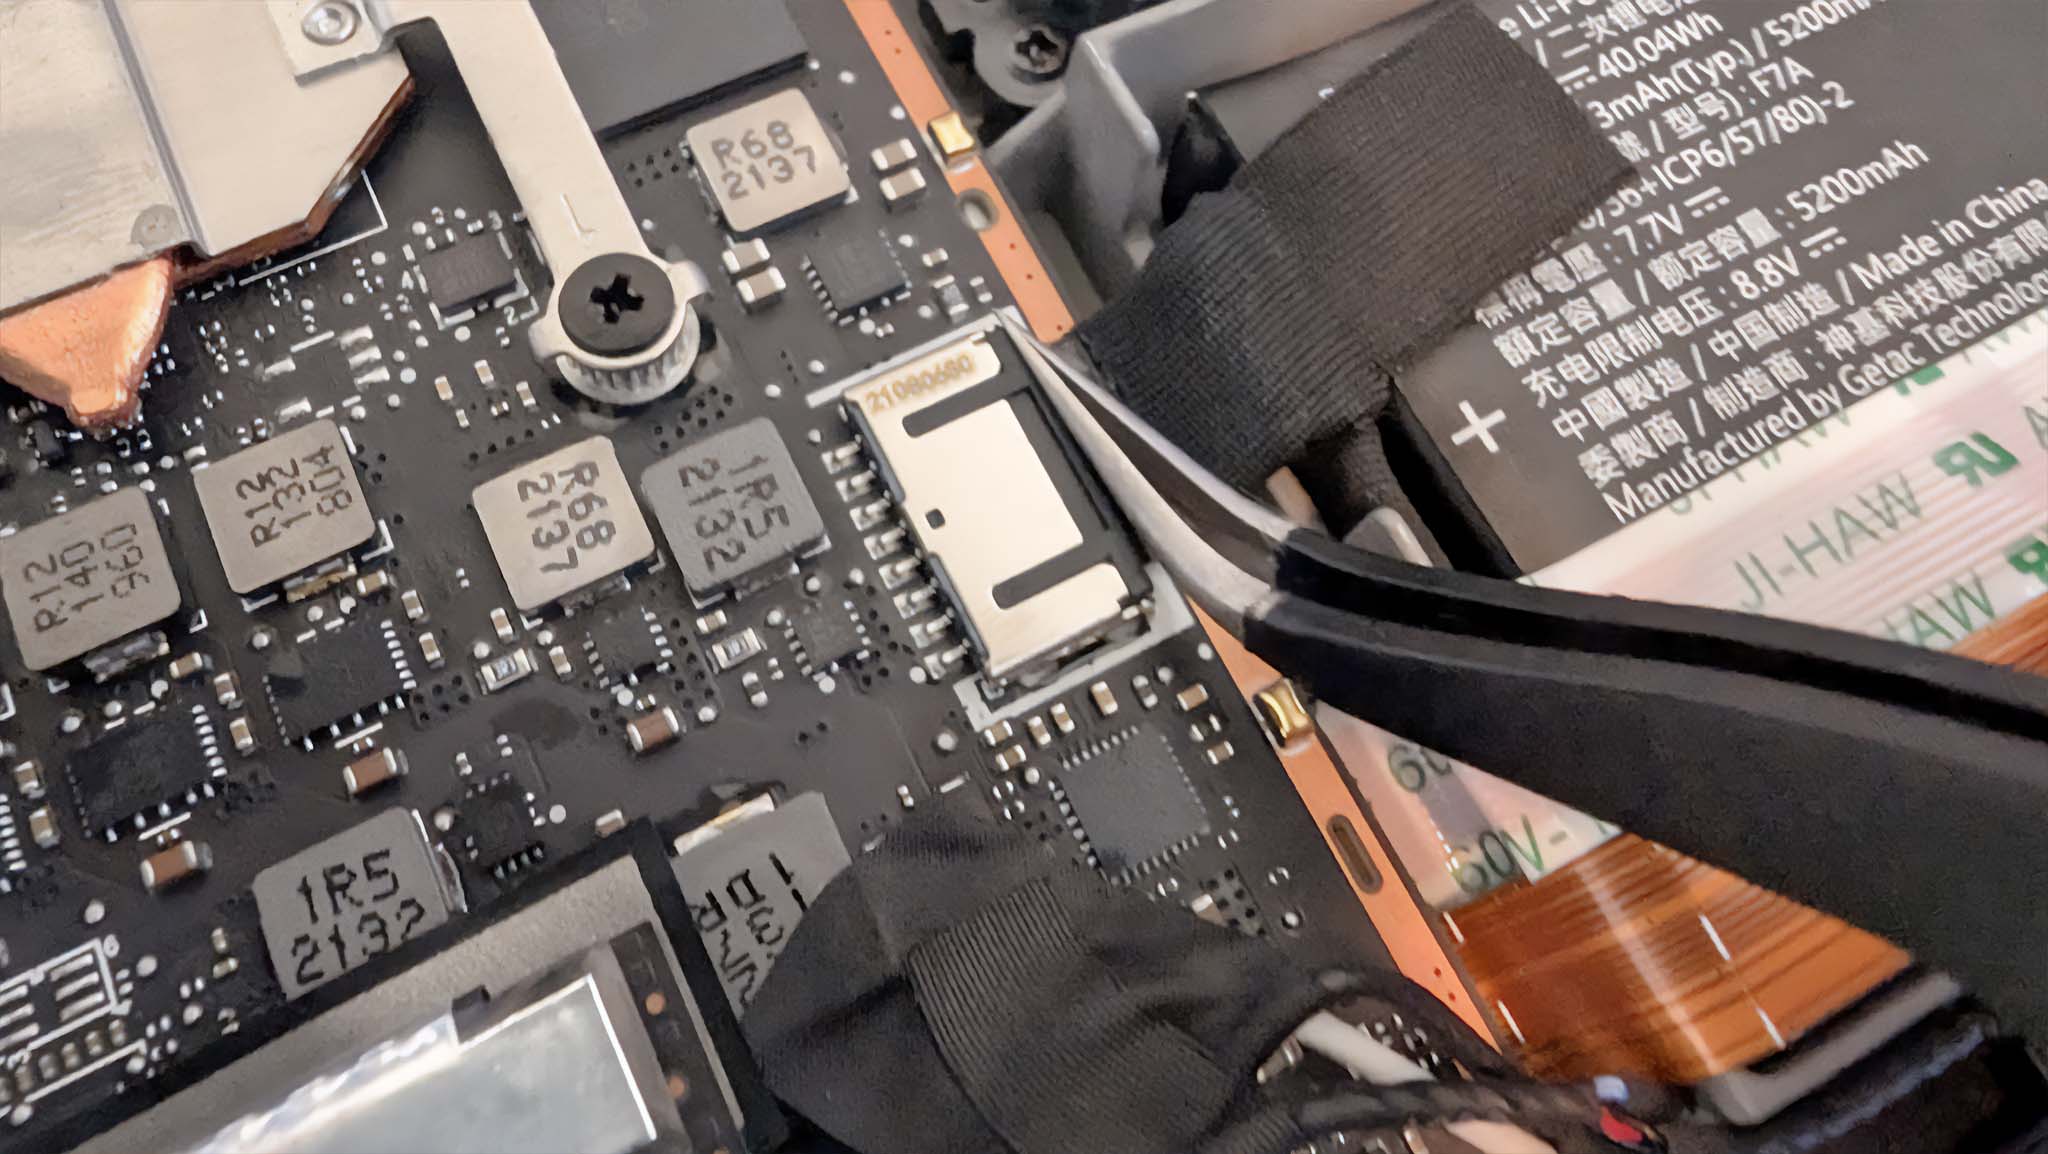
Put the new SSD into the SSD slot.
Screw the new SSD into place.
Gently plug the battery back into position.
Screw the motherboard shield back into place being careful not to pinch the fan cable.
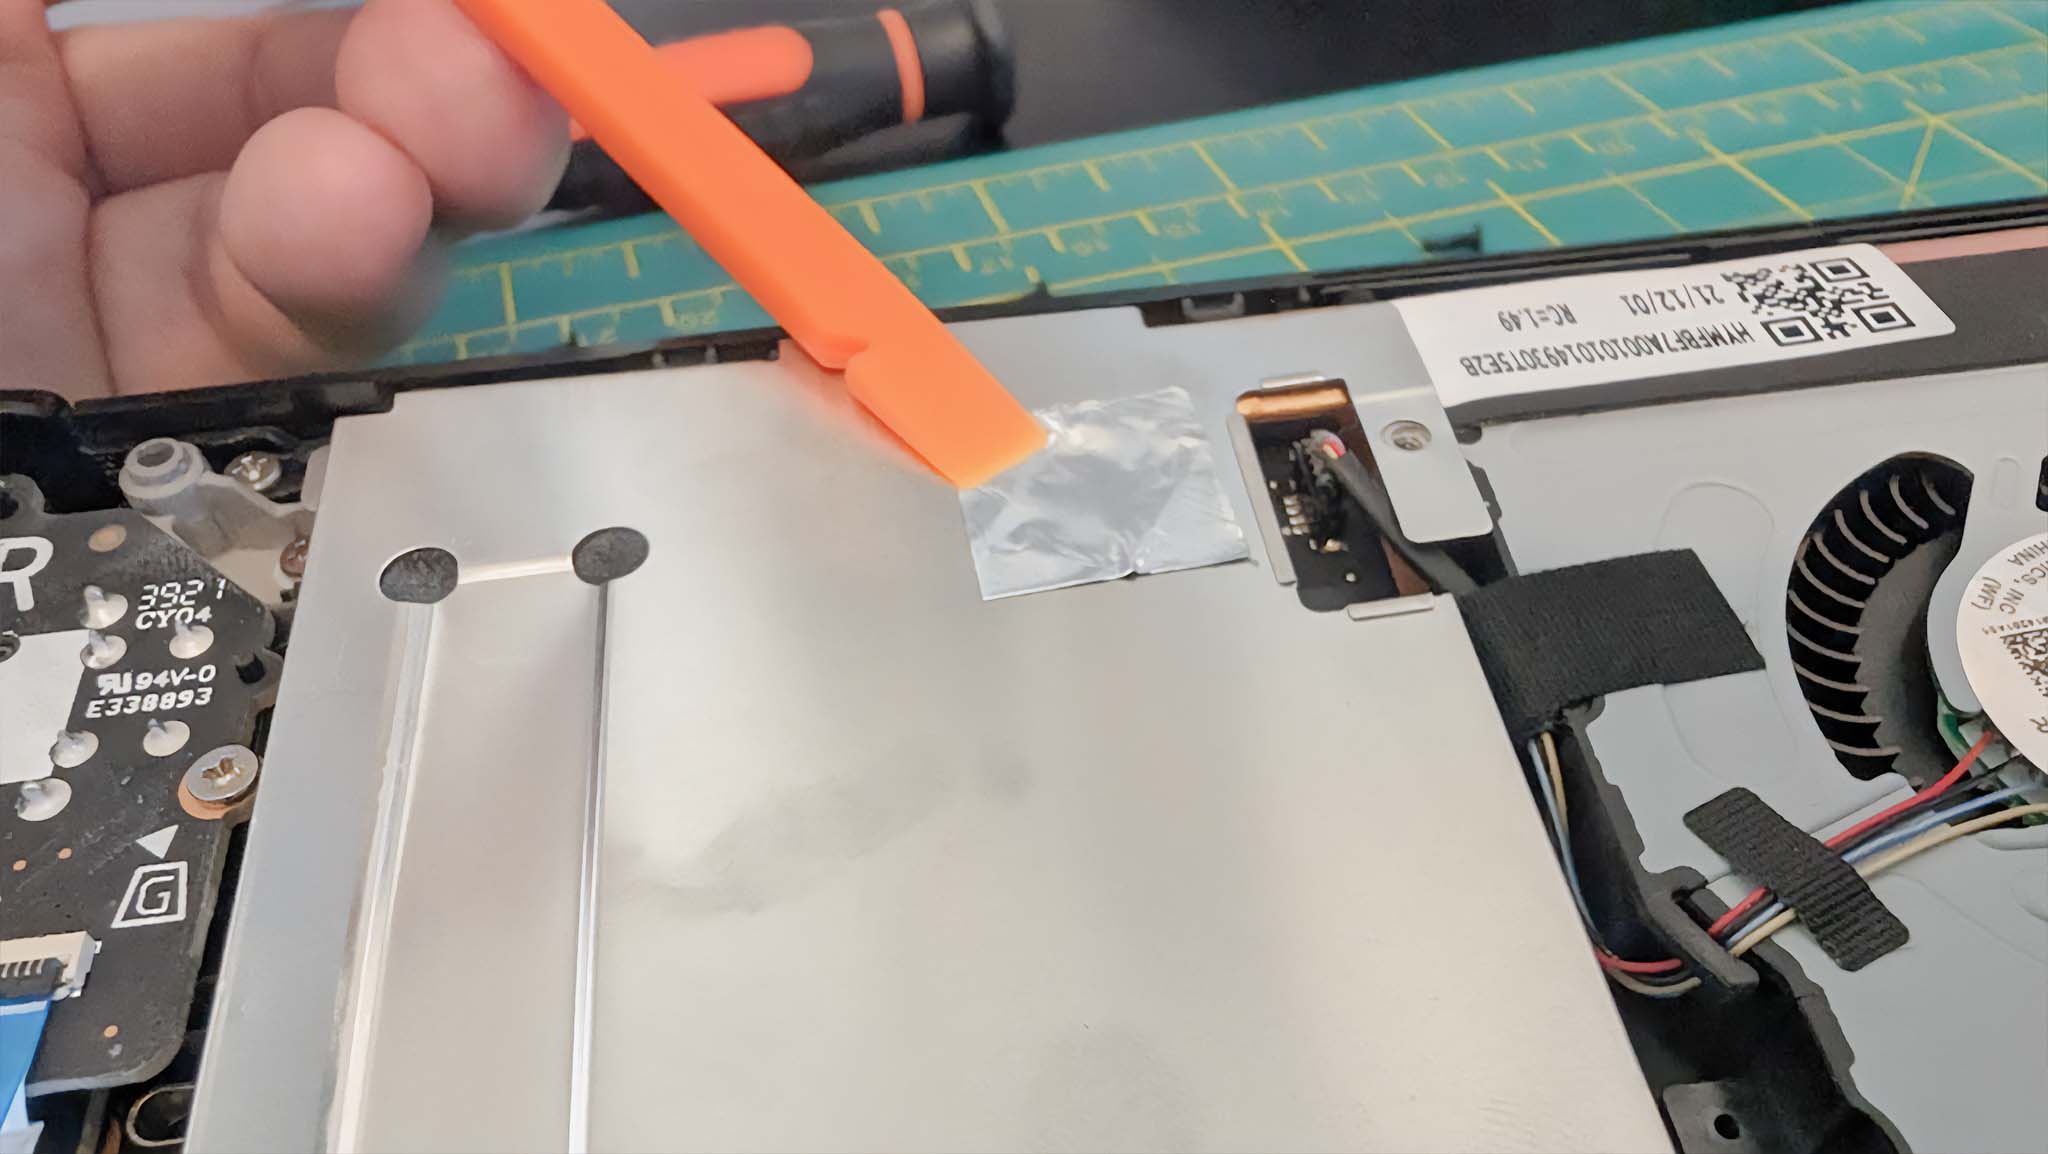
Smooth the sticker back out so it once again covers the largest motherboard cover screw.

Put the casing back into place and pinch it all around the sides until it’s back in position.

Finally, screw all eight of the backside screw back into place.
Now it’s time to reimage the Steam Deck and install SteamOS.
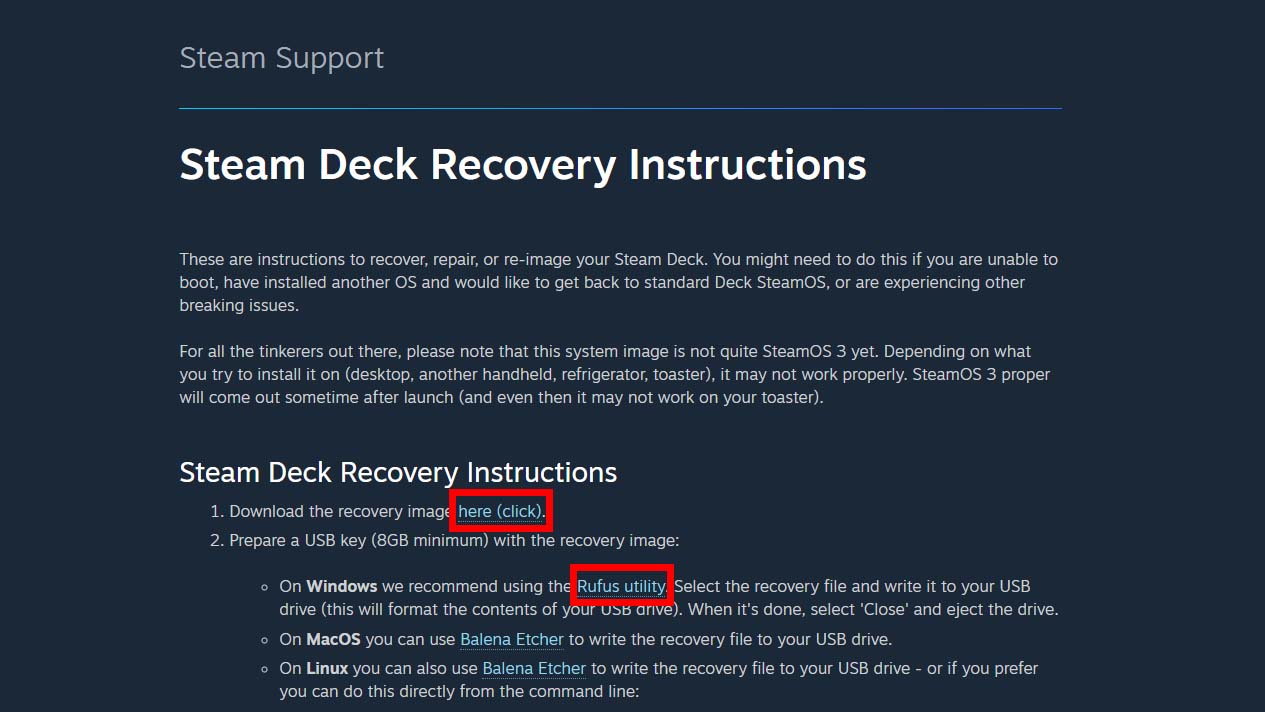
Download the recovery image and Rufus Utility from the Steam Deck Recovery page.
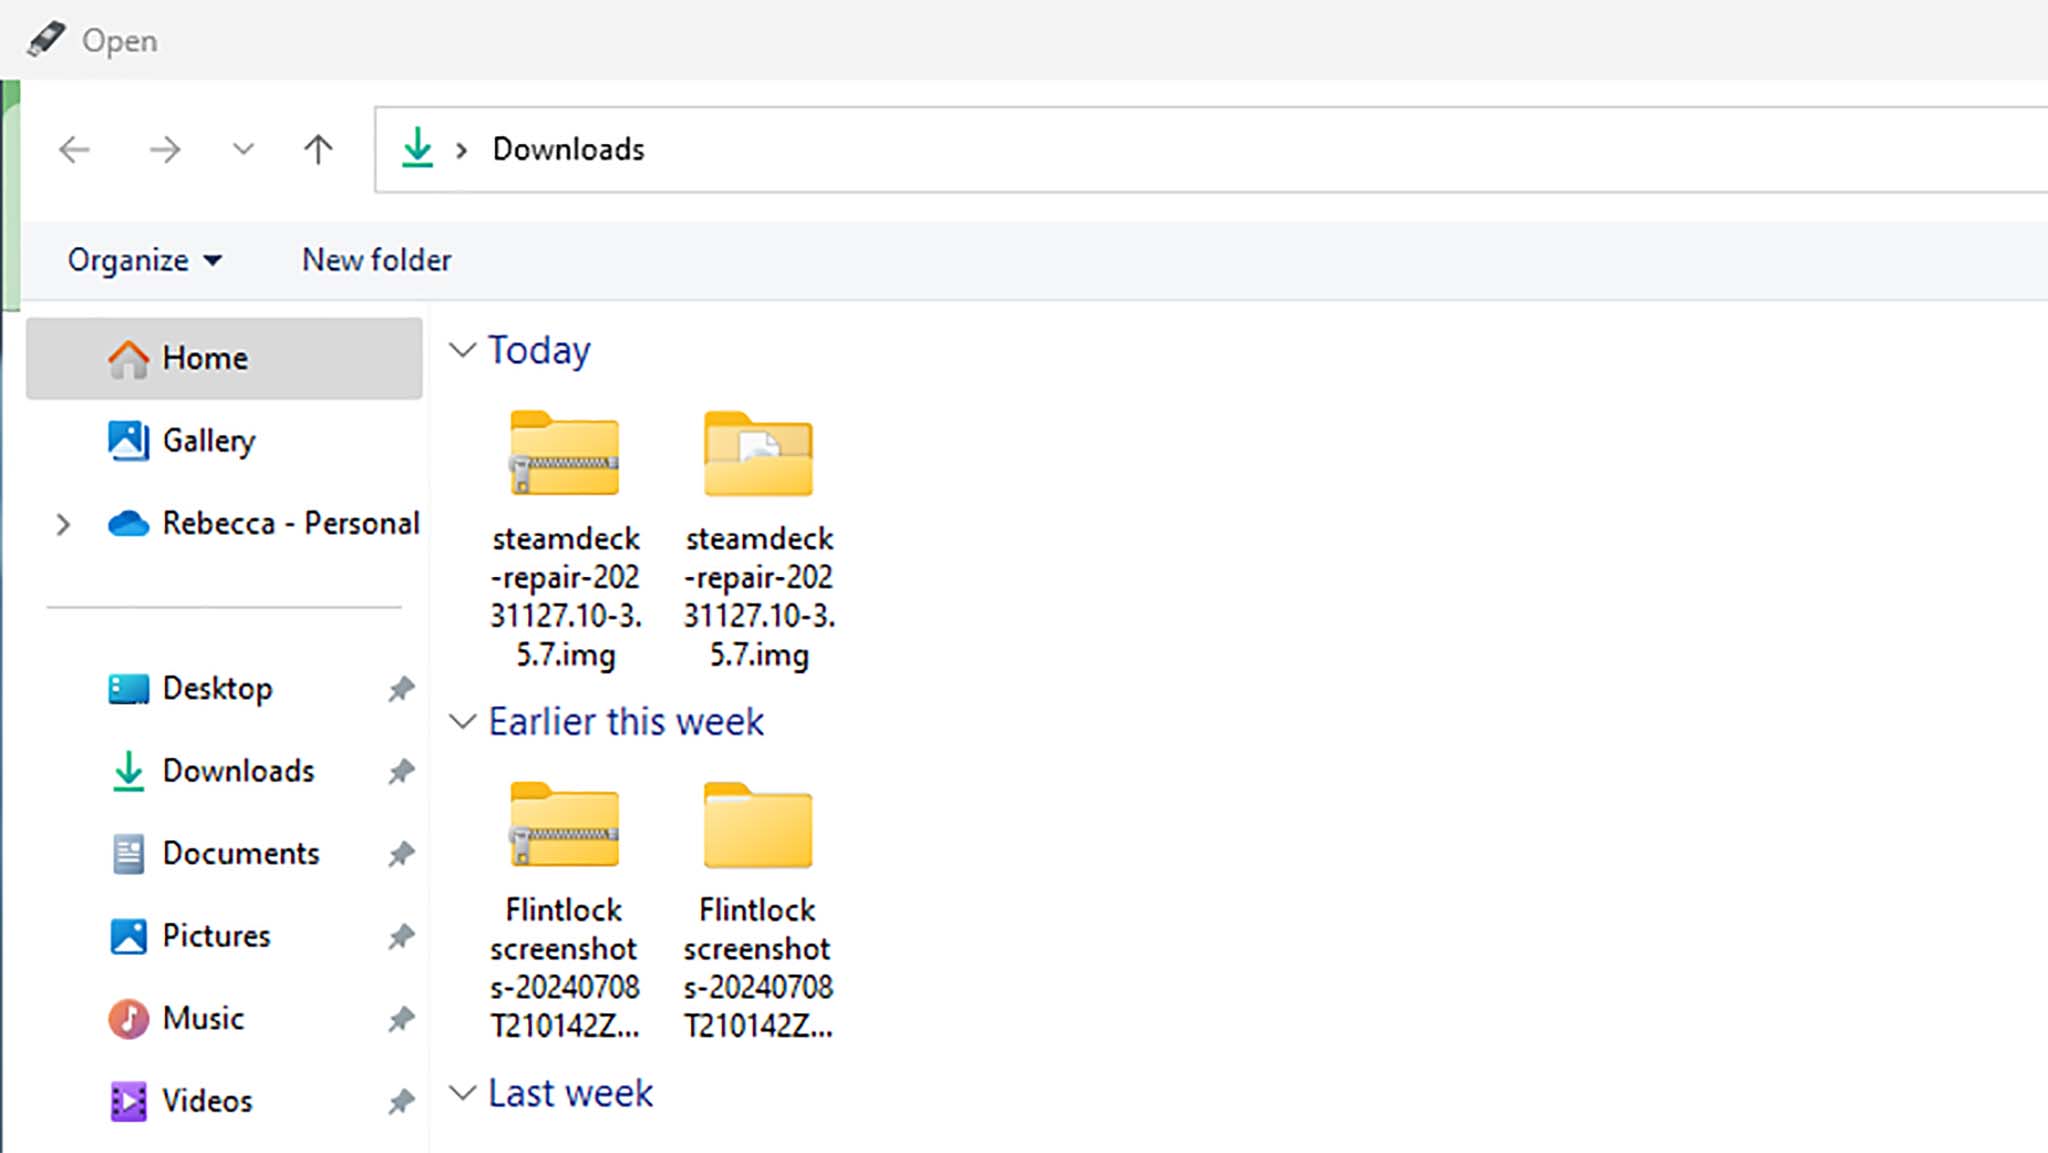
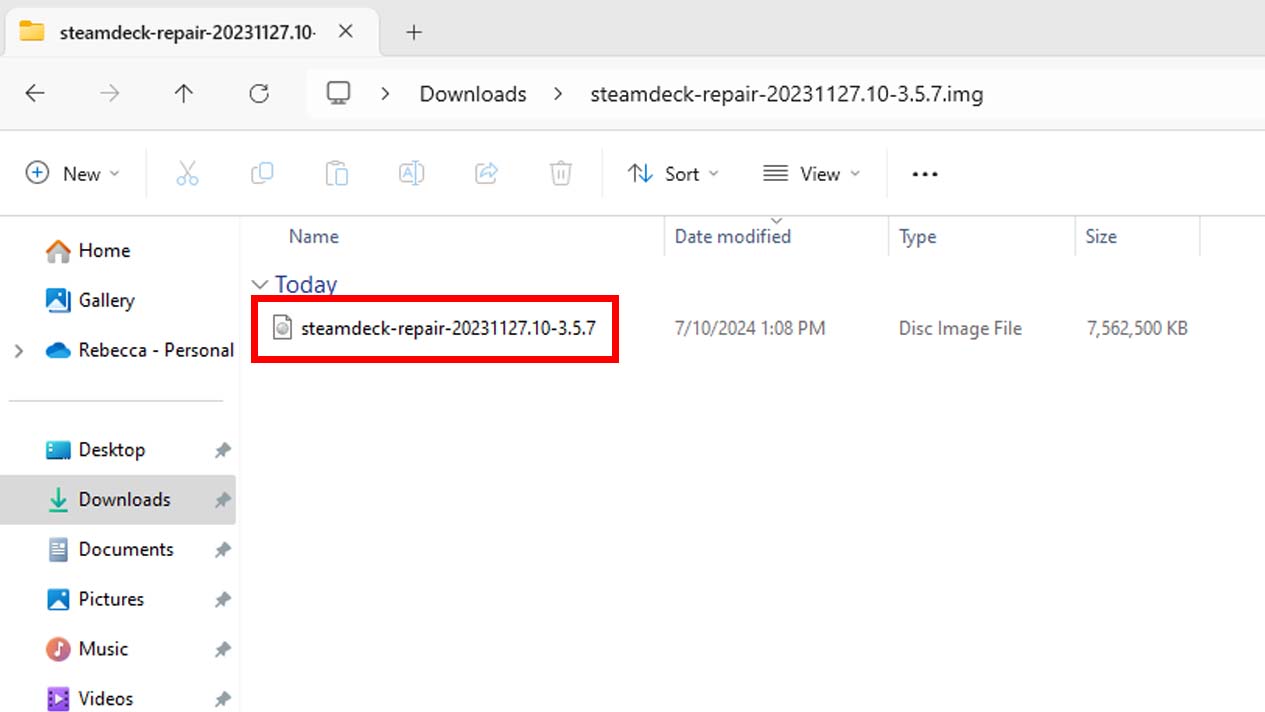
Extract the Steam Deck recovery file on your computer.
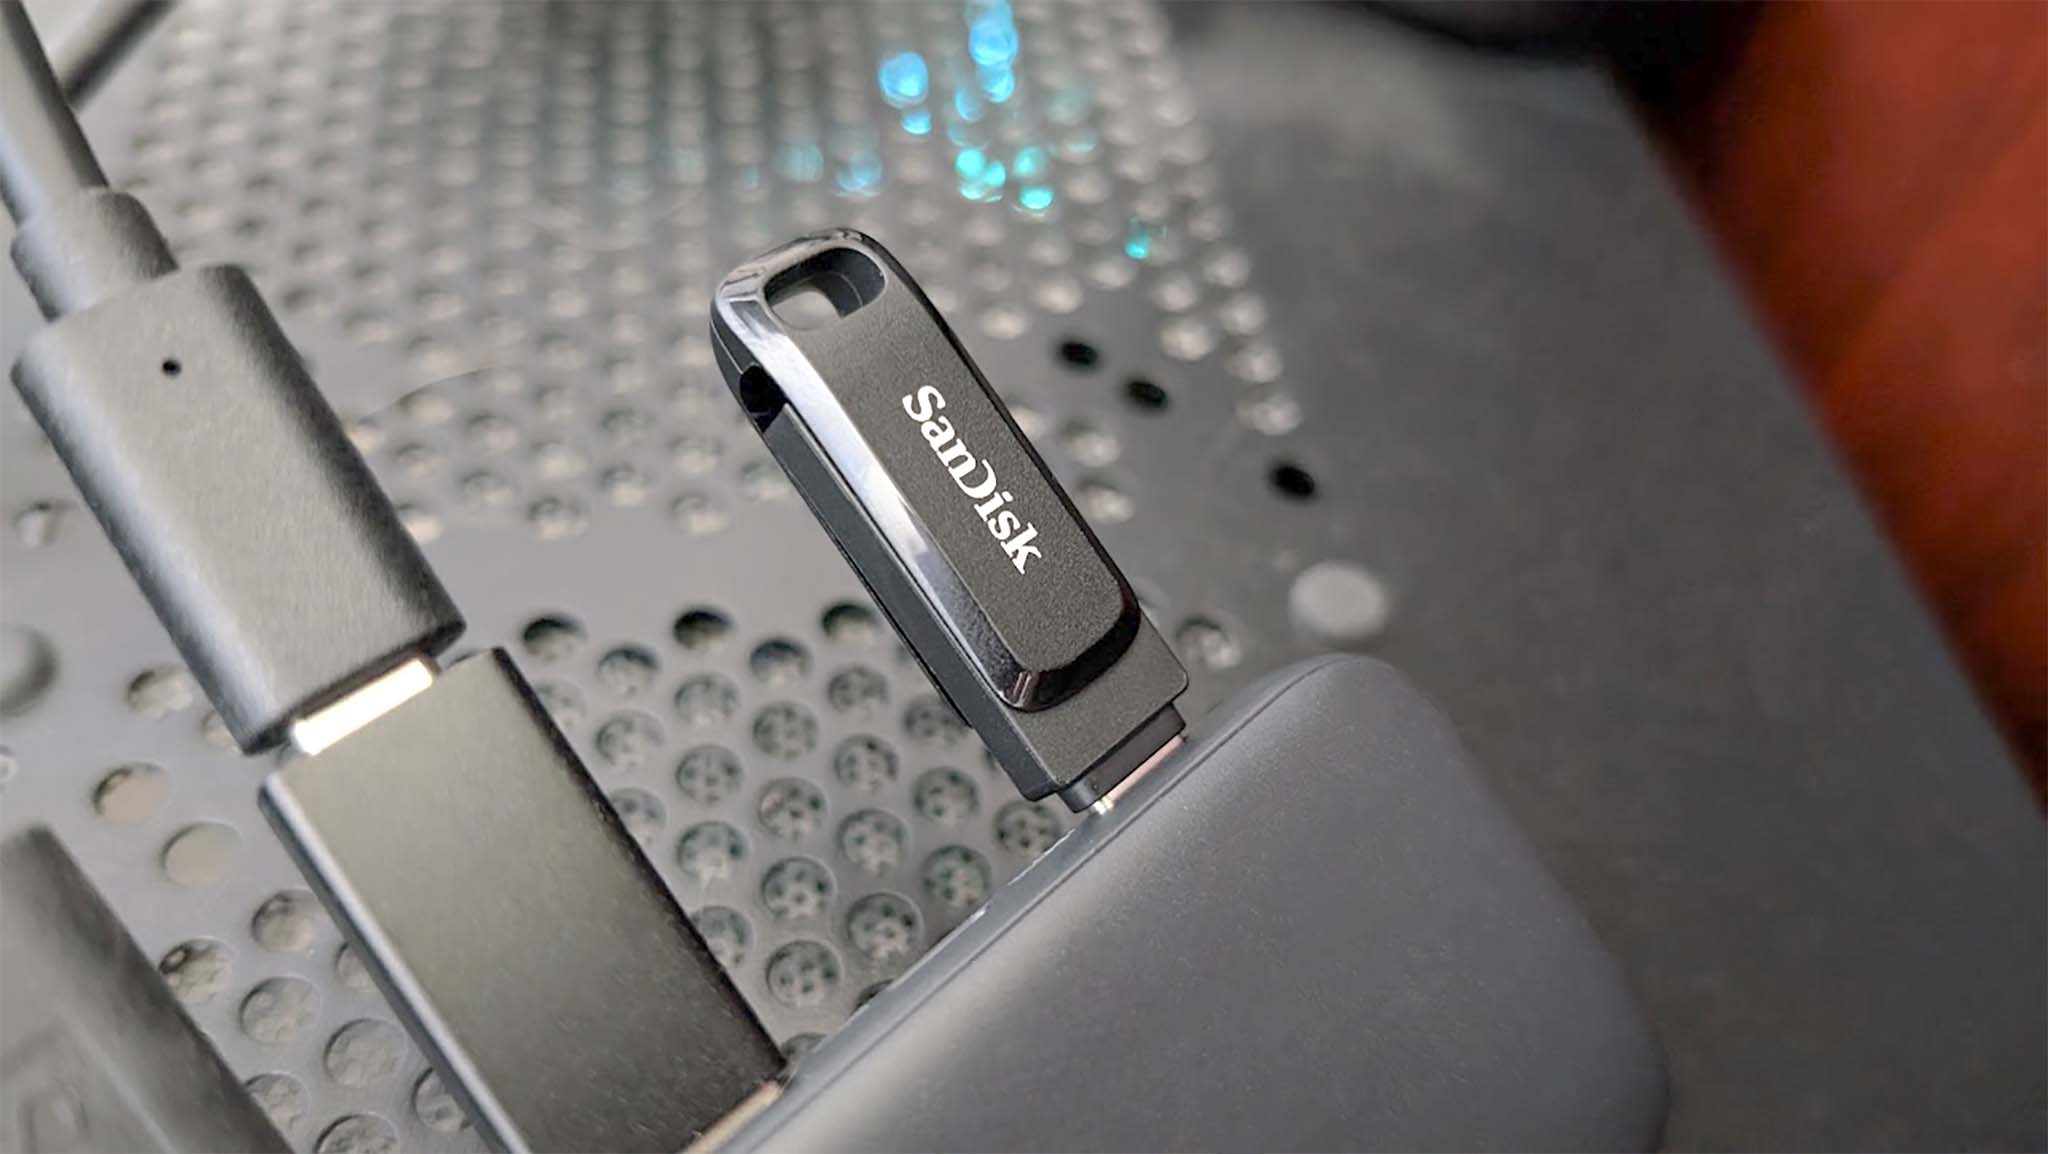
Plug the flash drive into your computer.
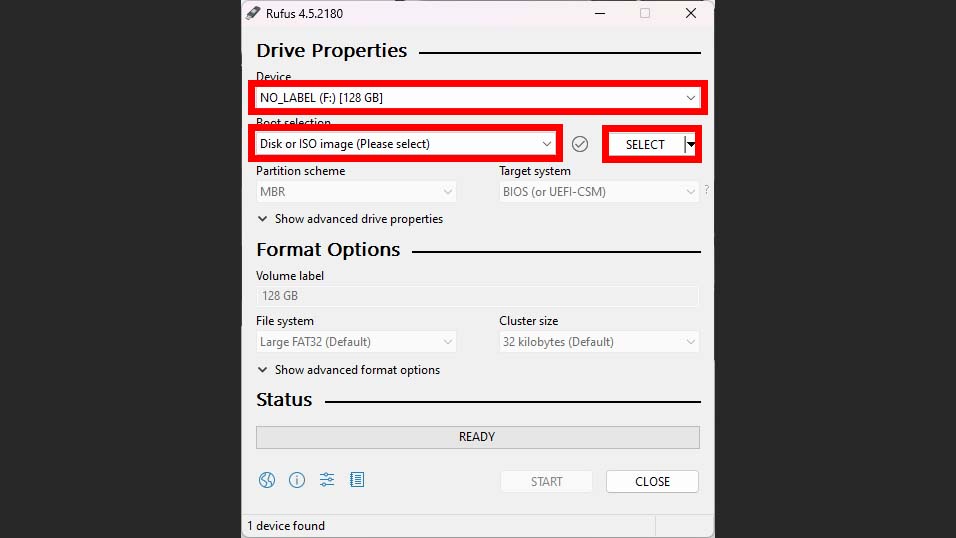
Open Rufus utility and make sure you have your USB flash drive selected.
Select the actual recovery image file.
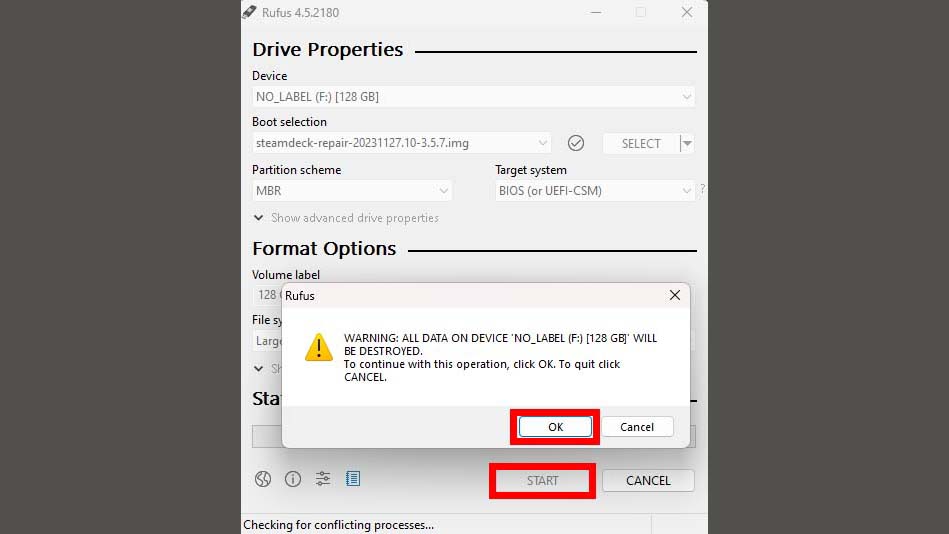
Now press Start and select OK when the pop up appears.
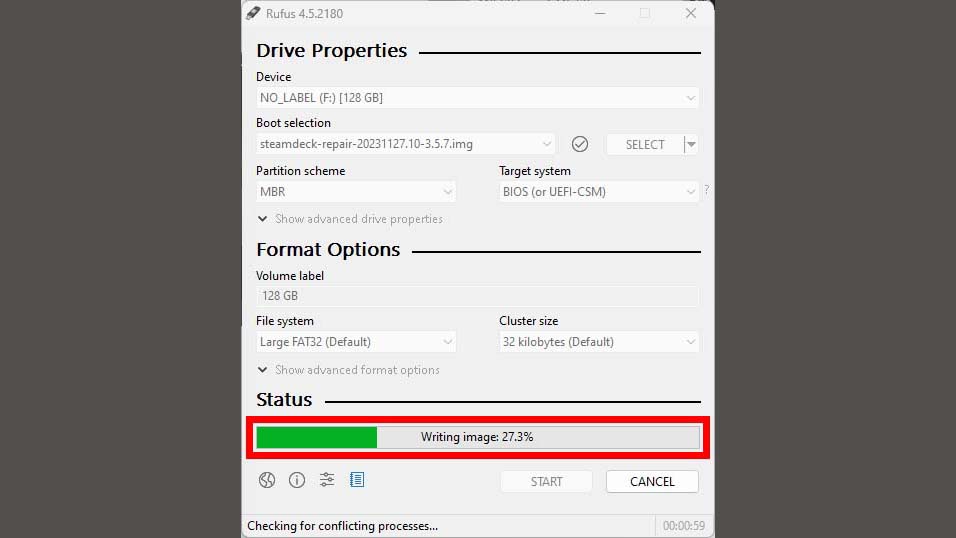
Wait for the image to write to the drive.
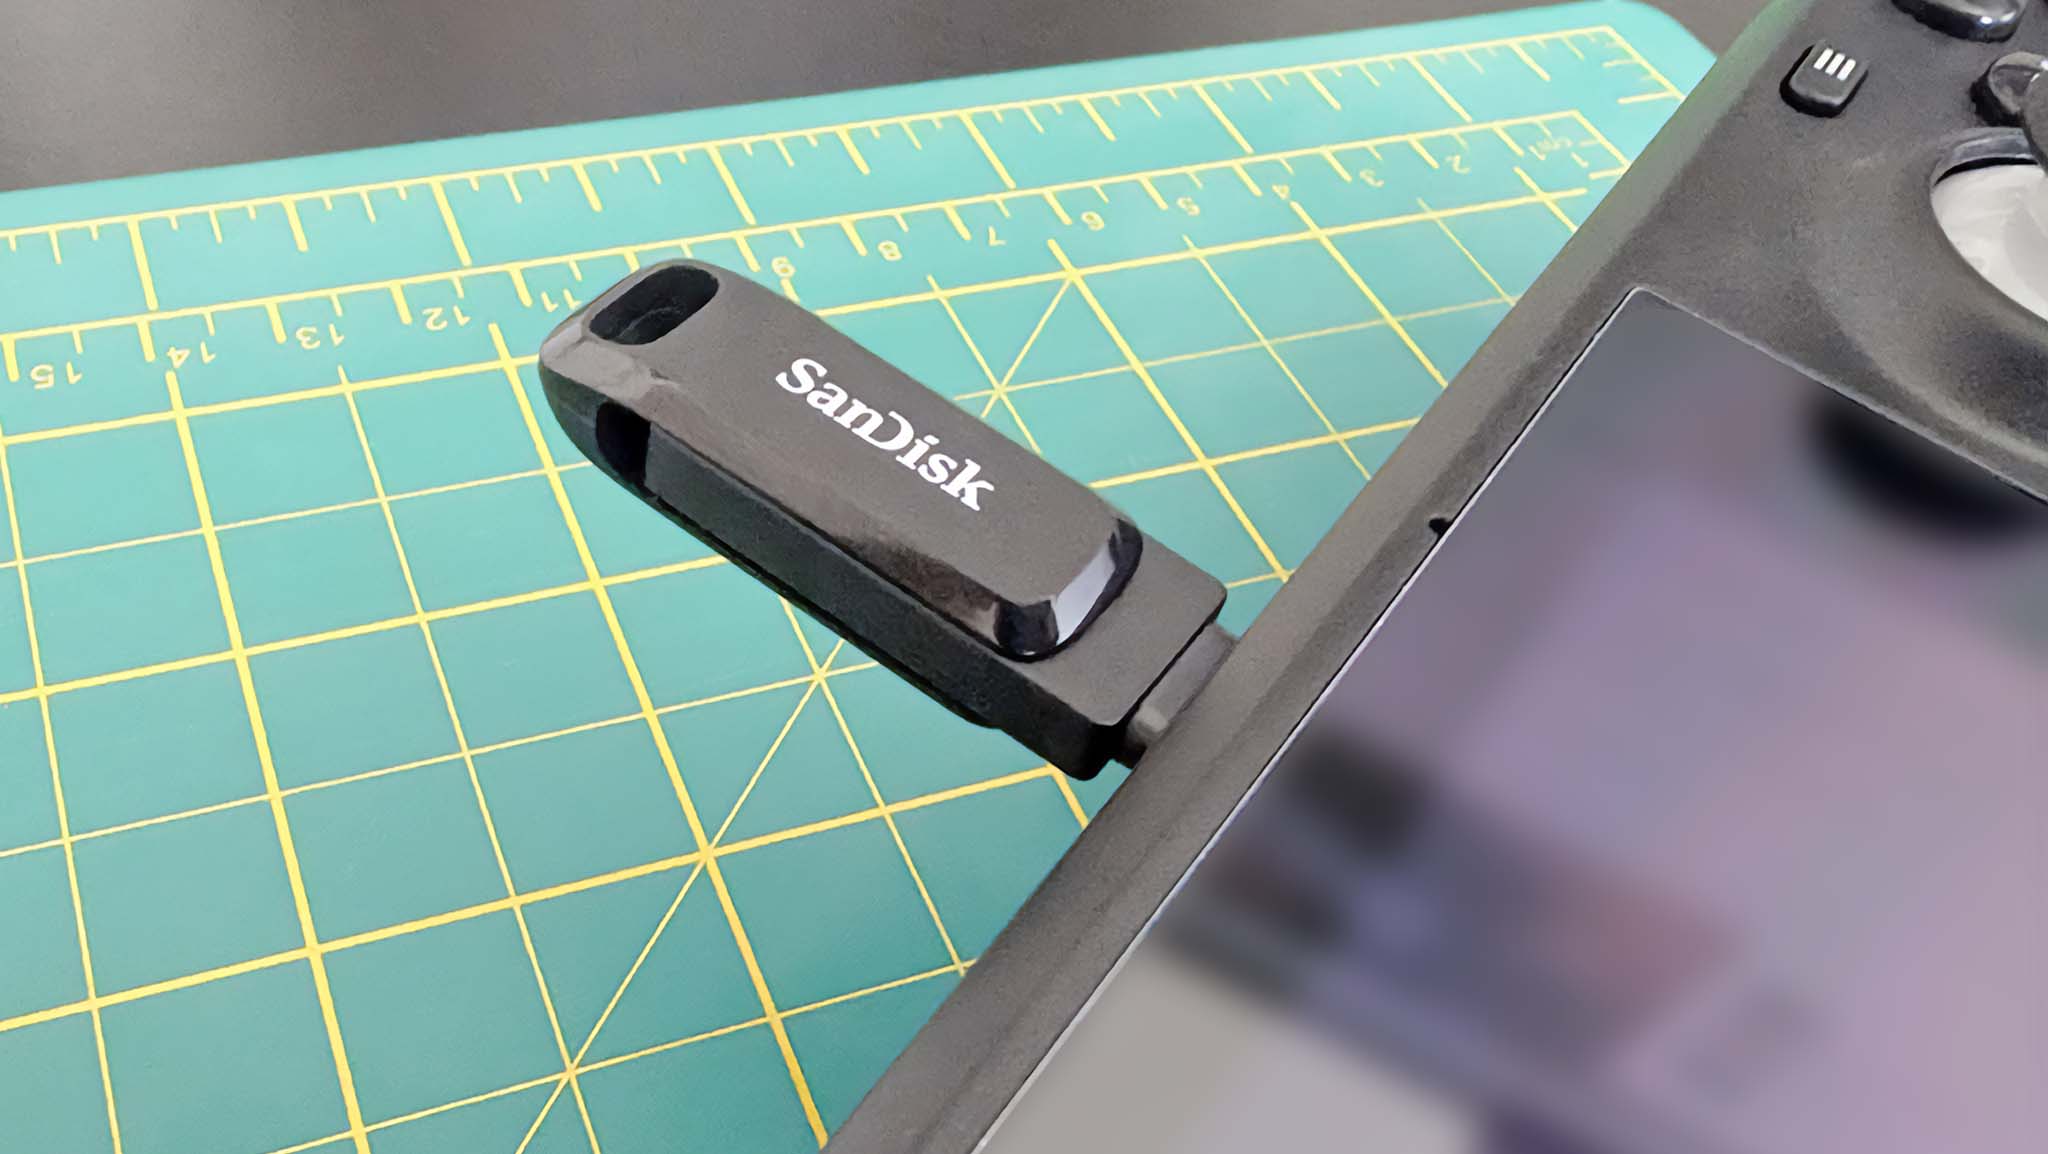
Take the flash drive from the computer and plug it into your Steam Deck.
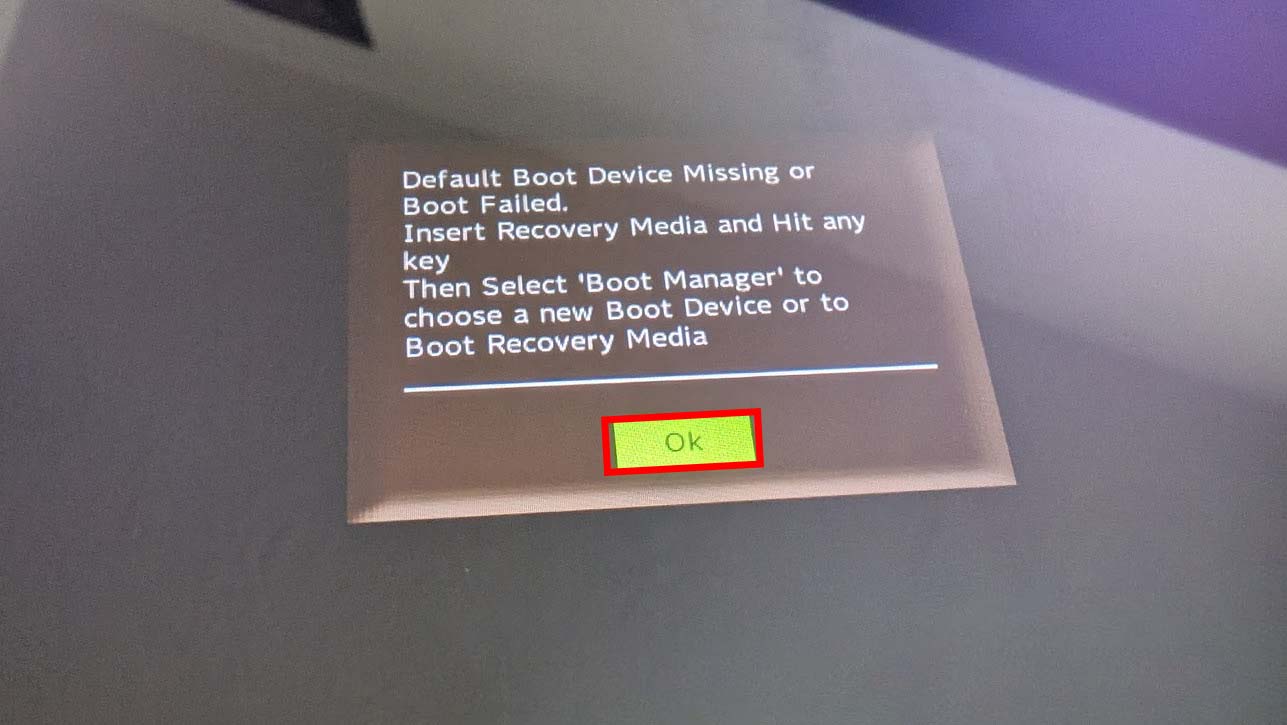
Select OK when this message pops up.
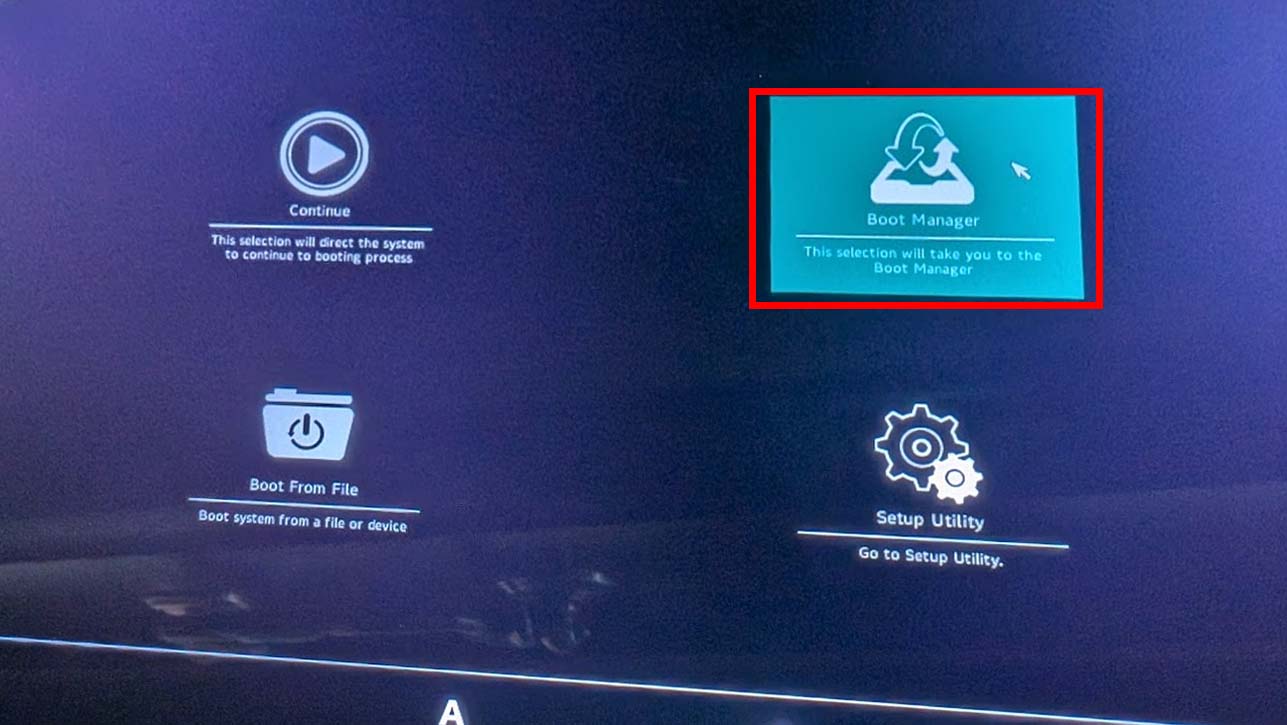
Use the touchpad to select Boot Manager.
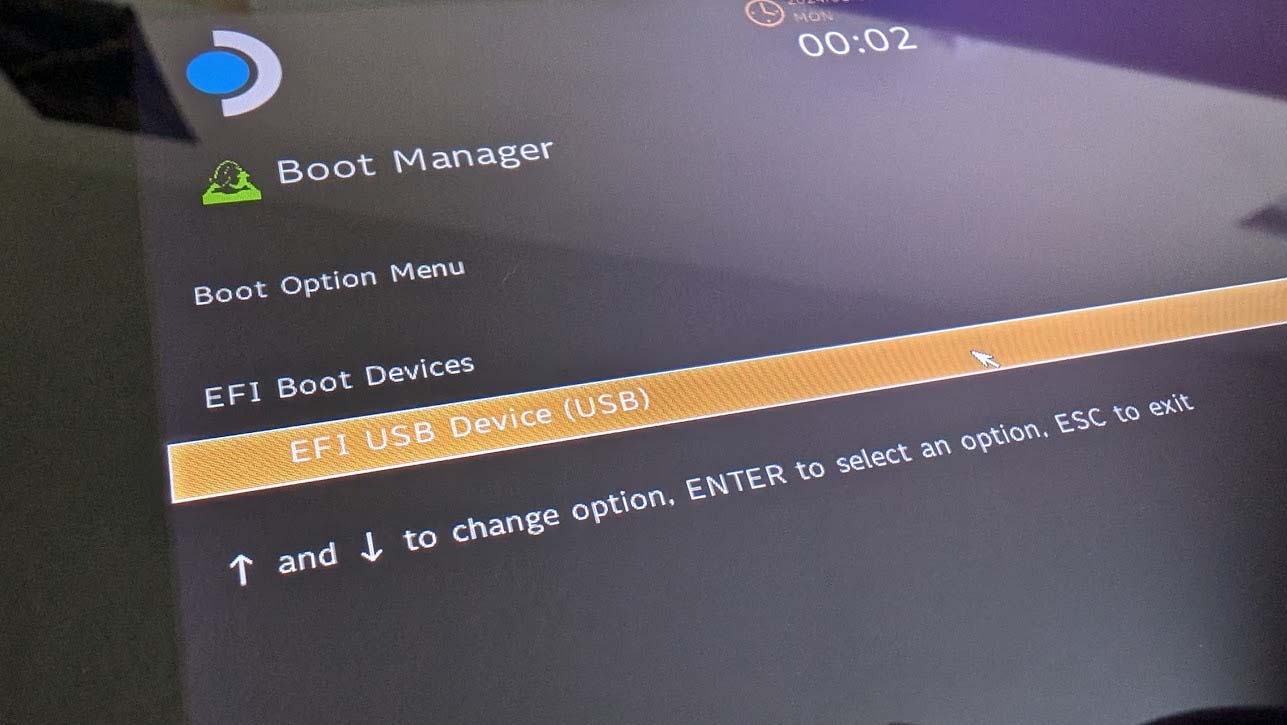
Select your external flash drive.
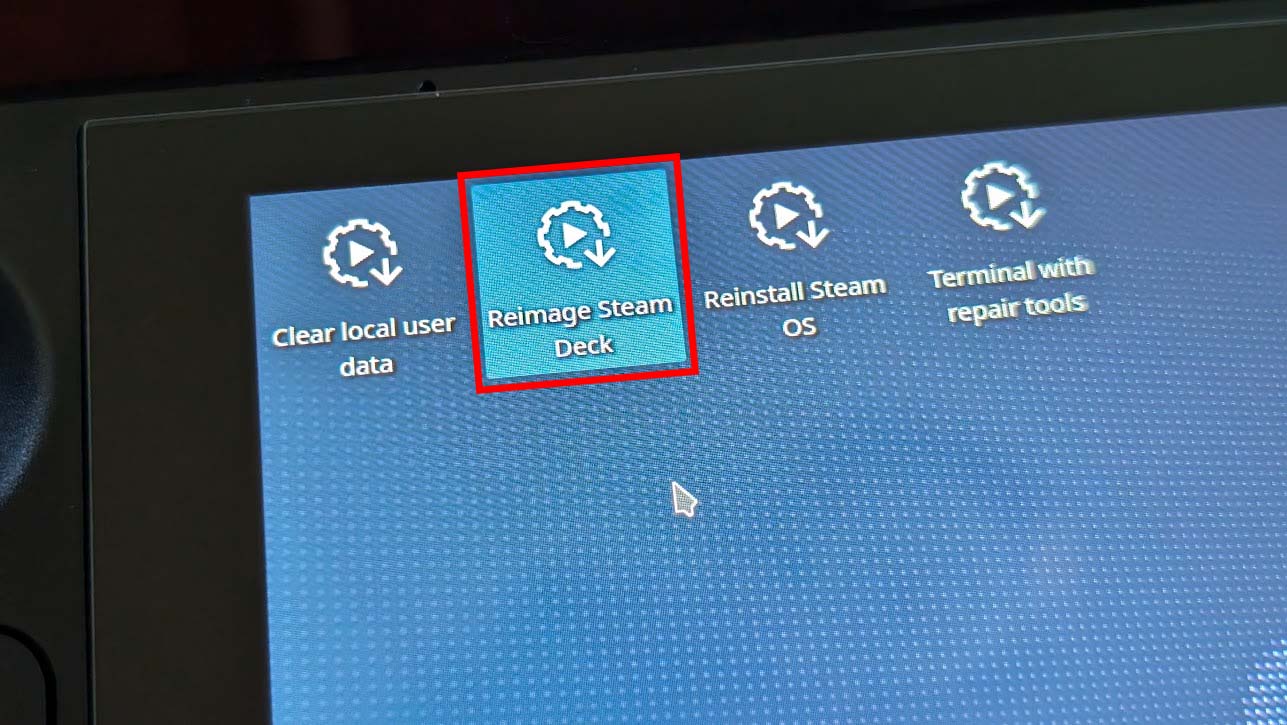
Use the touchpad to select Reimage Steam Deck. This is going to wipe the gaming handheld and install Steam OS.
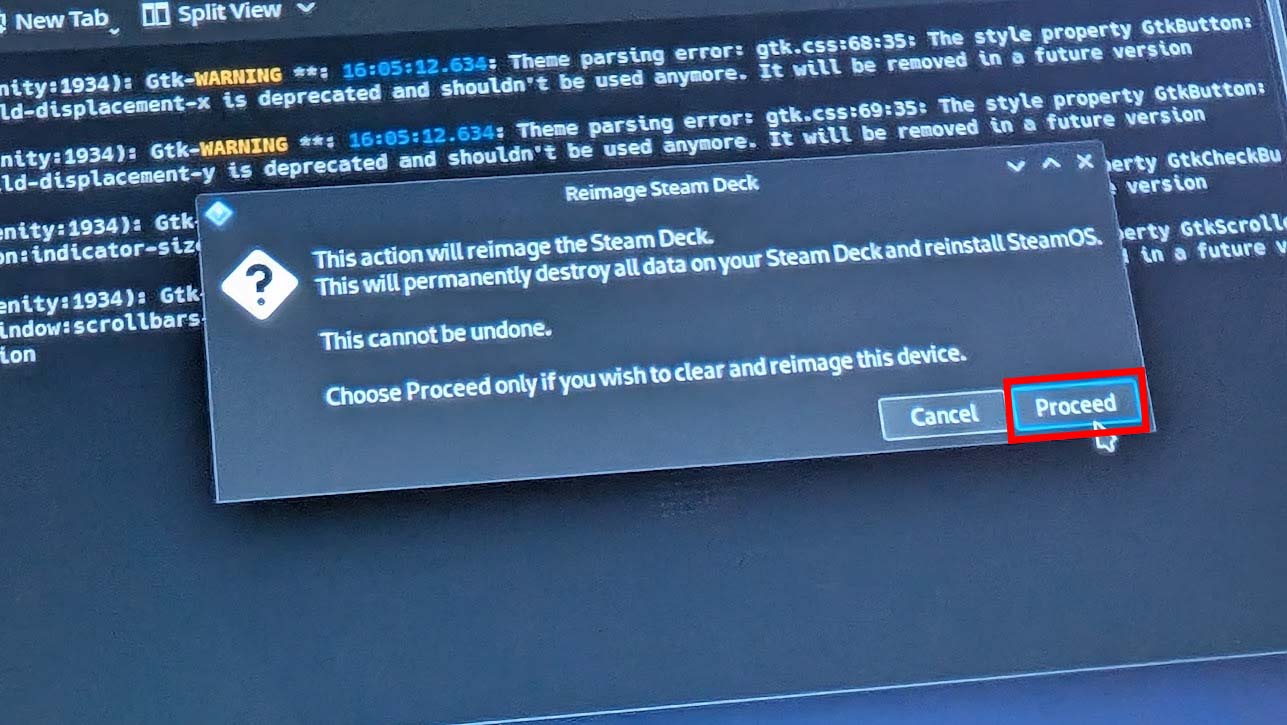
Another popup will appear. Press proceed to continue.
It’s a relatively easy process to install a larger SSD into your Steam Deck.